
In this blog post, I will show you how to send and visualize Cisco ASA syslog in Splunk. Splunk is used to search and analyse the data/logs generated from various devices.
As you can see below the syslog generated from the ASA are unstructured and complex to understand. You can feed the logs into Splunk in real time which then process and extracts the relevant data.
Jan 22 23:56:42 10.10.20.10 : %ASA-6-302015: Built outbound UDP connection 479 for OUTSIDE:130.88.202.49/123 (130.88.202.49/123) to identity:10.10.20.10/65535 (10.10.20.10/65535)
Jan 22 23:56:42 10.10.20.10 : %ASA-6-302015: Built outbound UDP connection 479 for OUTSIDE:130.88.202.49/123 (130.88.202.49/123) to identity:10.10.20.10/65535 (10.10.20.10/65535)
Jan 22 23:56:42 10.10.20.10 : %ASA-7-609001: Built local-host OUTSIDE:130.88.202.49
Jan 22 23:56:42 10.10.20.10 : %ASA-7-609001: Built local-host OUTSIDE:10.10.20.11
Jan 22 23:56:42 10.10.20.10 : %ASA-6-302020: Built inbound ICMP connection for faddr 10.10.20.11/0 gaddr 10.10.20.10/0 laddr 10.10.20.10/0 type 5 code 1
Jan 22 23:56:42 10.10.20.10 : %ASA-7-609001: Built local-host OUTSIDE:10.10.20.11
Jan 22 23:56:42 10.10.20.10 : %ASA-6-302020: Built inbound ICMP connection for faddr 10.10.20.11/0 gaddr 10.10.20.10/0 laddr 10.10.20.10/0 type 5 code 1
Jan 22 23:56:42 10.10.20.10 : %ASA-6-302021: Teardown ICMP connection for faddr 10.10.20.11/0 gaddr 10.10.20.10/0 laddr 10.10.20.10/0 type 5 code 1
Setup requirements
- Install Splunk instance (10.10.0.21)
- Install and configure syslog-ng server (10.10.0.22)
- Install universal forwarder on the same host as syslog-ng server
- Configure receiving of data on the Splunk Platform instance
- Install the Splunk Add-on for Cisco
- Configure logging on ASA and output to syslog-ng
- Configure forwarder to monitor syslog-ng logs, and forward data to Splunk

Cisco ASA Syslog Configuration
If you want to learn more about configuring Syslog on the ASA, please check out my other post here.
Diagram
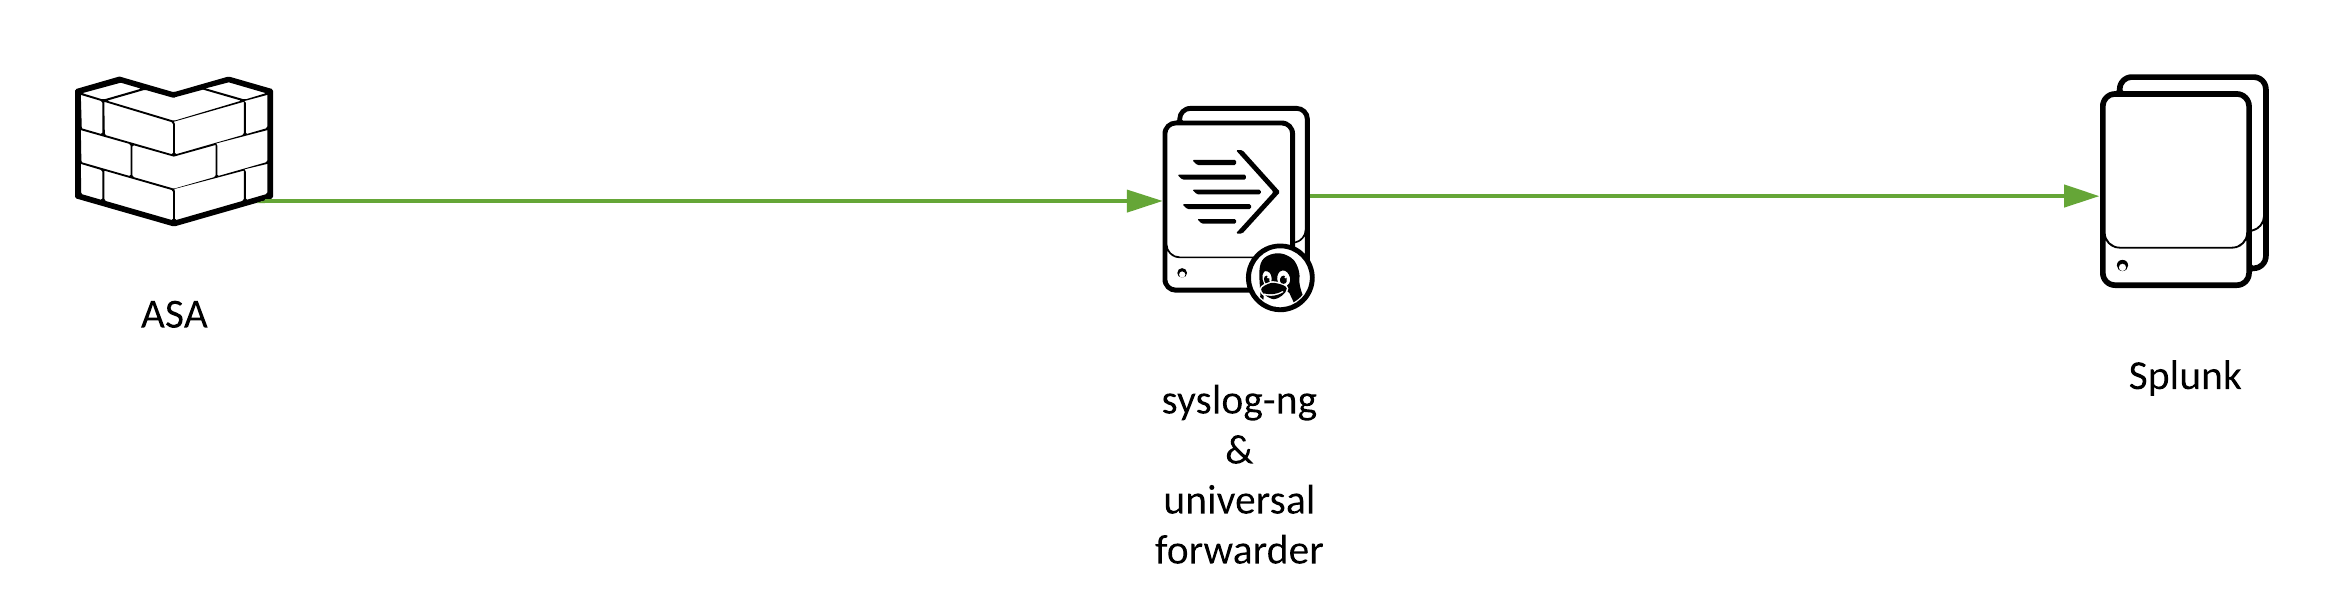
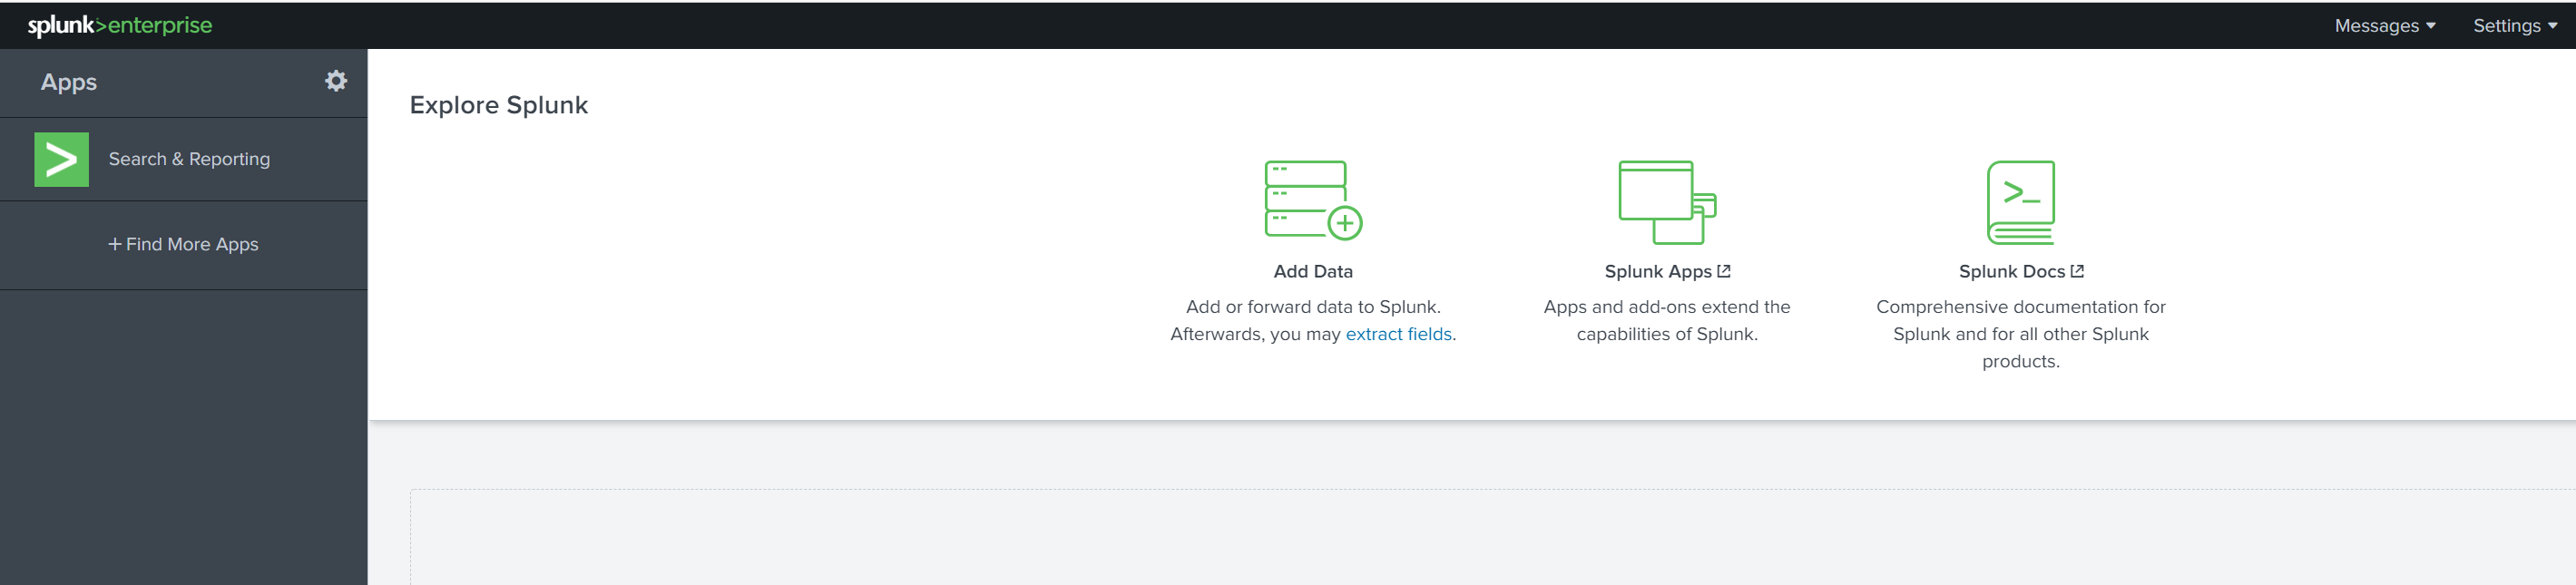
Install Splunk
Download and install Splunk from Download Splunk Enterprise for Free | Splunk
ubuntu@splunk:~/splunk$ wget -O splunk-8.1.1-08187535c166-linux-2.6-amd64.deb 'https://www.splunk.com/bin/splunk/

ubuntu@splunk:~/splunk$ sudo dpkg -i splunk-8.1.1-08187535c166-linux-2.6-amd64.deb
ubuntu@splunk:~/splunk$ sudo /opt/splunk/bin/splunk enable boot-start


****TRUNCATED***

ubuntu@splunk:~/splunk$ systemctl start splunk
==== AUTHENTICATING FOR org.freedesktop.systemd1.manage-units ===
Authentication is required to start 'splunk.service'.
Authenticating as: ubuntu
Password:
==== AUTHENTICATION COMPLETE ===

ubuntu@splunk:~/splunk$ systemctl status splunk
● splunk.service - LSB: Start splunk
   Loaded: loaded (/etc/init.d/splunk; generated)
   Active: active (running) since Thu 2021-01-21 16:48:16 UTC; 21s ago
     Docs: man:systemd-sysv-generator(8)
Splunk Install
After the installation, you should be able to access it via http://<ip_address:8000
Install syslog-ng server
The installation is very simple.
ubuntu@syslog:~$ sudo apt-get install syslog-ngubuntu@syslog:~$ syslog-ng --version
syslog-ng 3 (3.13.2)
Config version: 3.13
Installer-Version: 3.13.2
Revision: 3.13.2-3Let's configure the log collection. Default configuration file is located /etc/syslog-ng/syslog-ng.conf For this example, I created a new configuration file called devices.conf in the conf.d subfolder.
ubuntu@syslog:/etc/syslog-ng$ tree
.
├── conf.d
│   └── devices.conf
├── patterndb.d
├── scl.conf
└── syslog-ng.conf

2 directories, 3 files
ubuntu@syslog:/etc/syslog-ng$ cat conf.d/devices.conf
#
options {
create_dirs(yes);
owner(ubuntu);
group(ubuntu);
perm(0644);
dir_owner(ubuntu);
dir_group(ubuntu);
dir_perm(0755);
};
#
source s_udp {
network (
transport("udp")
port(514)
);
};
#
destination d_host-specific {
file("/var/log/devices/$HOST/$YEAR/$MONTH/$HOST-$YEAR-$MONTH-$DAY.log");
};
log {
source(s_udp);
destination(d_host-specific);
};syslog-ng configuration file
The logs are saved under /var/log/devices directory. Each device sending syslog will have it's own folder. A new file is generated every day and nested in folders for year/month. ubuntu@syslog:/etc/syslog-ng$ cd /var/log/devices/
ubuntu@syslog:/var/log/devices$ tree
.
└── 10.10.20.10 <<< IP address of the ASA
└── 2021 <<< Year
└── 01 <<< Month
├── 10.10.20.10-2021-01-21.log <<< New file for each day
├── 10.10.20.10-2021-01-22.log
└── 10.10.20.10-2021-01-23.log
3 directories, 3 filesInstall universal forwarder on the same host as syslog-ng server
Download and install the forwarder from Splunk: Universal Forwarder for Remote Data Collection | Splunk
ubuntu@syslog:~$ wget -O splunkforwarder-8.1.1-08187535c166-Linux-x86_64.tgz 'https://www.splunk.com/bin/splunk/Extract the files into /opt/ directory
ubuntu@syslog:~$ sudo tar xvzf splunkforwarder-8.1.1-08187535c166-Linux-x86_64.tgz -C /opt/Move to /opt/splunkforwarder/bin directory and start the forwarder.
ubuntu@syslog:~$ cd /opt/splunkforwarder/bin/
ubuntu@syslog:/opt/splunkforwarder/bin$ sudo ./splunk start --accept-license
This appears to be your first time running this version of Splunk.
Splunk software must create an administrator account during startup. Otherwise, you cannot log in.
Create credentials for the administrator account.
Characters do not appear on the screen when you type in credentials.
Please enter an administrator username: ansible
Password must contain at least:
* 8 total printable ASCII character(s).
Please enter a new password:
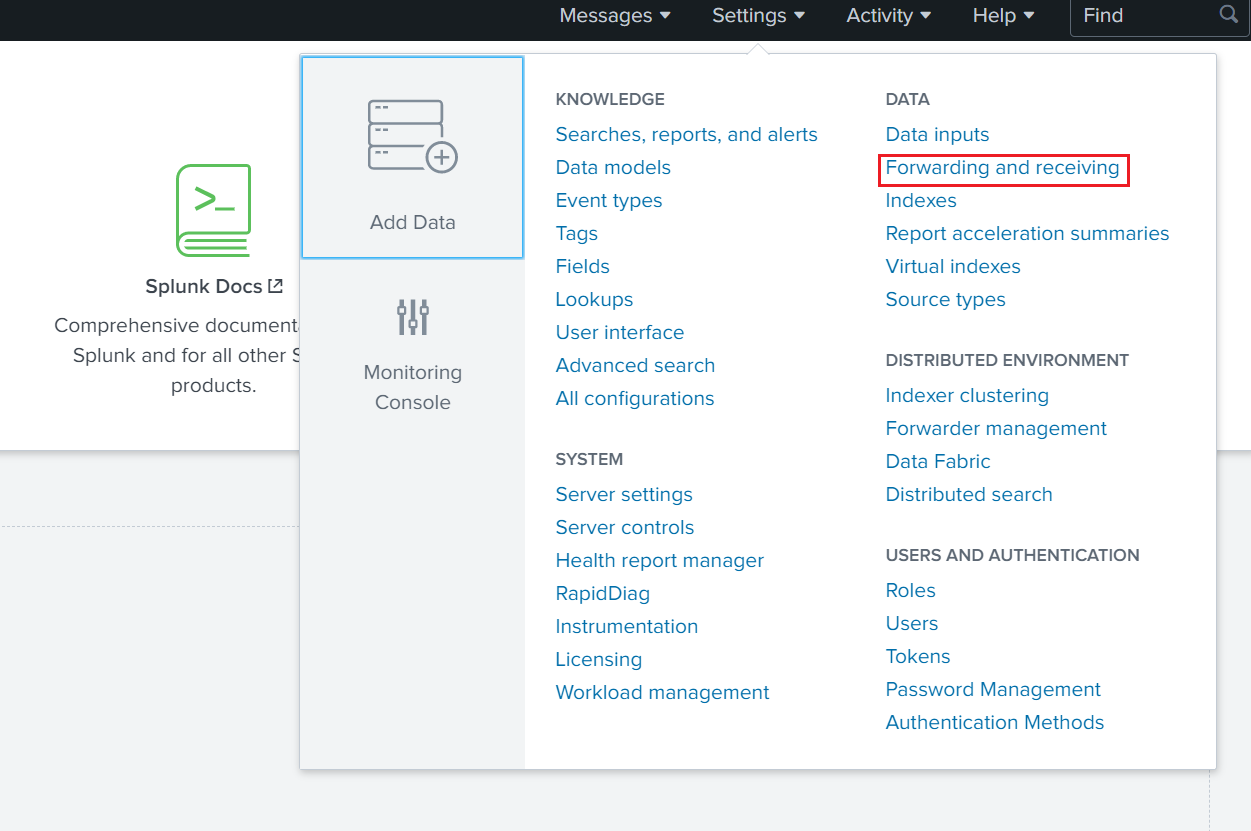
Please confirm new password: Configure receiving of data on the Splunk Platform instance
Use Splunk Web Interface to configure a receiver.
- Log into Splunk web GUI with your admin credentials
- In Splunk, go to Settings > Forwarding and receiving.
- Select "Configure receiving."
- Select "New Receiving Port."
- Add a port number of 9997 and save.
Install the Splunk Add-on for Cisco
- Click on "Apps" then "Find more apps"
- Search for "ASA" and click Install

Configure logging on ASA and output to syslog-ng
- IP address of syslog-ng server is
10.10.0.22 - Cisco ASA IP is
10.10.20.10
asa-01# show run logging
logging enable
logging timestamp
logging buffer-size 81920
logging monitor errors
logging buffered debugging
logging trap debugging
logging device-id hostname
logging host OUTSIDE 10.10.0.22
Configure forwarder to monitor syslog-ng logs, and forward data to Splunk
Step 1 - Configure the universal forwarder to connect to a receiving indexer.
In this example, the IP address of the receiver/Splunk instance is 10.10.0.21
ubuntu@syslog:~$ cd /opt/splunkforwarder/bin/

ubuntu@syslog:/opt/splunkforwarder/bin$ sudo ./splunk add forward-server 10.10.0.21:9997
Splunk username: ansible
Password:
Added forwarding to: 10.10.0.21:9997.
Step 2 - Add monitoring.
ubuntu@syslog:/opt/splunkforwarder/bin$ sudo ./splunk add monitor /var/log/devices/10.10.20.10 -recursive true -sourcetype cisco:asa -host asa-01

ubuntu@syslog:/opt/splunkforwarder/bin$ sudo ./splunk restart
Stopping splunkd...
Shutting down.  Please wait, as this may take a few minutes.
.
Stopping splunk helpers...

Done.

Splunk> All batbelt. No tights.

Checking prerequisites...
        Checking mgmt port [8090]: open
        Checking conf files for problems...
        Done
        Checking default conf files for edits...
        Validating installed files against hashes from '/opt/splunkforwarder/splunkforwarder-8.1.1-08187535c166-linux-2.6-x86_64-manifest'
        All installed files intact.
        Done
All preliminary checks passed.

Starting splunk server daemon (splunkd)...
Done
Please make sure that the sourcetype is set to cisco:asa
Verification
I'm going to generate some traffic on the ASA INSIDE interface by pinging from 172.16.10.10 to 20.20.20.20.

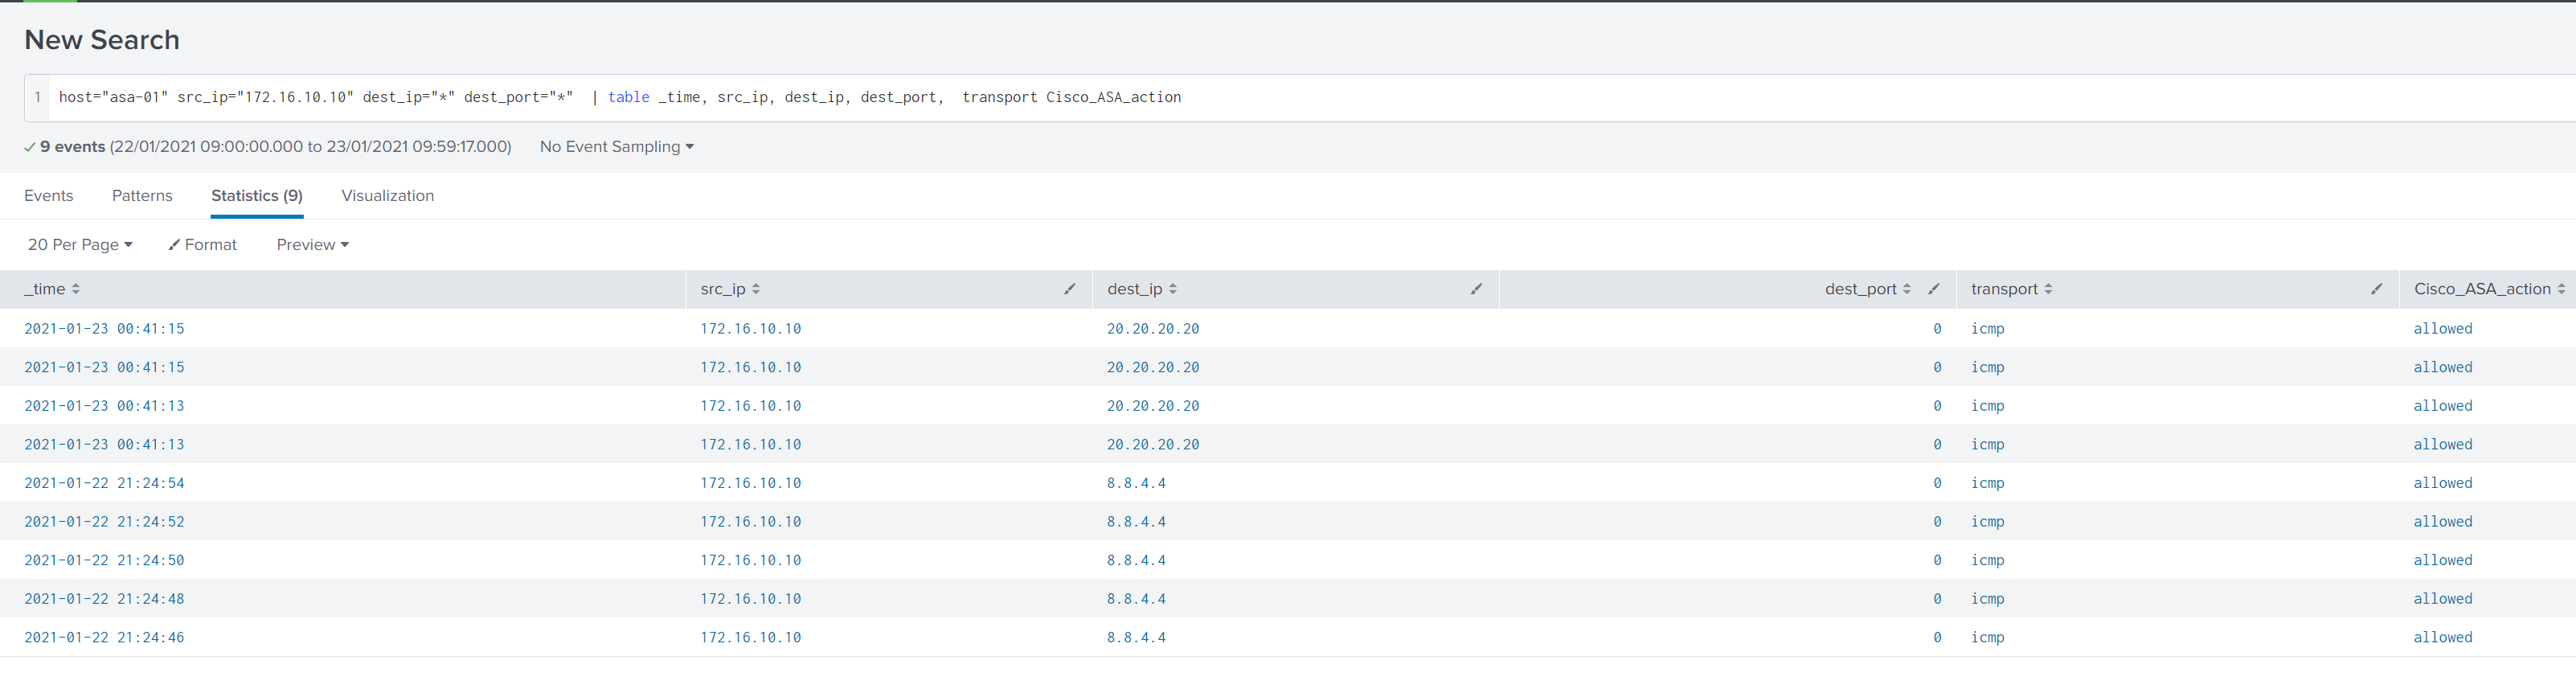
Thanks for reading.
As always, your feedback and comments are more than welcome.
References

https://docs.splunk.com/Documentation/Splunk/8.1.1/Data/MonitorfilesanddirectoriesusingtheCLI