Overview
You can use TACACS+ to authenticate and authorize users into the F5 BIG-IP system which eliminates the need to configure and manage local user accounts. The goal here is to make sure that the administrators can log in to F5 using the TACACS+ protocol where the ISE authenticates the user and inform F5 what they can access (Administrator or Guest)
Rather than store the user accounts locally on the BIG-IP system, you can store the accounts remotely (TACACS+ server or AD). To implement access control for remotely-stored BIG-IP user accounts, you can use the web GUI or tmsh. You first specify information for the type of remote authentication server, and then you configure Remote Role Groups.
Software version
- Cisco ISE - 3.0 (The process is exactly the same for older versions)
- F5 - 11.6
Access requirements
- Users who are part of the Network-Admins group will have Administrator access
- Users who are part of the IT-Ops group will have Guest access
Please note that I'm using Local Identity Groups in this example. In a real world, more likely you will be using AD groups.
F5 Configurations
The following two-step process enables TACACS+ authentication on F5.
Configure via TMSH
auth remote-role {
    role-info {
        /Common/f5_admins {
            attribute F5-LTM-USER-Info-1=admin
            console tmsh
            line-order 1
            role administrator
            user-partition All
        }
        /Common/f5_guest {
            attribute F5-LTM-USER-Info-1=guest
            line-order 2
            role guest
            user-partition All
        }
    }
}
auth source {
    type tacacs
}
auth tacacs /Common/system-auth {
    protocol ip
    secret $M$Wv$FMtu1GmtsnghnoatK6amZw==
    servers { 10.10.0.100 }
    service ppp
}
ltm default-node-monitor {
    rule none
}
Configure via web GUI
1. Enable TACACS+
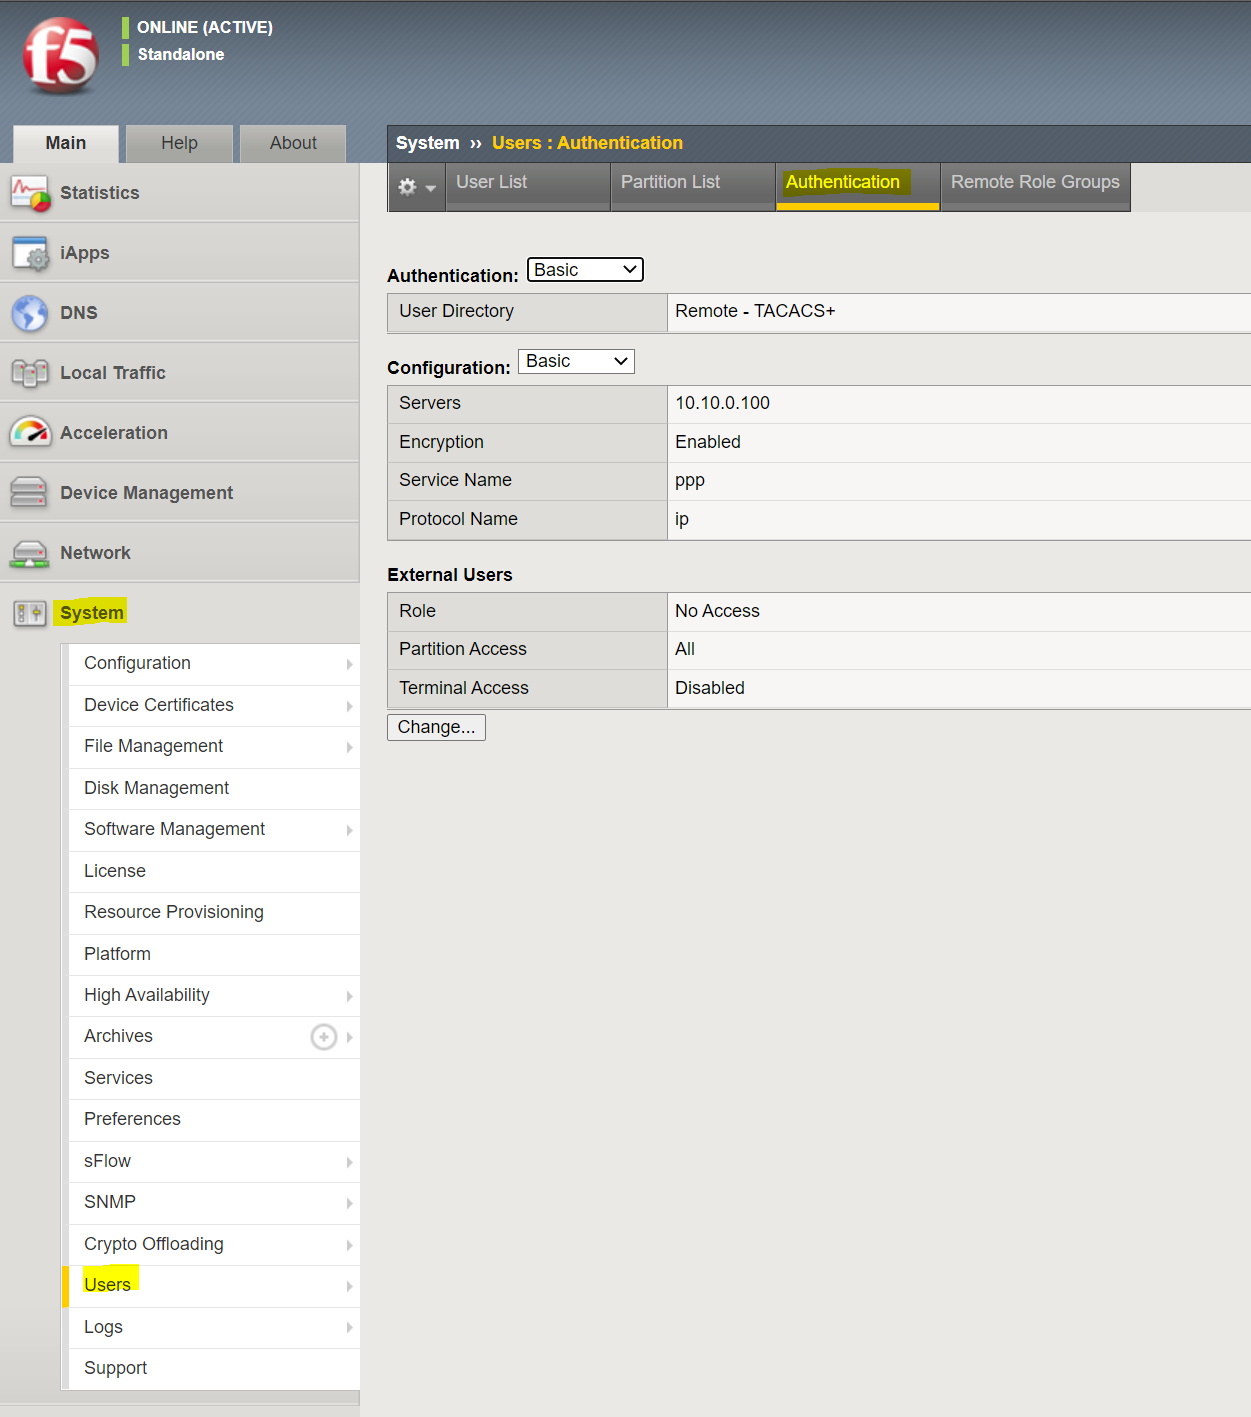
Navigate to System > Users > Authentication and add ISE as the TACACS+ server.
Please note that I set the External Users Role to No Access which means if ISE doesn't send any custom attributes/role names for a specific user, the access is denied.
2. Configure Remote Role Groups
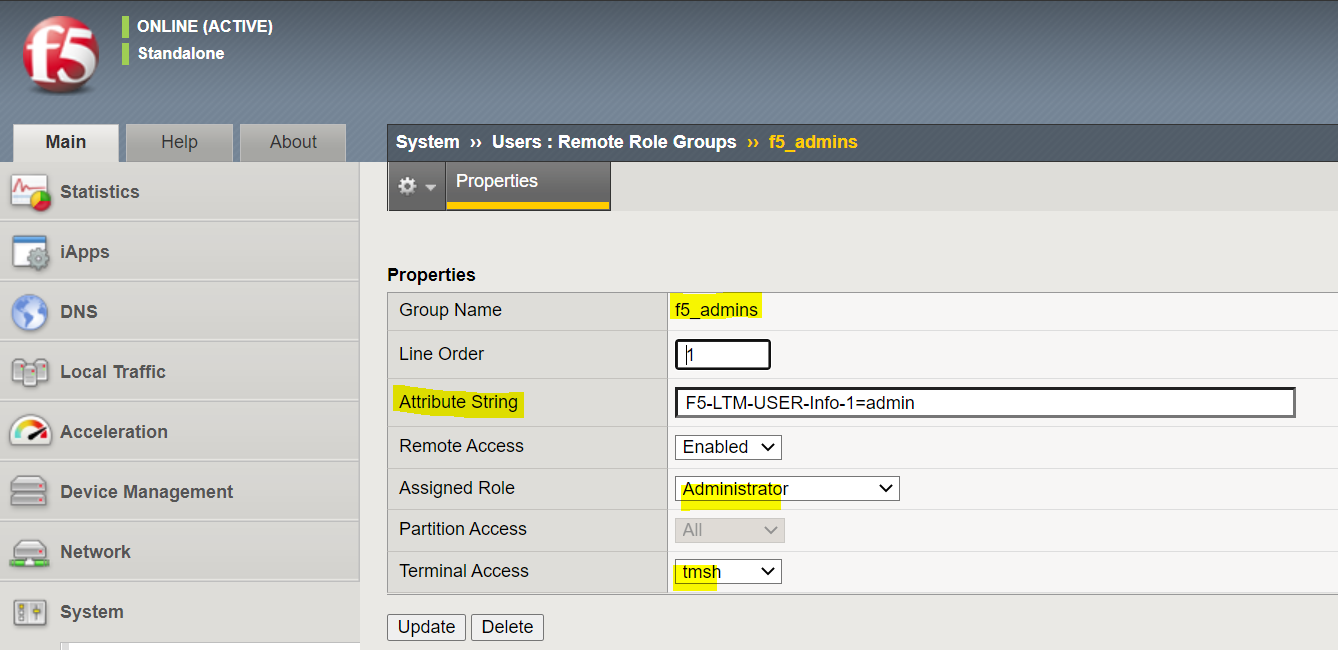
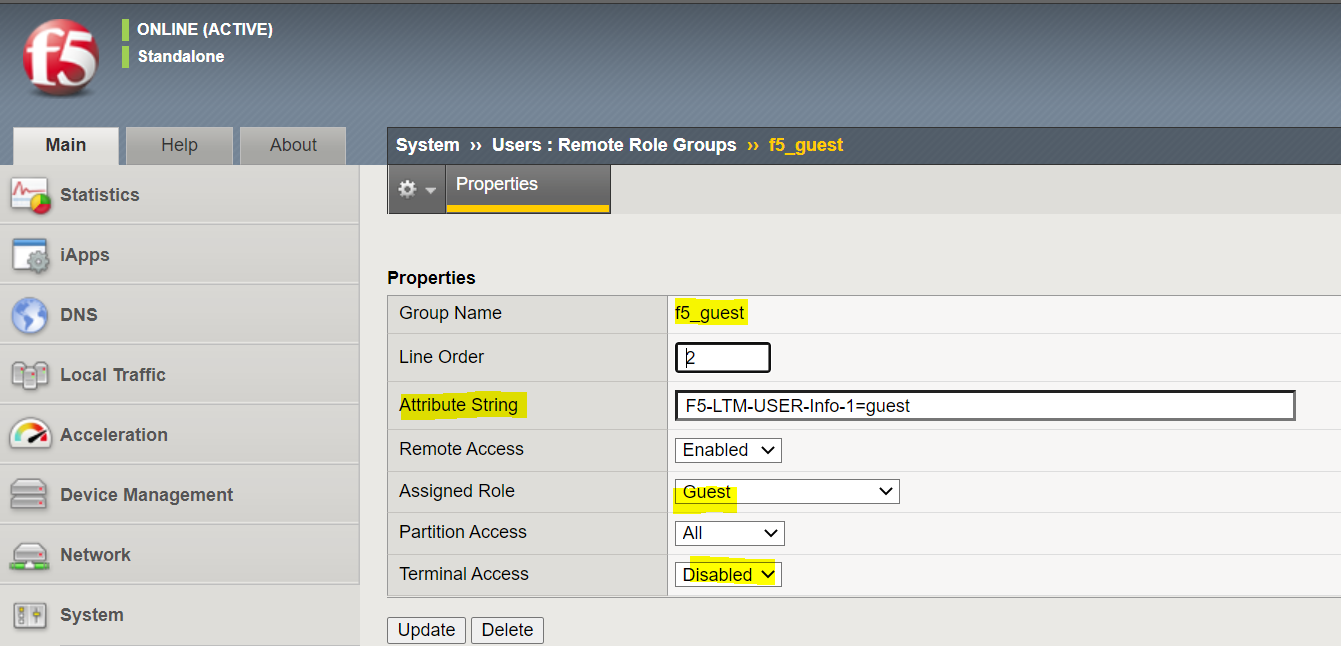
I'm creating two groups as shown below, one for Administrator and one for Guest
Please note that the attribute string should match on the ISE.
Cisco ISE Configuration
As you can see below, I have two local users Bob and Max. Bob is part of the Network-Admins group and Max is part of the IT-Ops group.

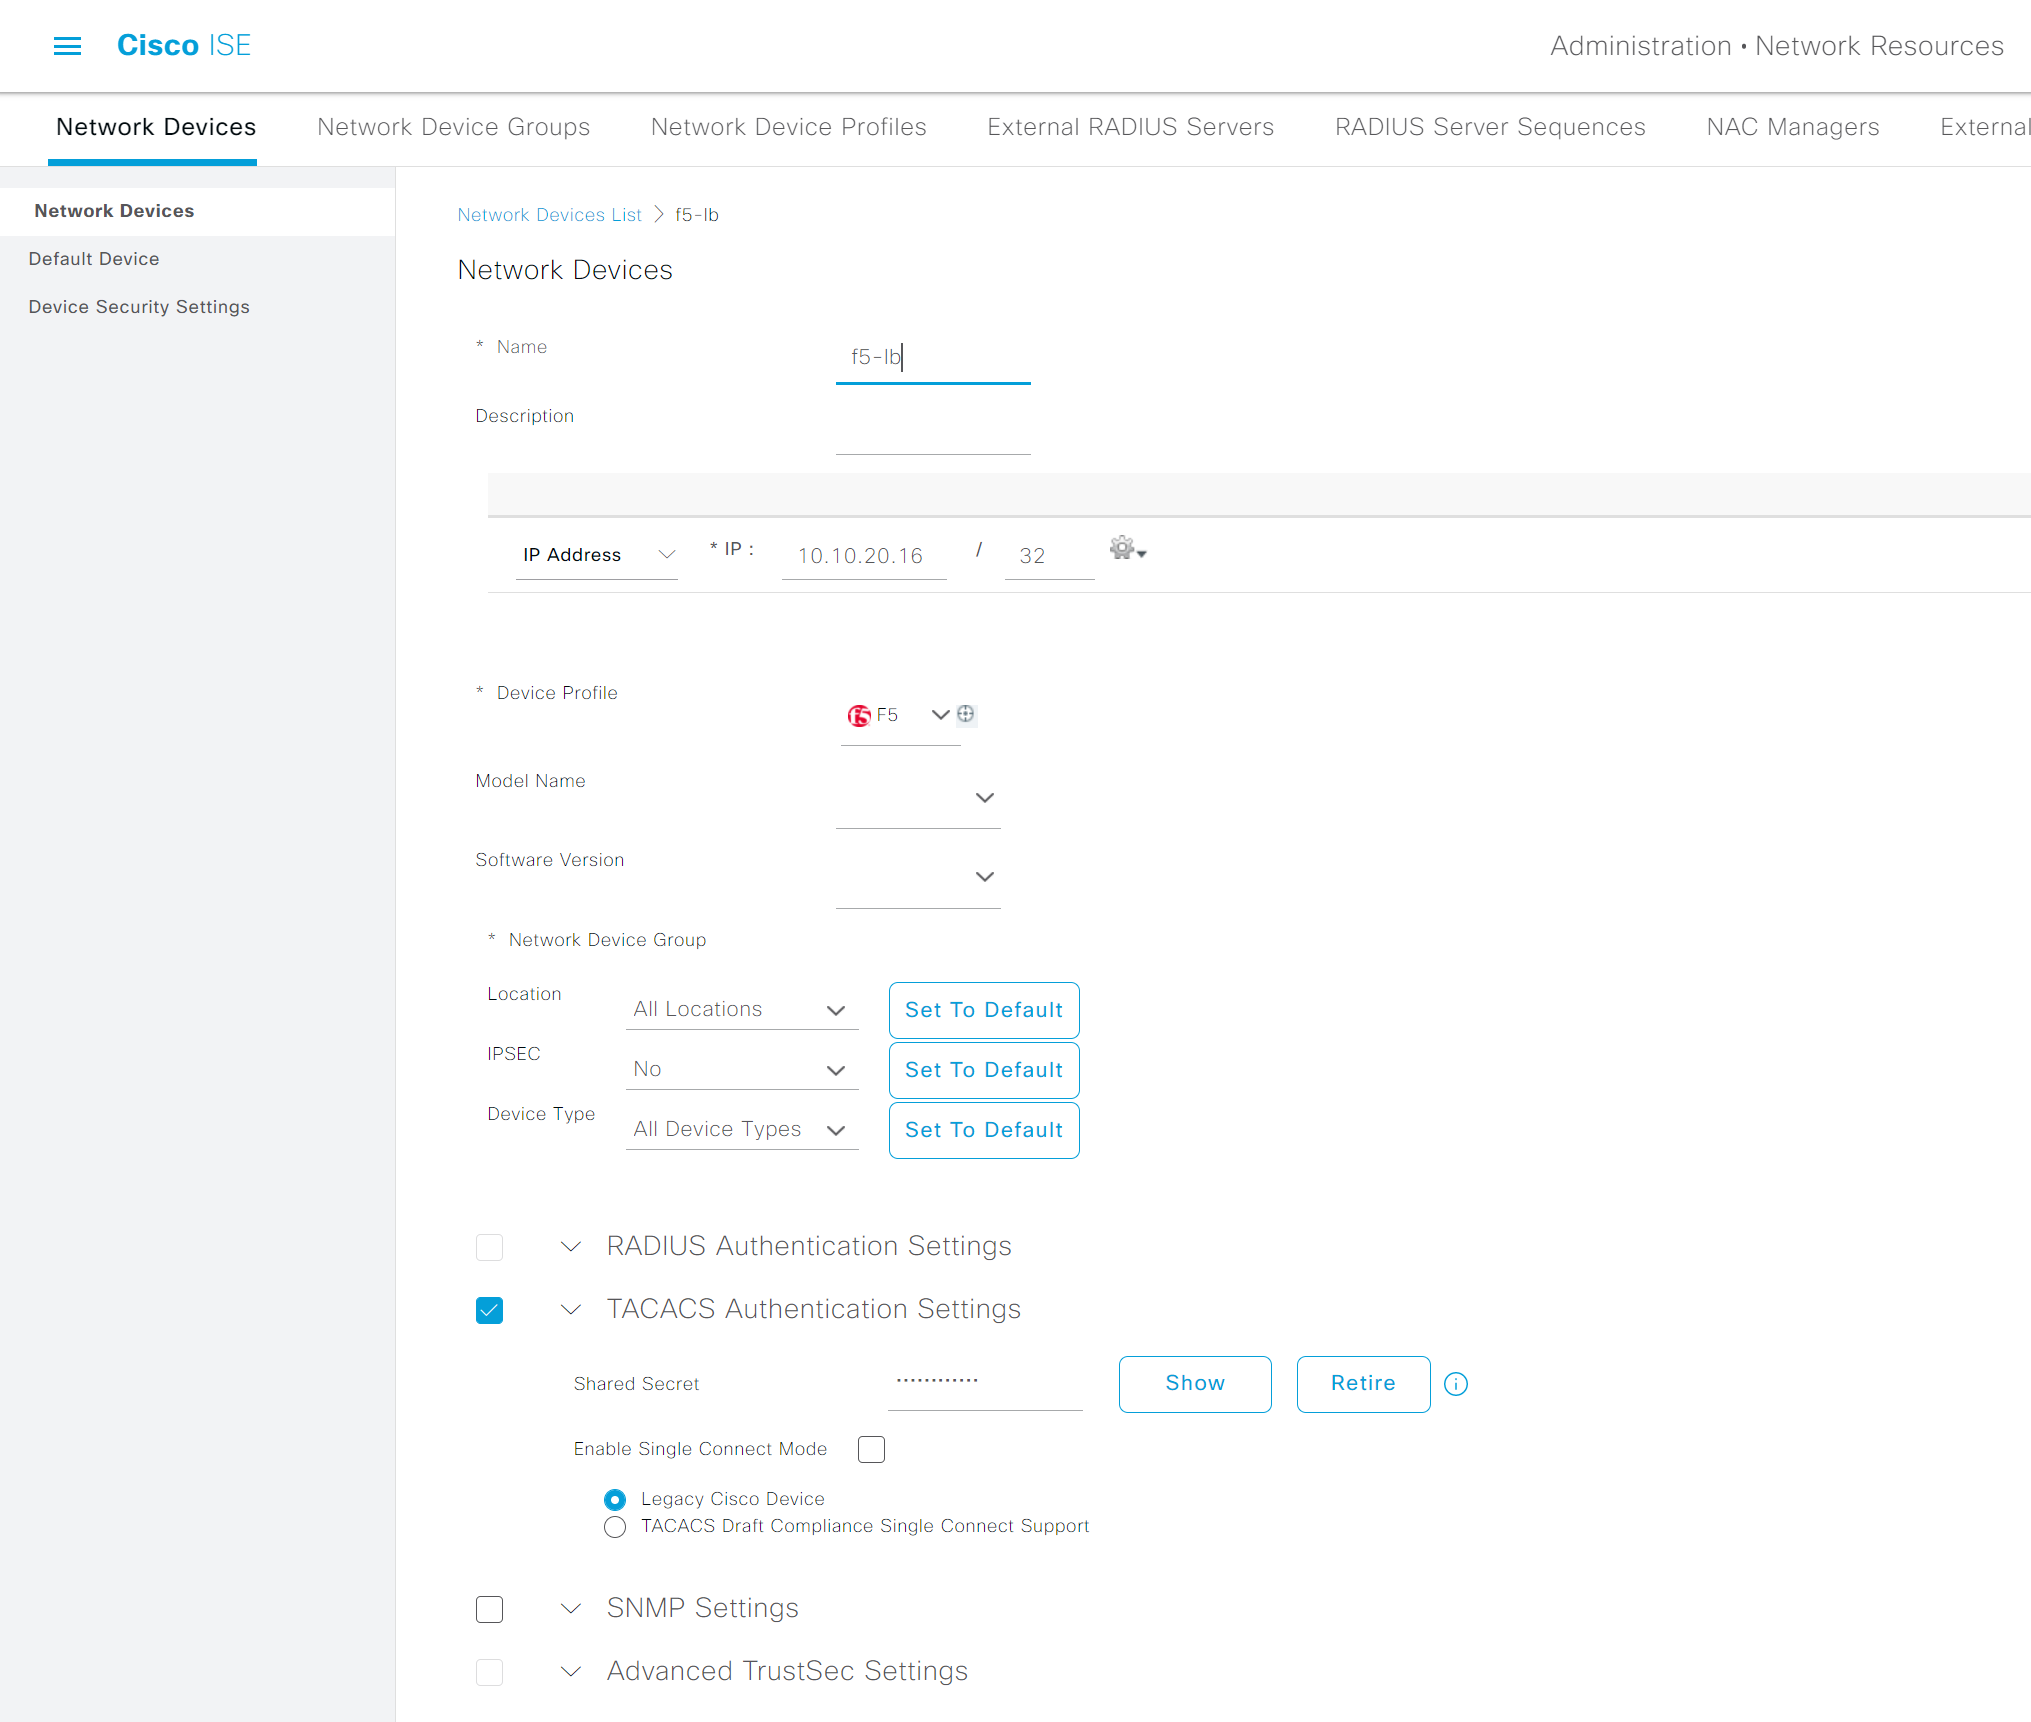
1. Add F5 into the ISE by navigating to Administration > Network Devices
Devices that you want to manage via TACACS+ need to be added to the ISE. Please note that the shared secret must match between the devices.
2. Create TACACS+ Profiles
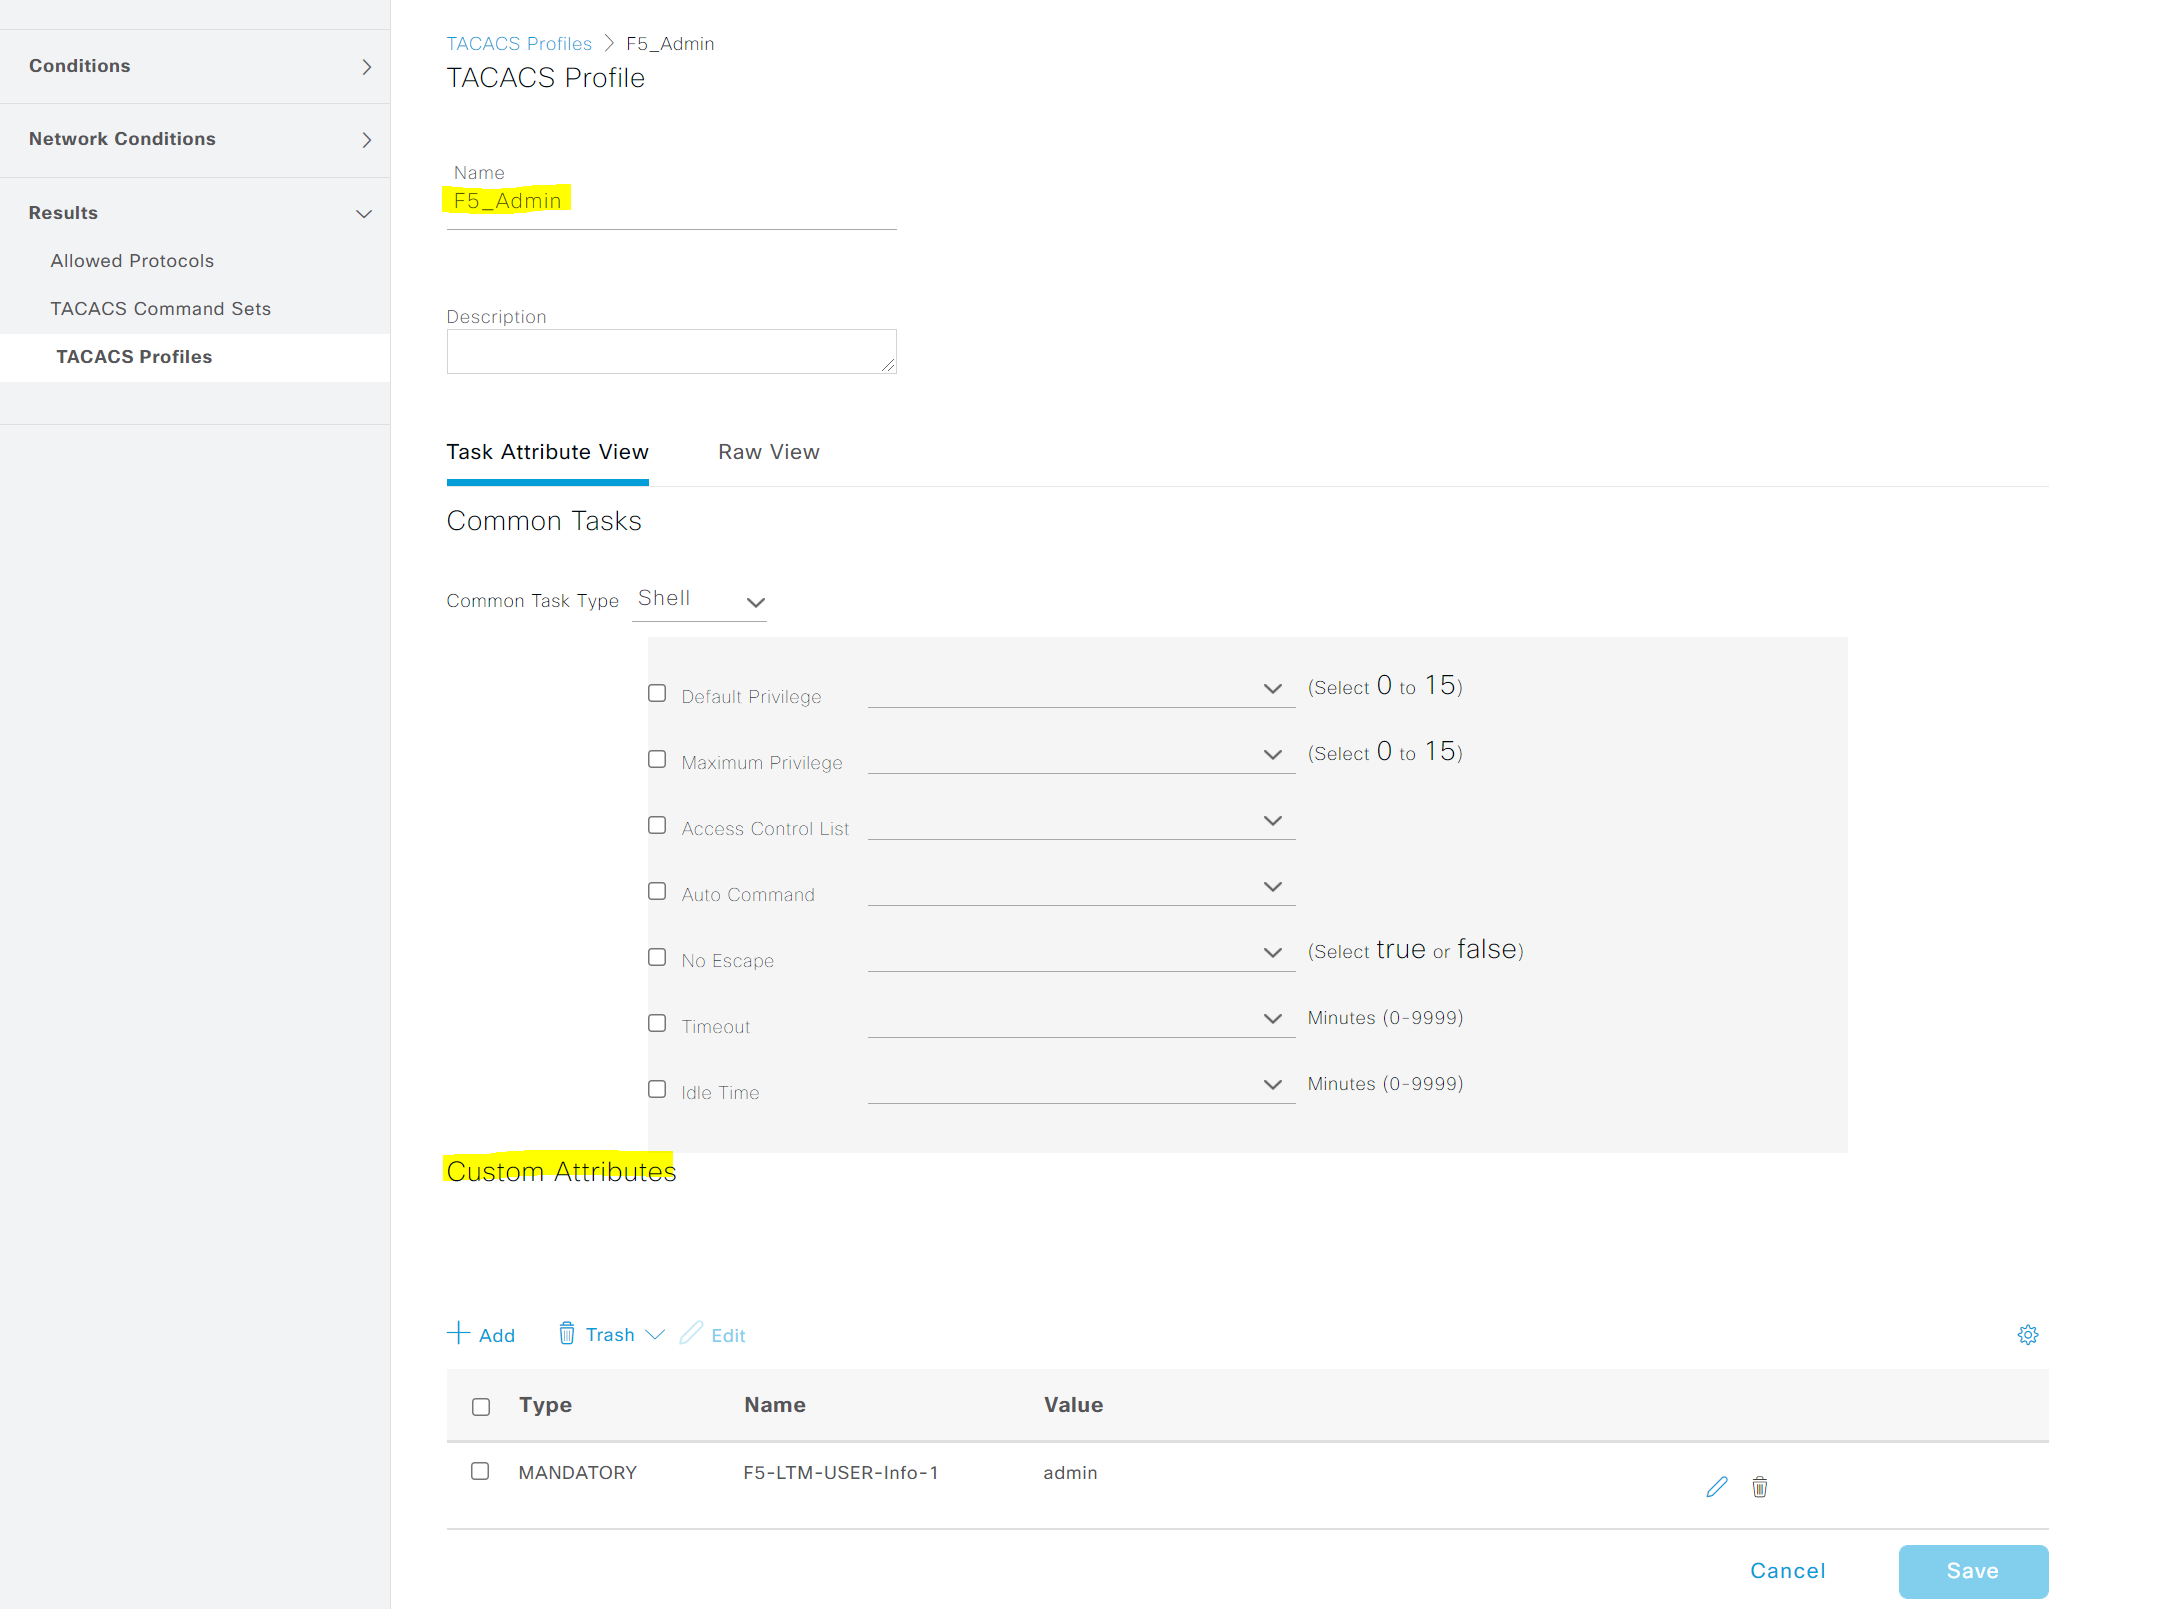
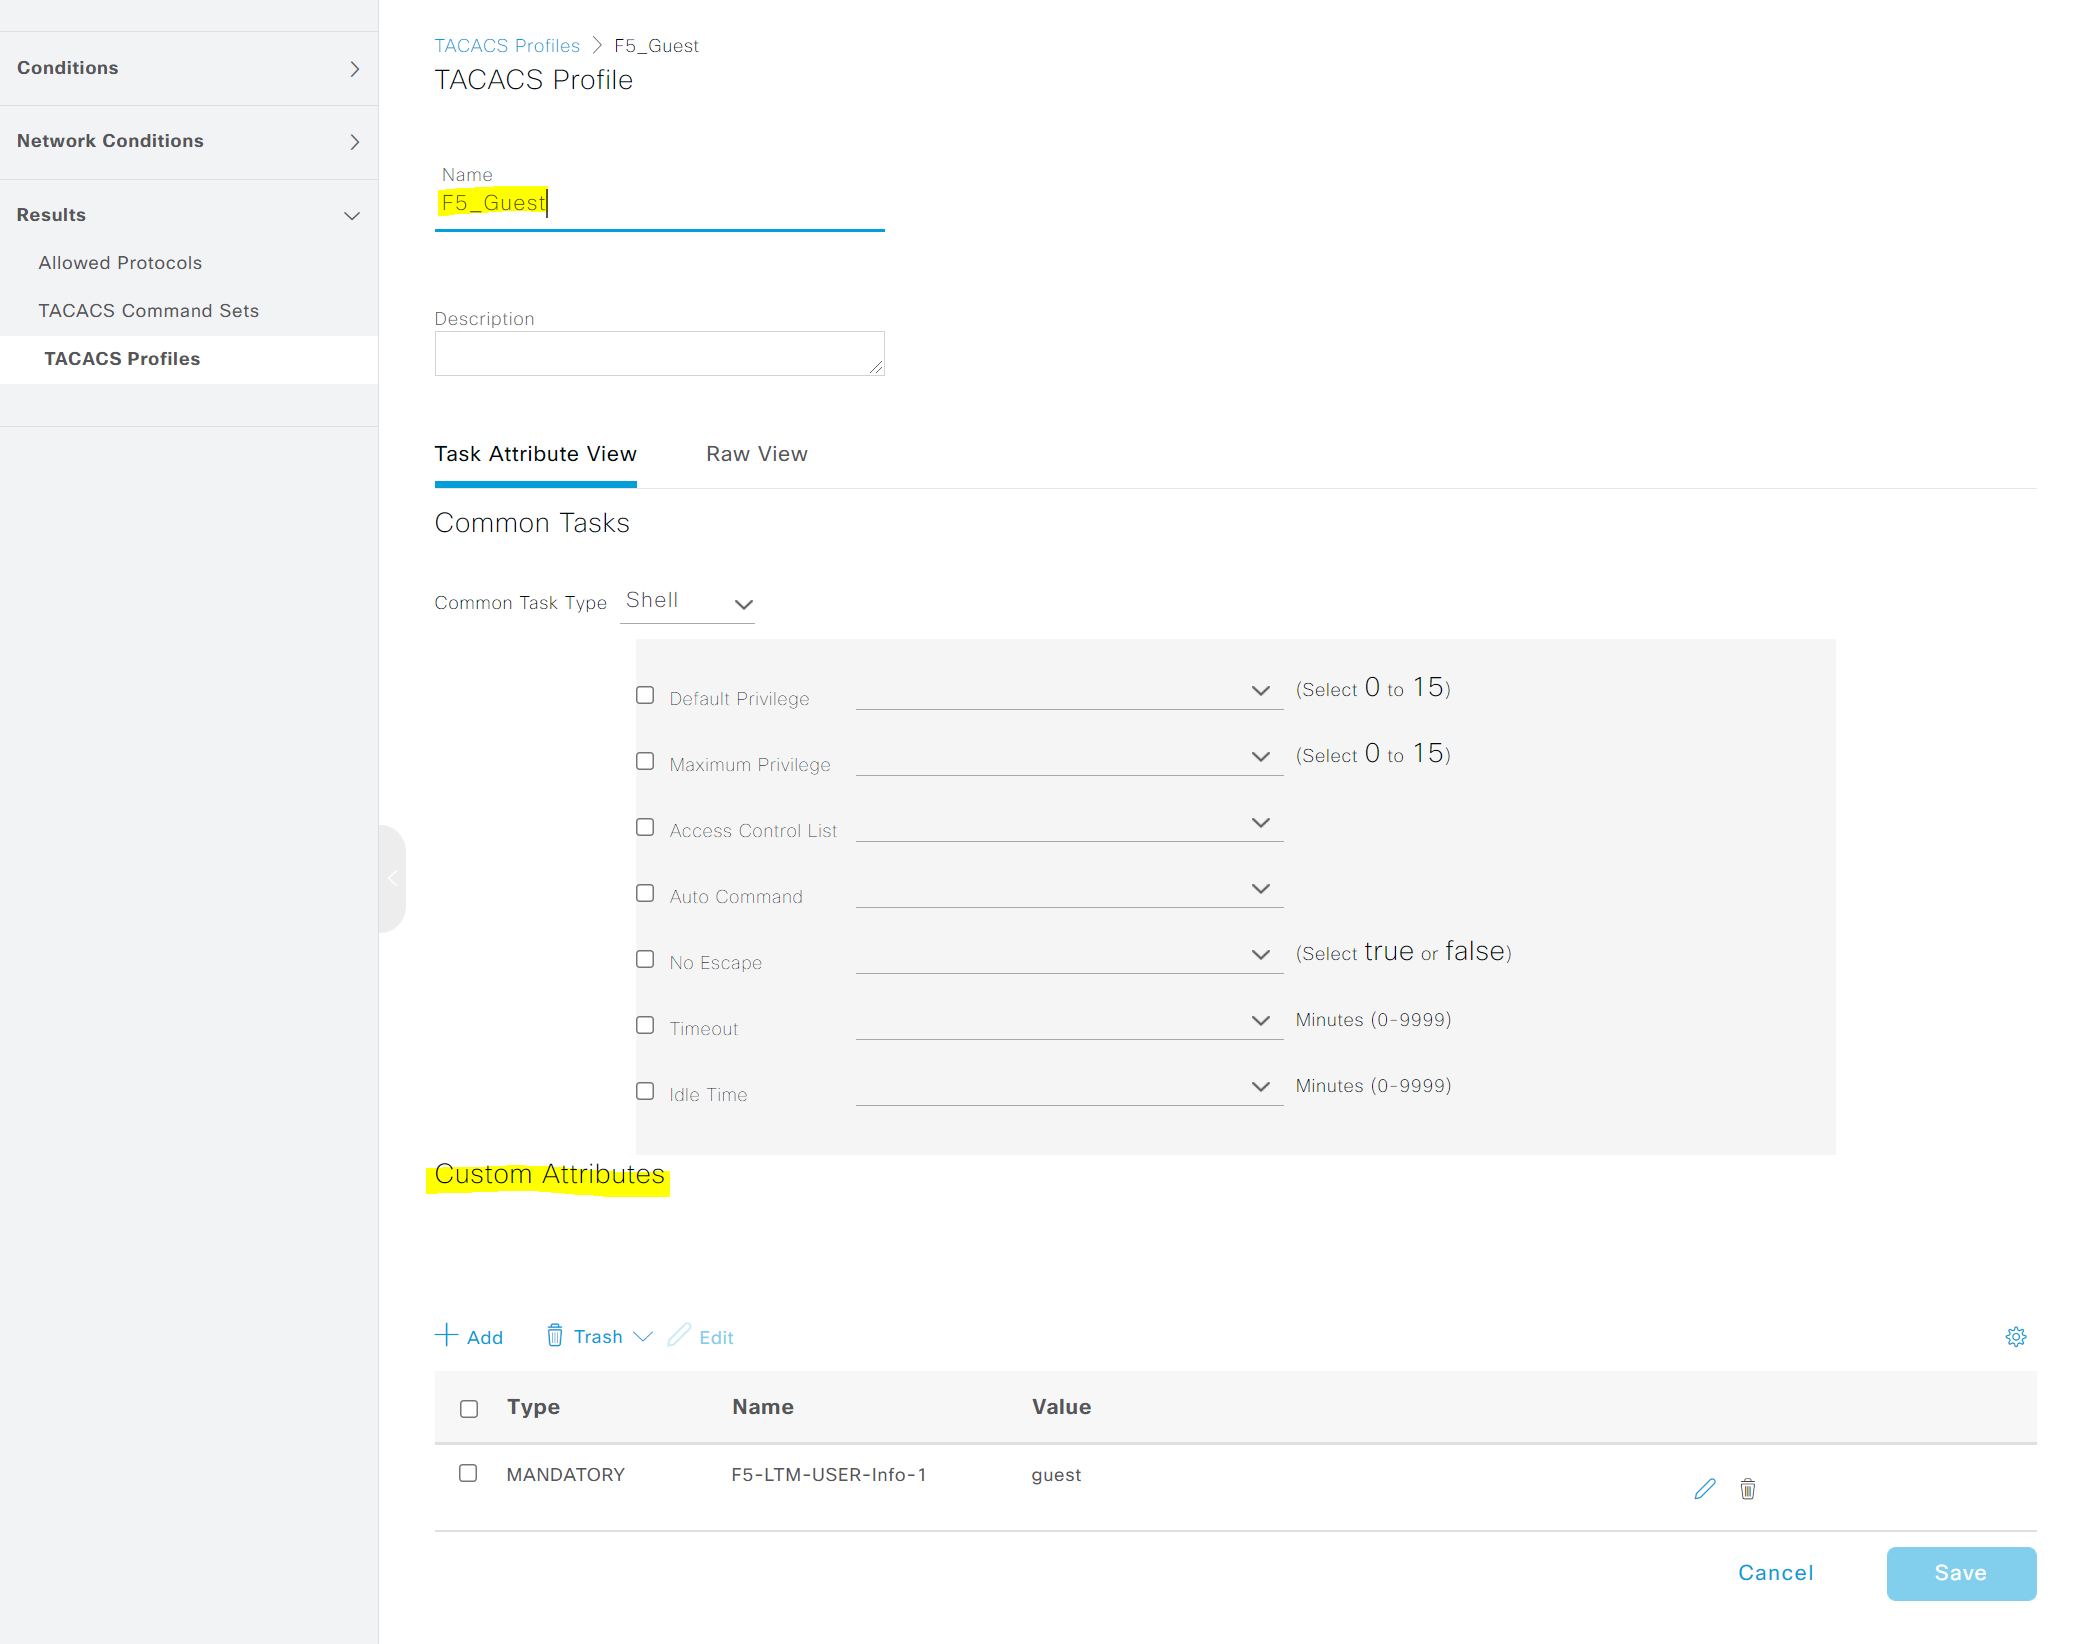
Navigate to Work Centers > Device Administration > Policy Elements > TACACS Profiles and create two profiles with the custom attributes.
Please note that the value of the attibute should match the attribute string configured on F5.
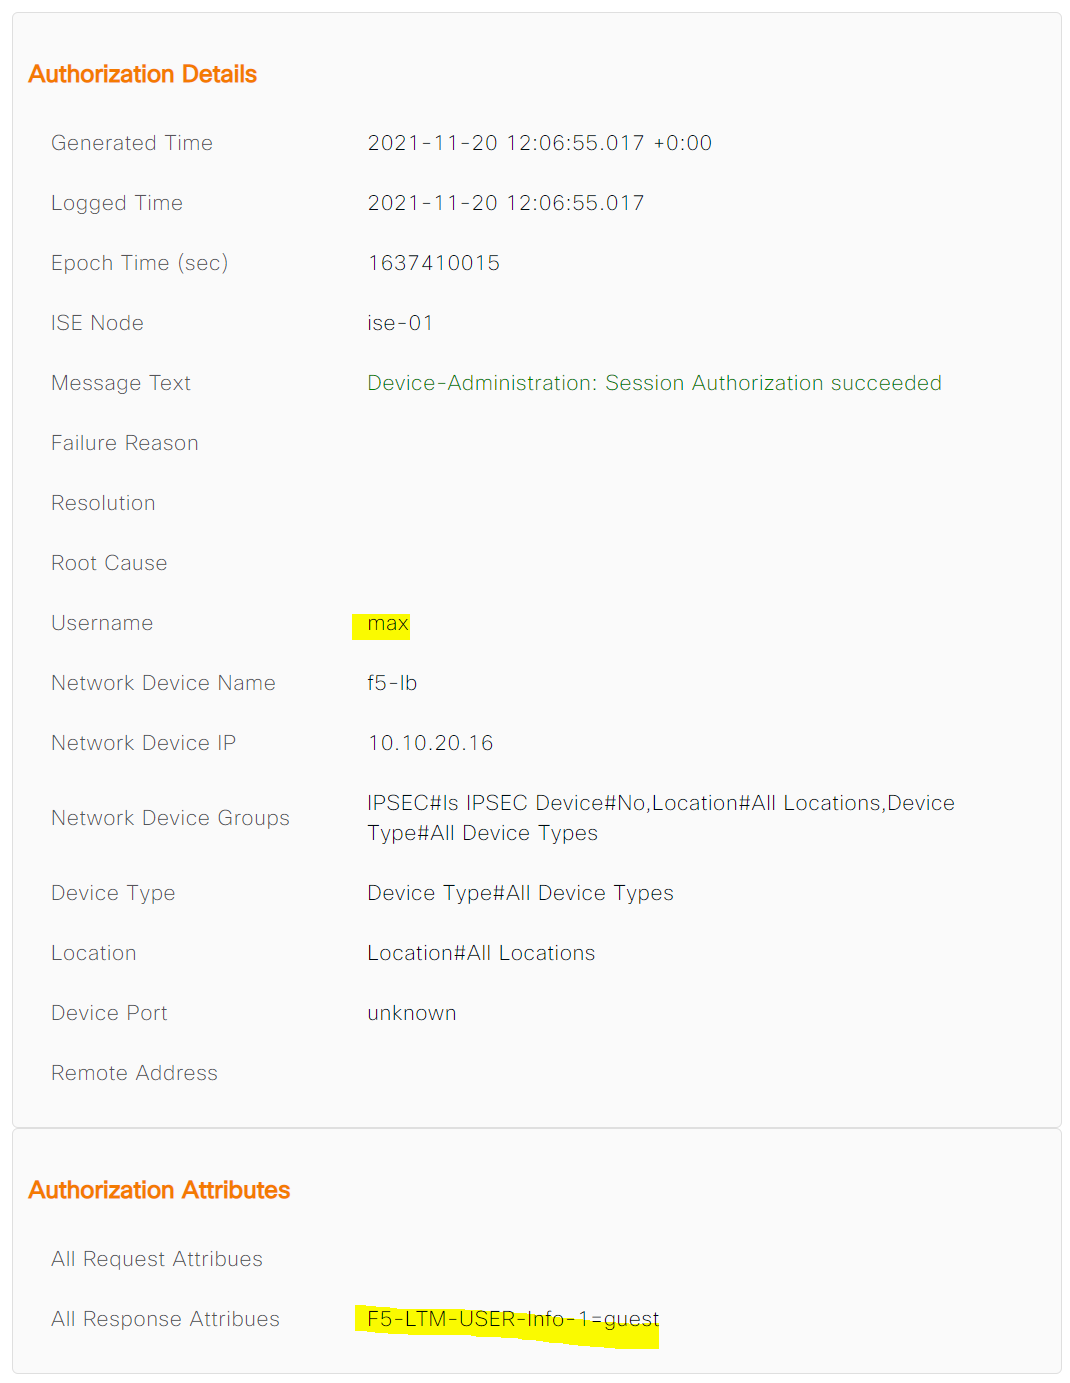
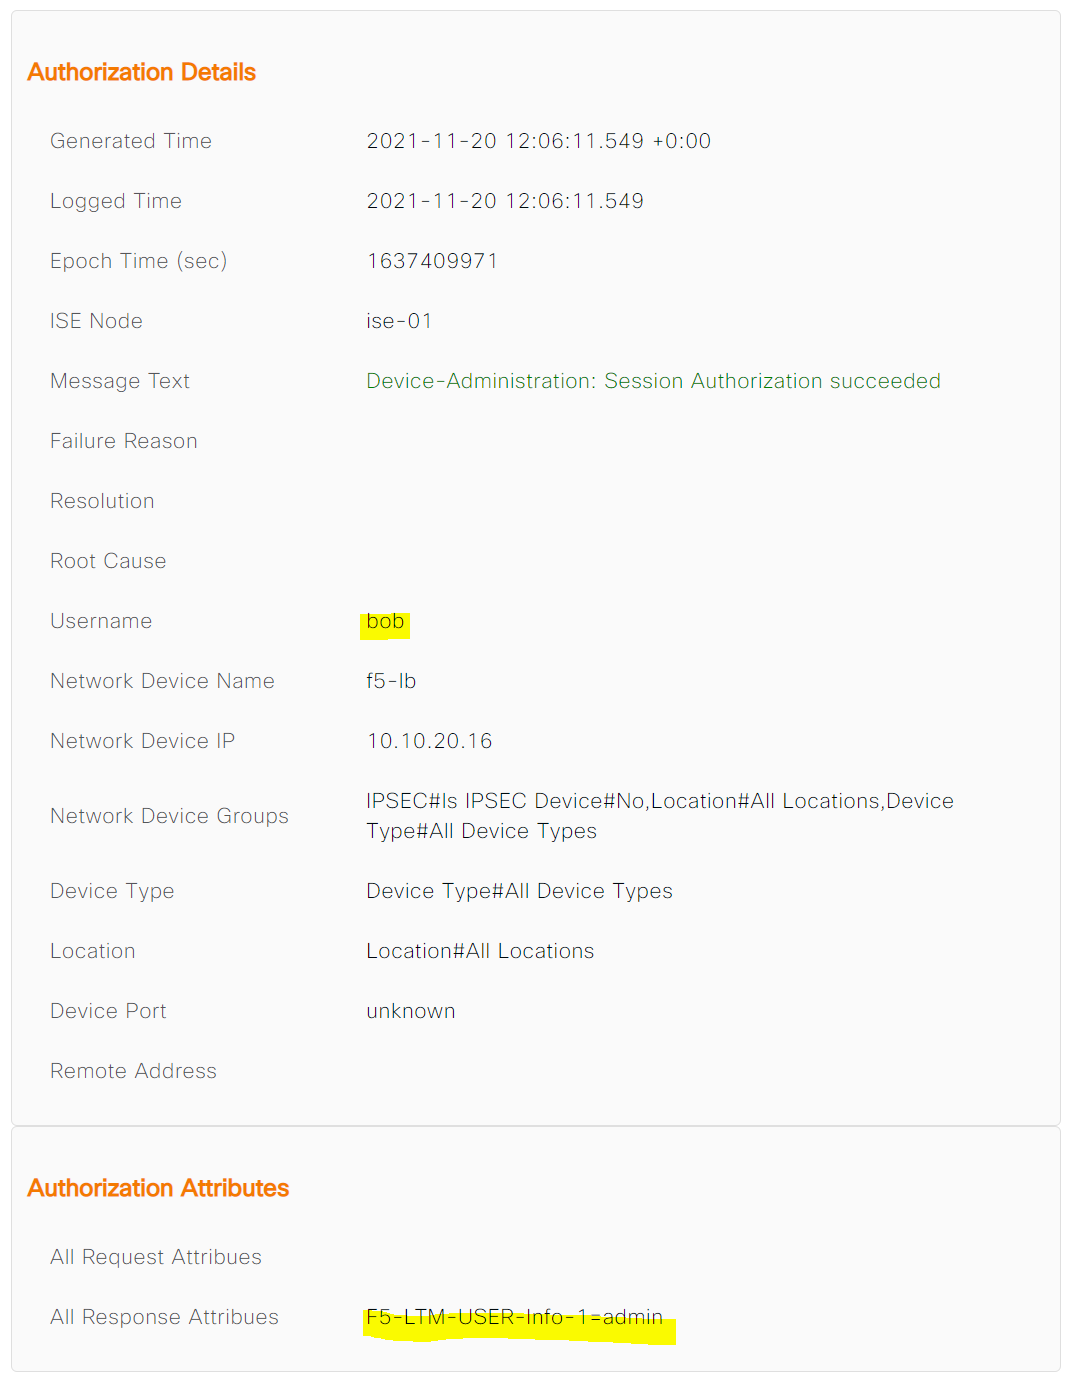
Once the authorization is completed, ISE will send a TACACS authorization response message to the F5 which includes the custom attribute names so, the firewall would know which role to apply to that specific user.
3. Device Admin Policy Sets
This is the final step where the Profiles are attached to the Authorization Policy.

Verification
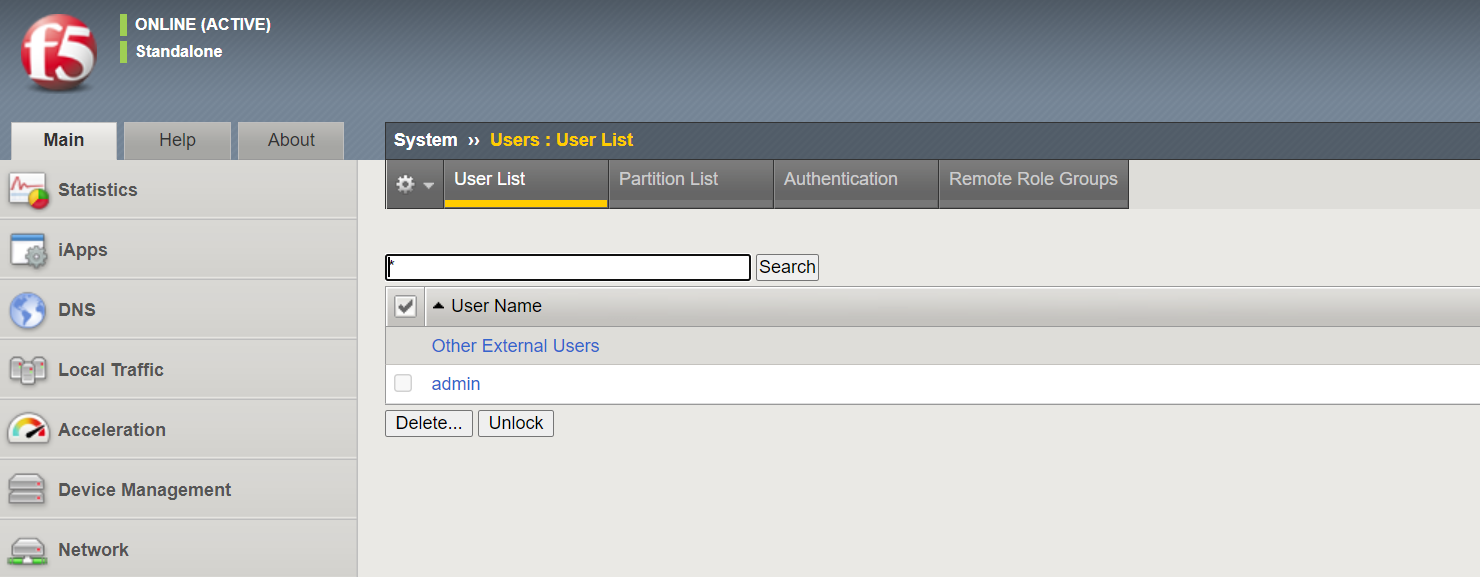
As you can see below, F5 only has the 'local' admin account and nothing else.
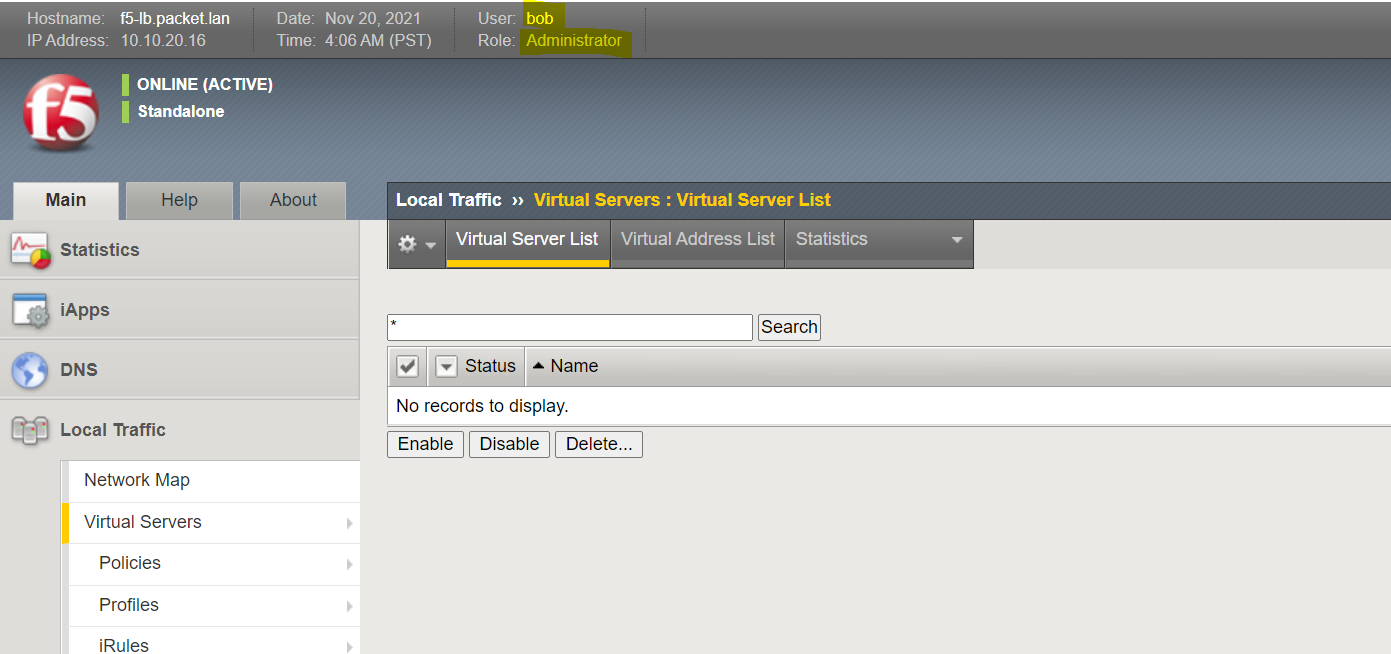
Bob logins to the F5 and gets Administrator access
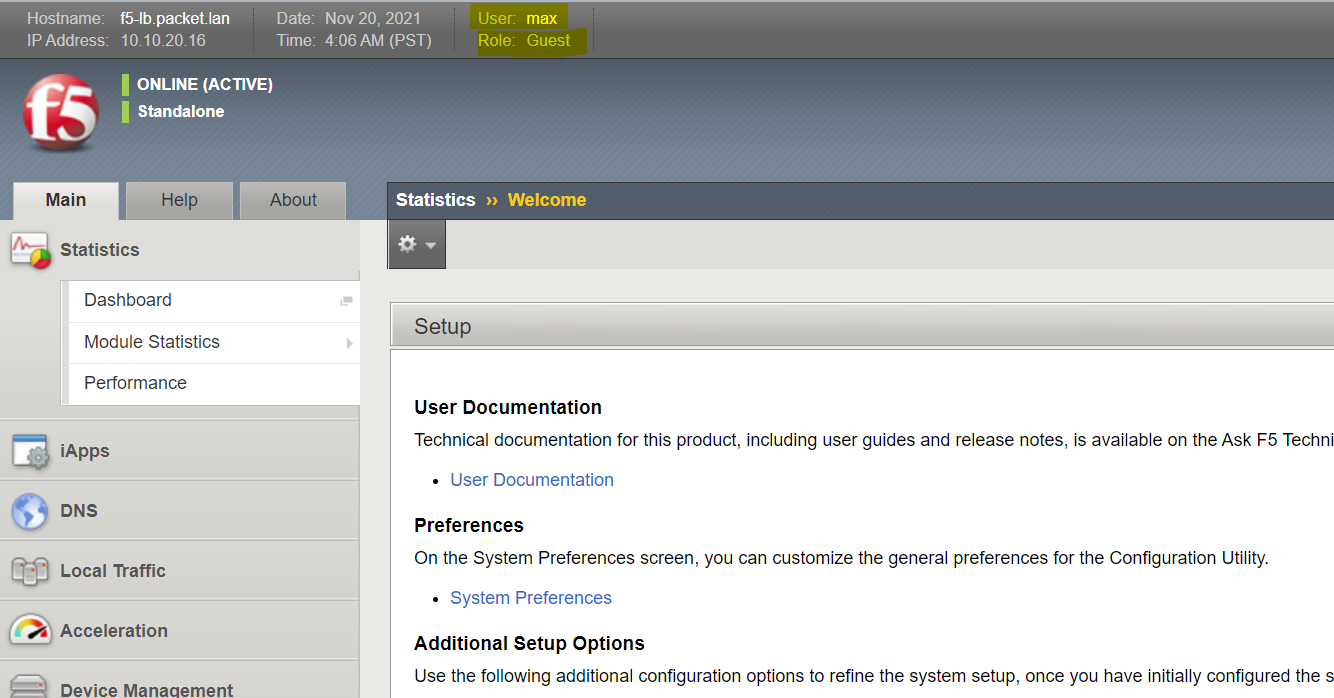
Max logins to the F5 and gets Guest access
