Recently, I had the opportunity to help a friend set up and manage a network using Fortinet's FortiGate Firewall, FortiSwitches and FortiAPs. Typically, you'd find a mix of different equipment from various vendors - think Palo Alto for Firewalls, Cisco for switches, Juniper for routers and perhaps Meraki for access points. In such scenarios, each device needs to be configured individually and then linked together using physical trunk links.
With Fortinet, however, the experience was different, and in many ways, a lot simpler (and harder!). In this blog post, I'll walk you through my experience with Fortinet. I'll tell you about how I got the FortiGate, FortiSwitch, and FortiAP all setup and working together. I hope my journey gives you a good idea of what to expect when configuring the full Fortinet stack.
FortiGate Firewall
Starting off with the FortiGate firewall, the process was easier than I anticipated. To kick things off, I connected the FortiGate to the WAN and upgraded the firmware, registered with FortiCloud, an intuitive process that simply involved following prompts and login with your FortiCloud credentials. With the firewall secured and registered, that was it, our FortiGate firewall was up and running in no time.
FortiSwitch
The journey took an interesting turn when it came to configuring the FortiSwitch. I was under the assumption that setting up an LACP trunk between the firewall and the switch, a common practice in most network setups, would be the end of it. But, Fortinet had its own twist.
FortiLink
Sure, you do need a trunk connection between the firewall and the switch, but Fortinet has a special name for it - 'FortiLink'. This term was new to me, but I quickly discovered that FortiLink is the special link type/protocol that allows FortiSwitches to become extensions of the FortiGate, all manageable directly from the FortiGate’s interface. This meant I could control all configurations and policies from one place, a concept that was different but quite appealing.
FortiLink defines the management interface and the remote management protocol between the FortiGate and FortiSwitch.
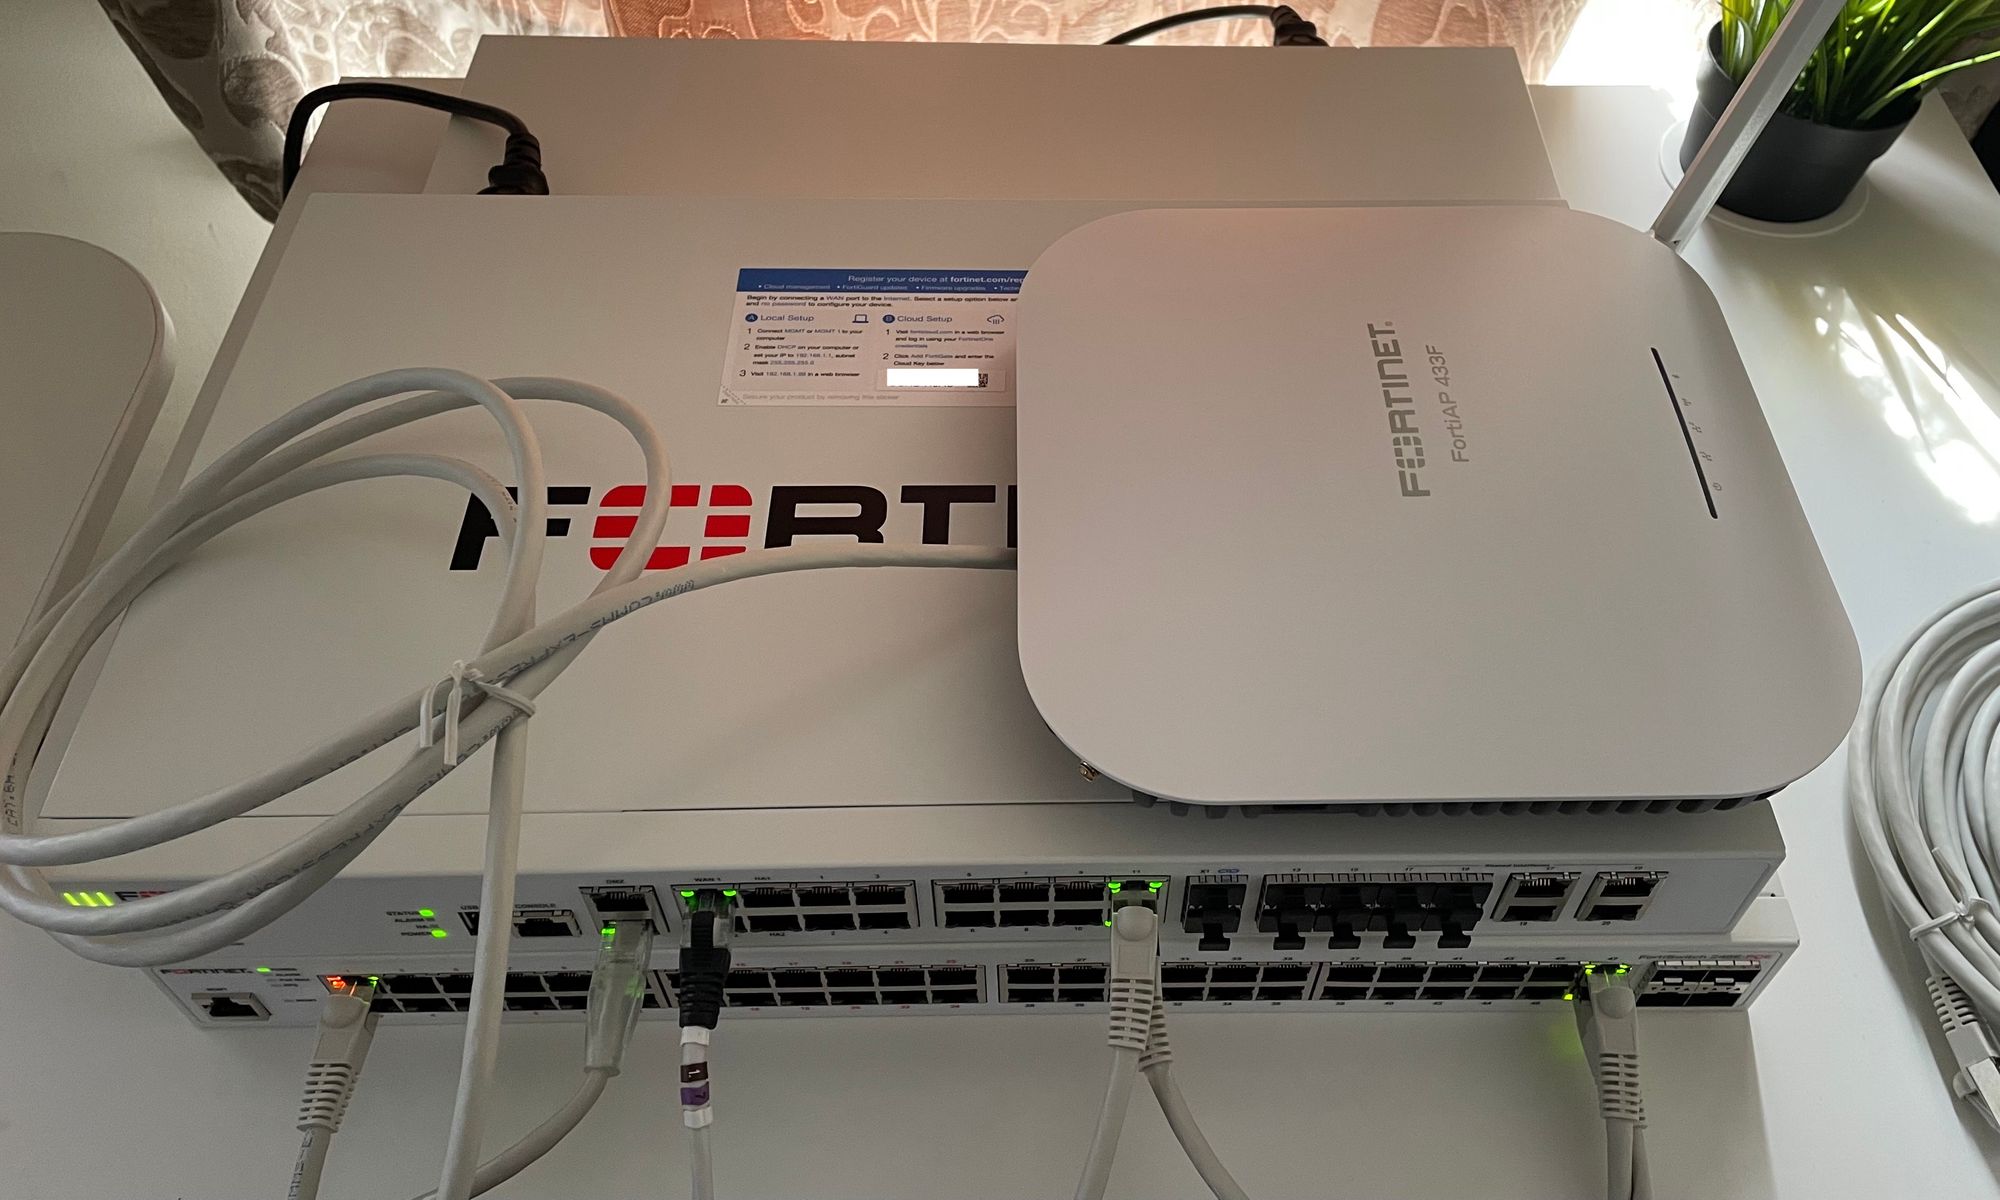
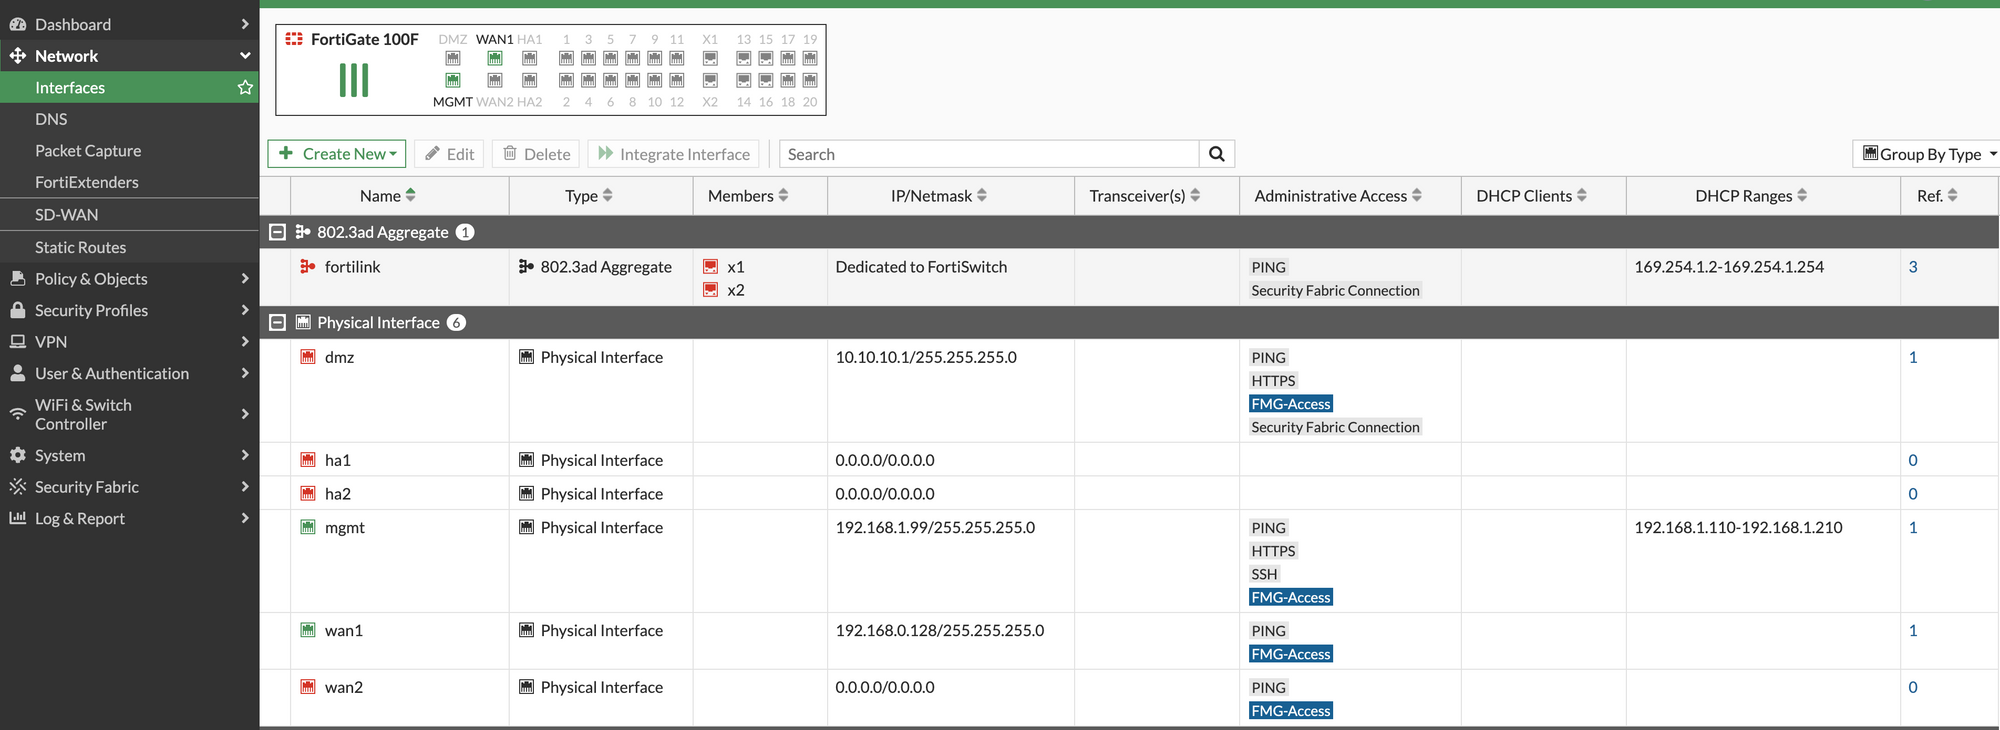
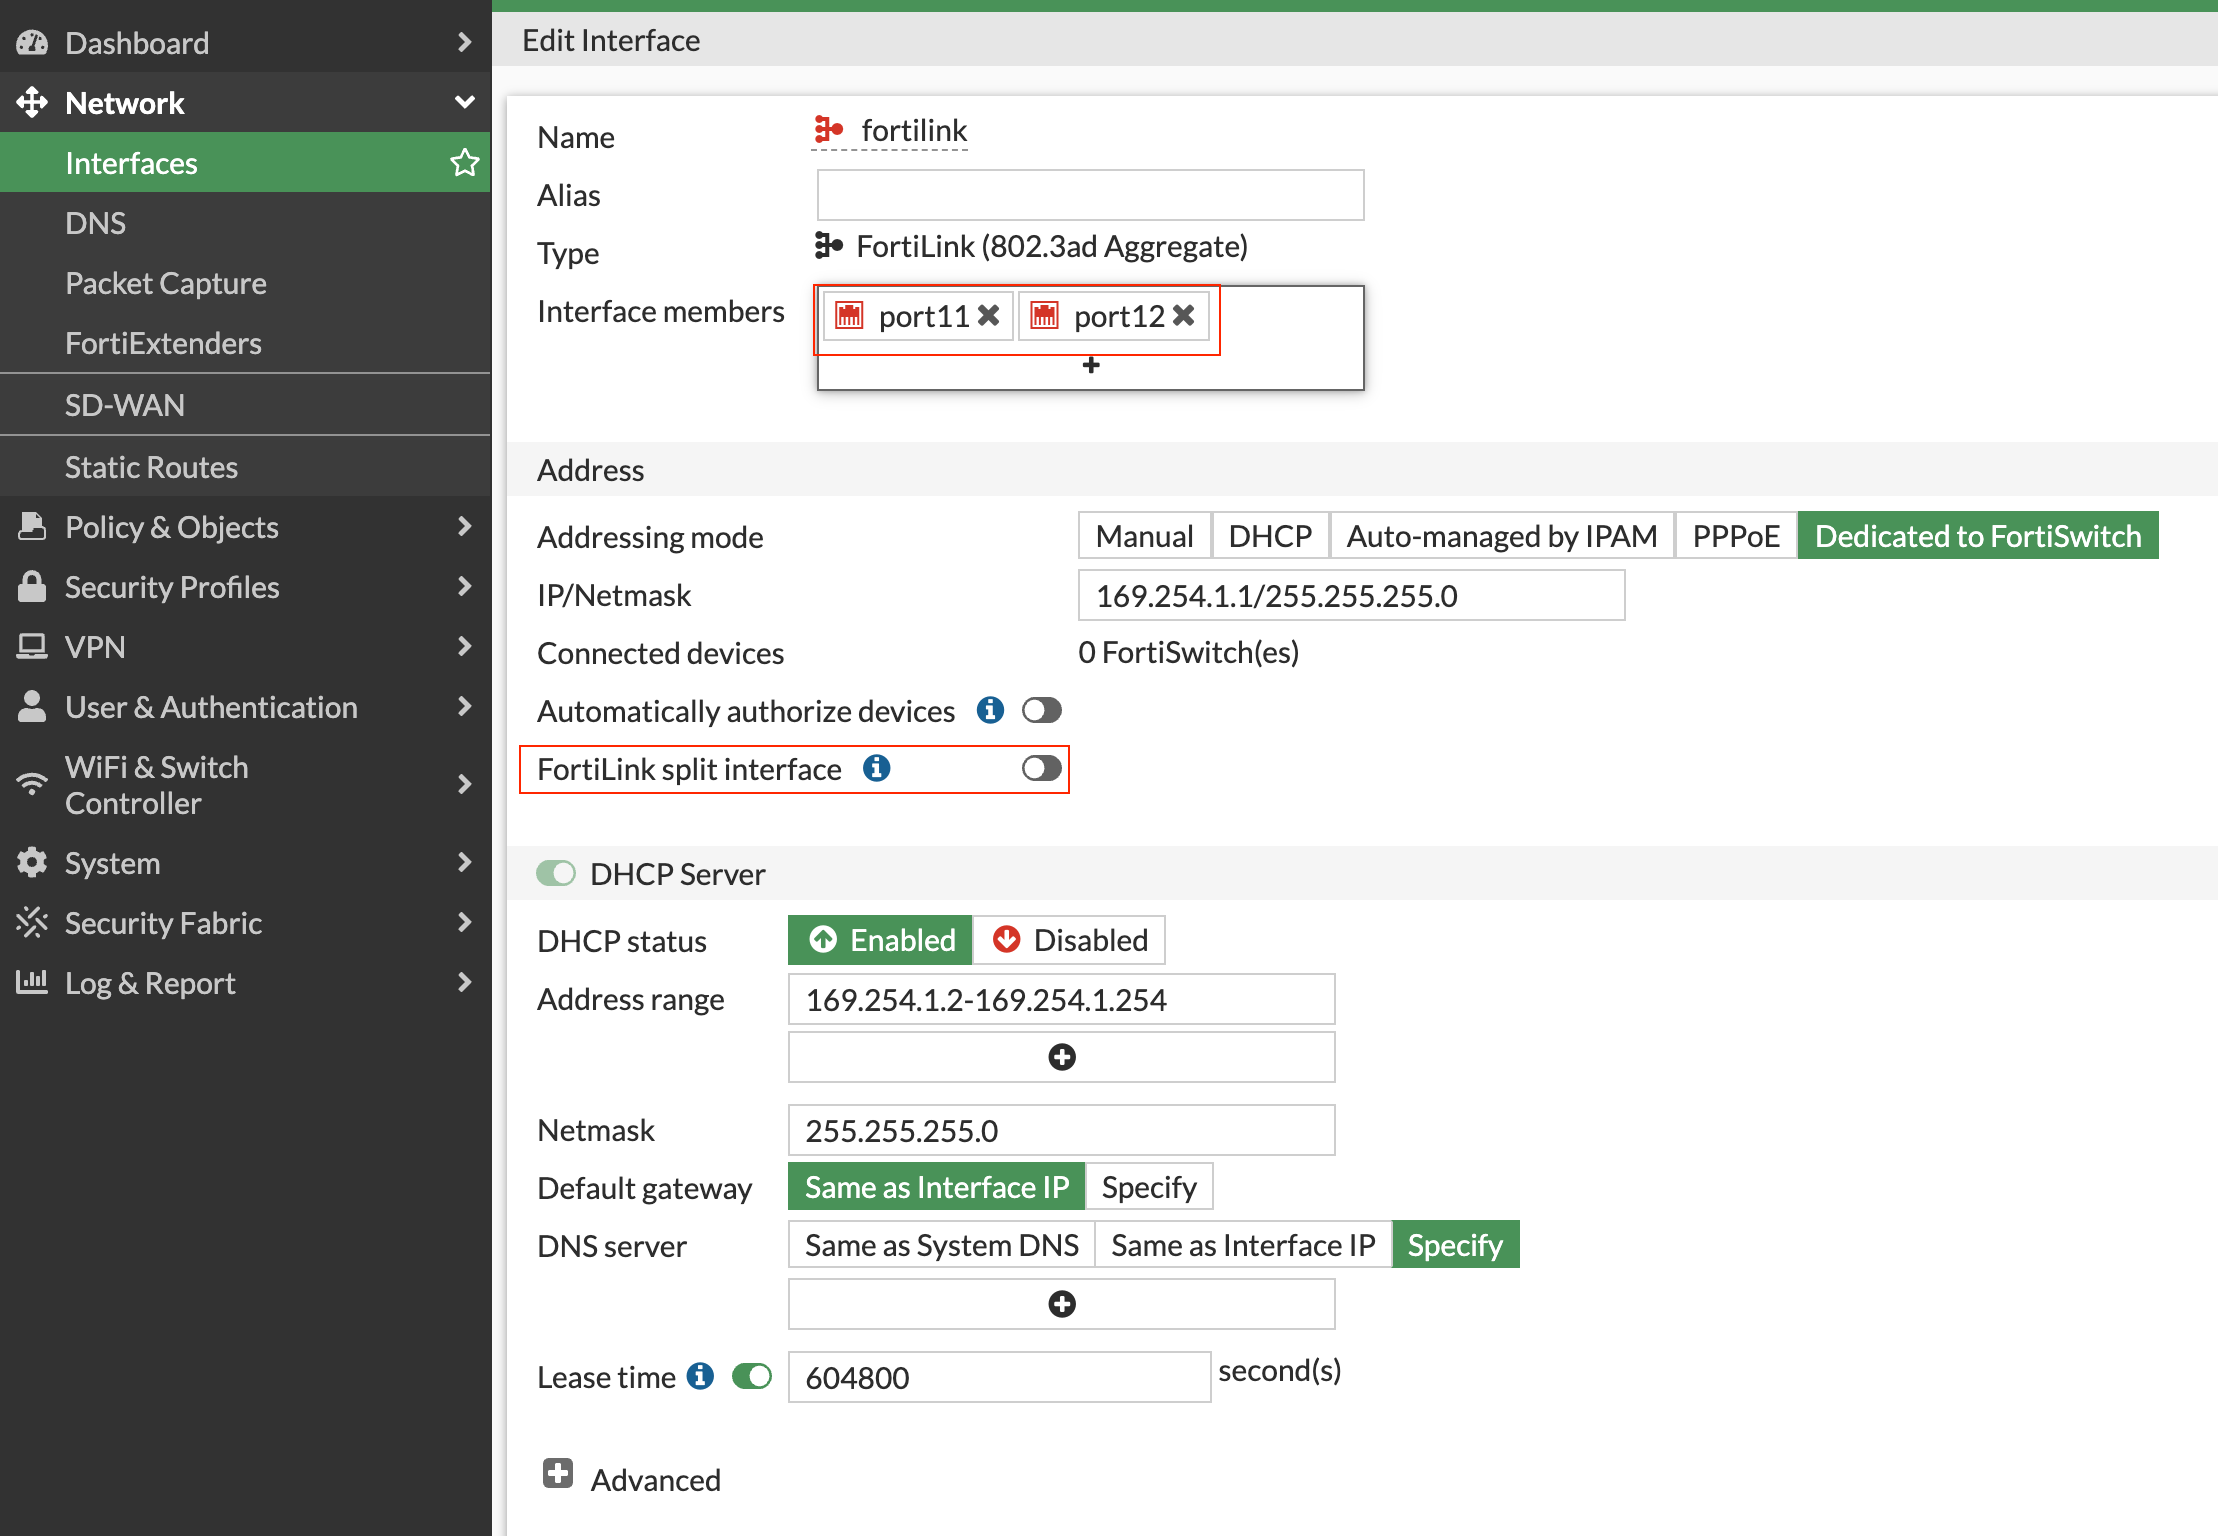
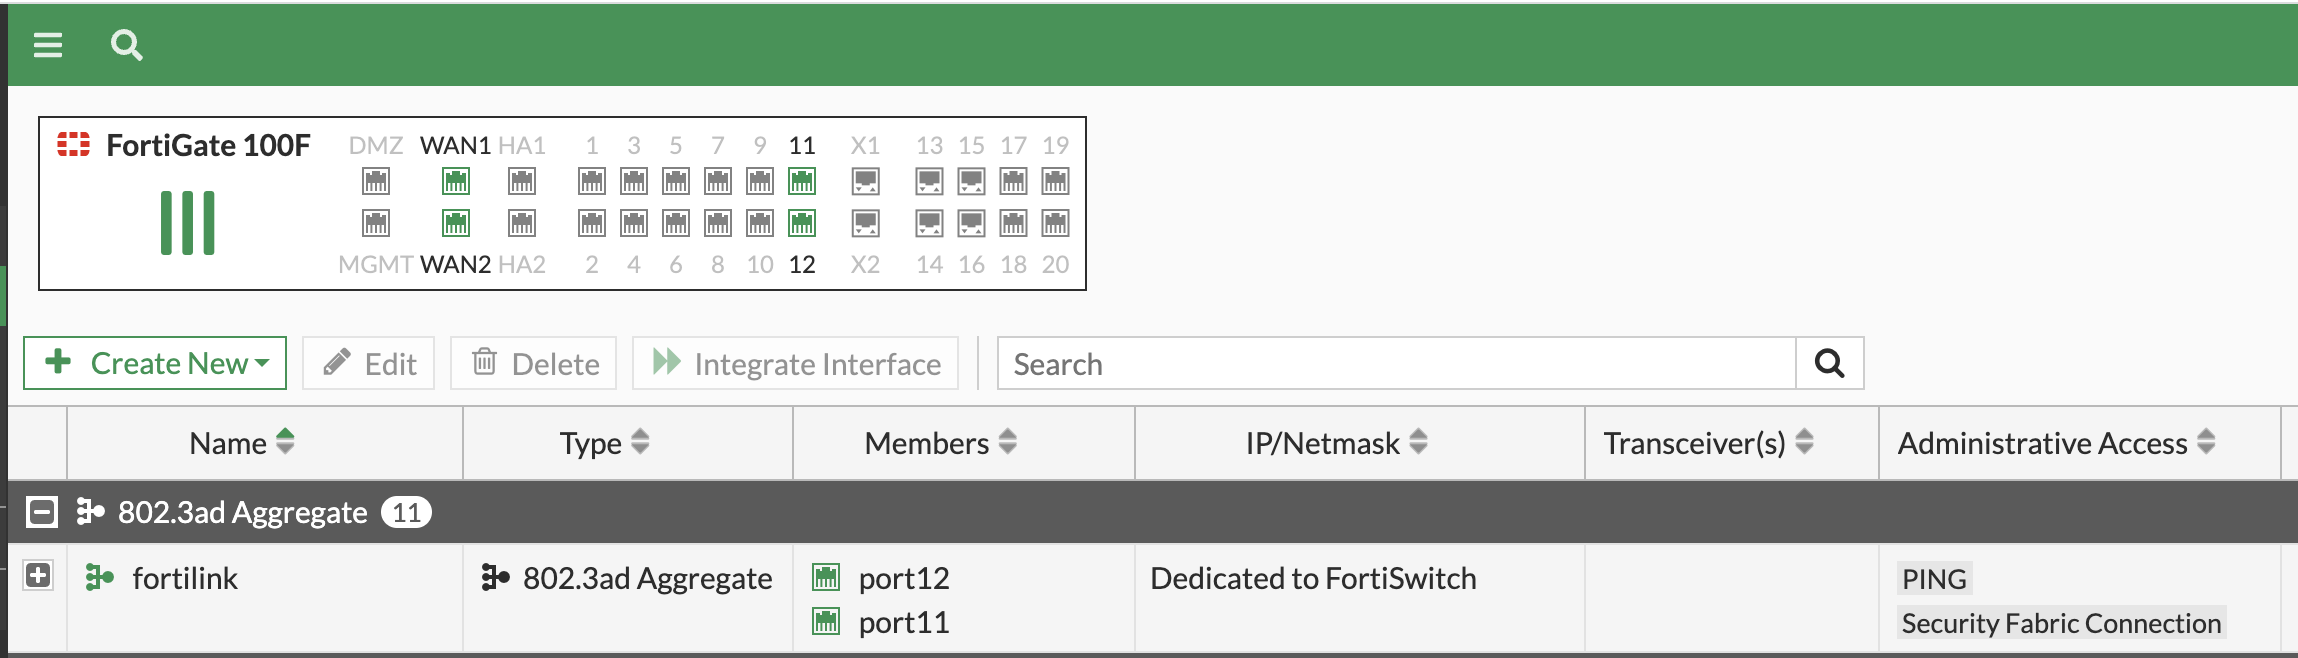
Setting up a FortiLink was just as straightforward as connecting a dedicated port from the switch to the firewall. In the case of the FortiSwitch 248E that I used, the dedicated links are Port 48 or Port 52. You simply need to connect a cable from one of these ports to any port on the FortiGate that you'd like to use for the FortiLink.
On the FortiGate side, I had to edit the FortiLink interface and add the port I wanted to use for the FortiLink. After doing this, it was just a matter of waiting a few minutes. Soon enough, the switch showed up under the Managed FortiSwitches section in the interface.
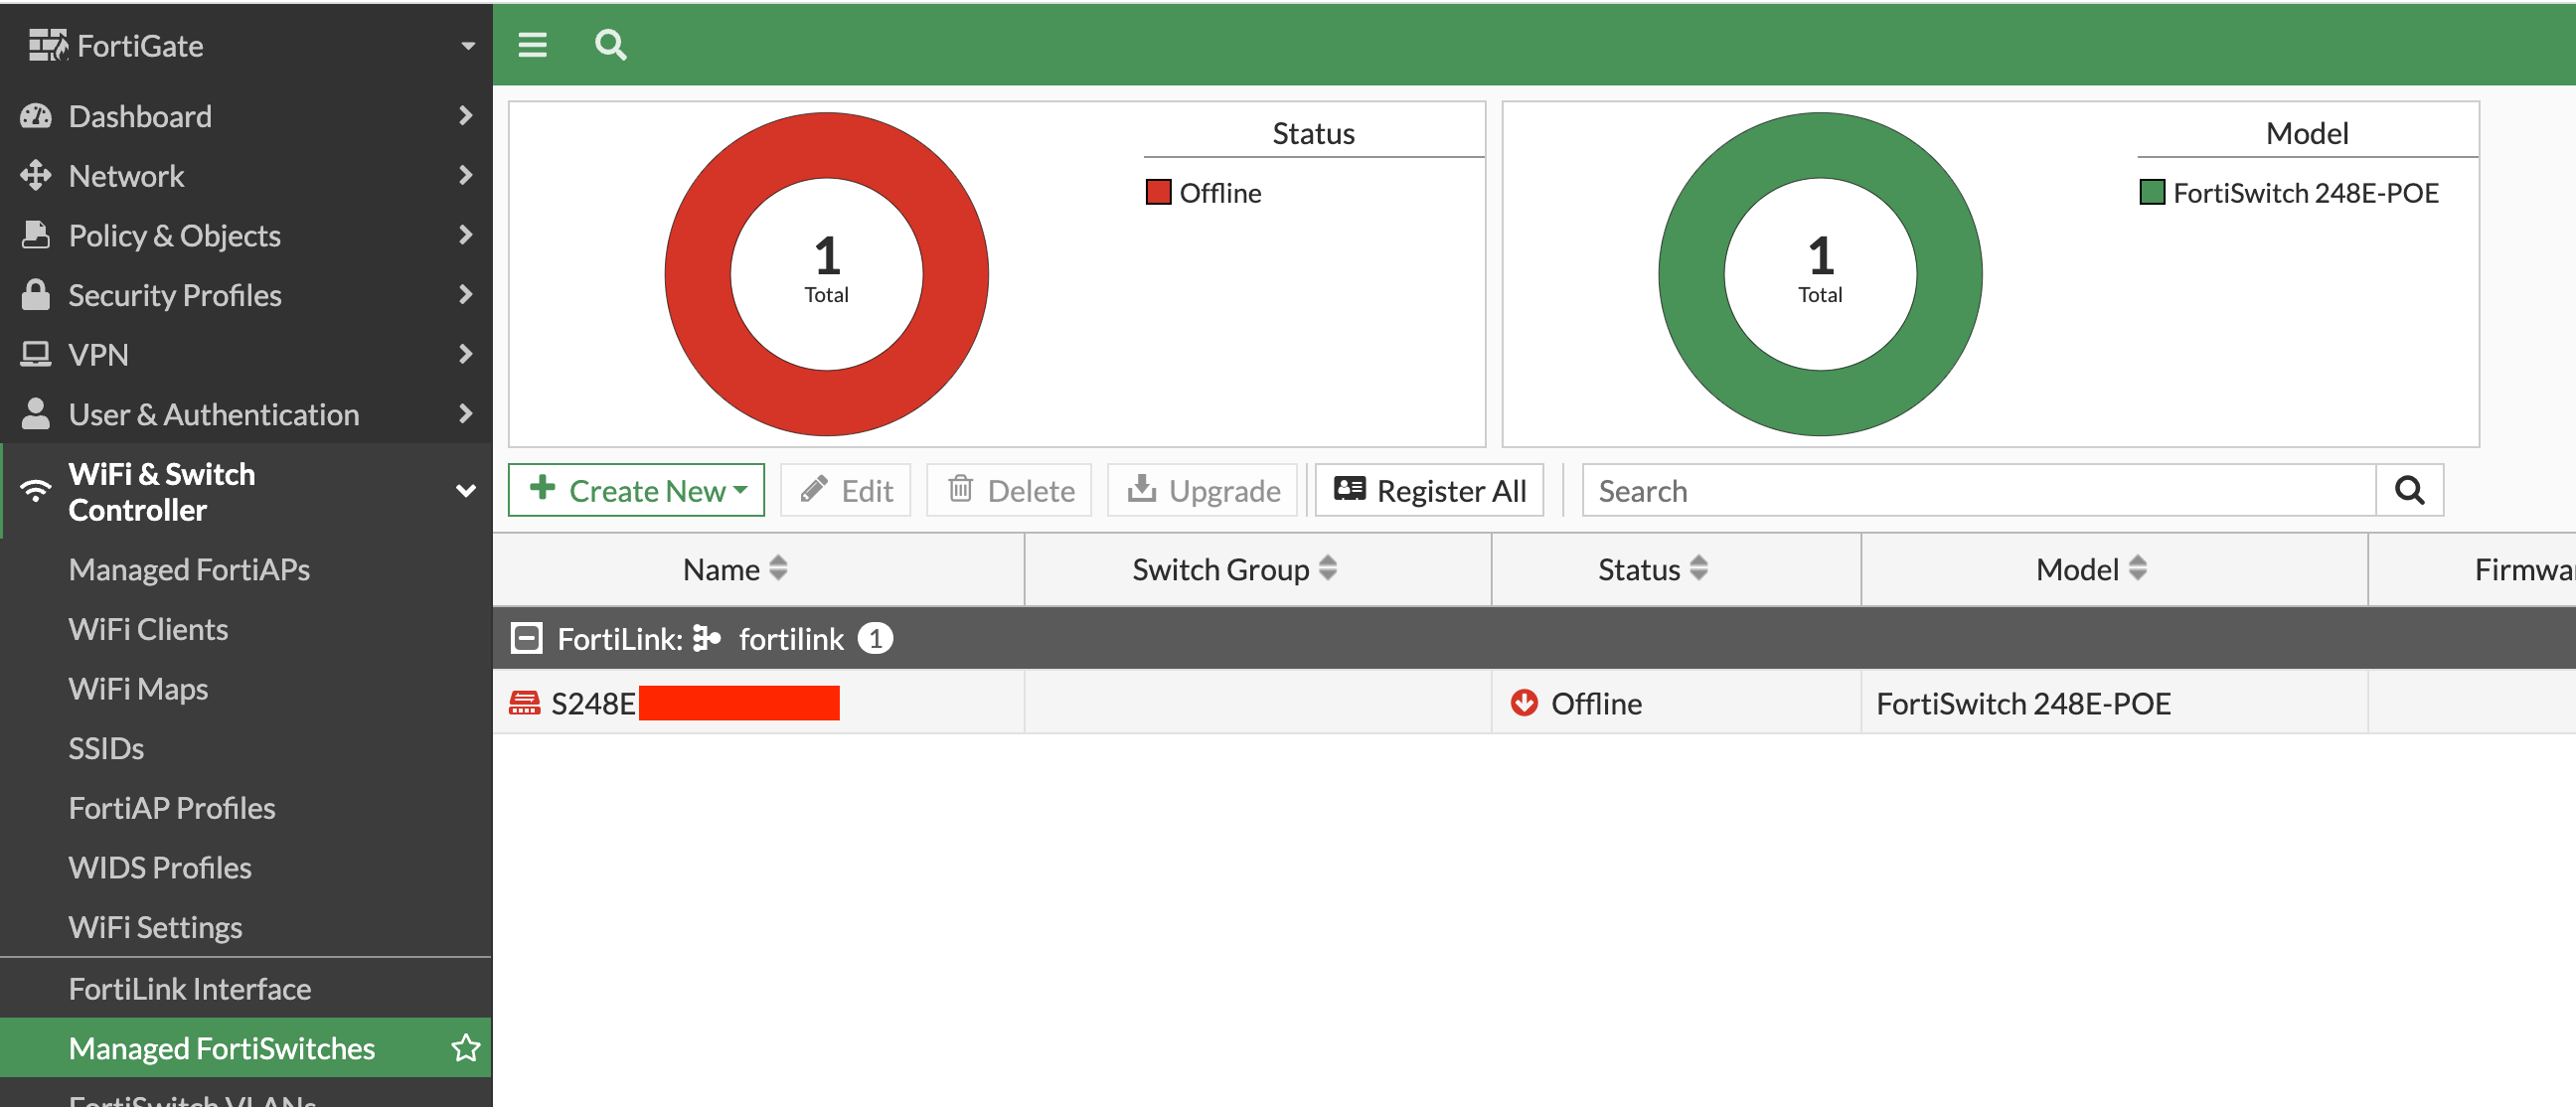
Here comes the final step - authorizing the switch. This is as simple as clicking on the switch in the interface and hitting 'Authorize'. After doing this, the FortiSwitch was fully integrated and ready to go.
LACP with FortiLink
When setting up the FortiLink, one crucial factor to consider is that it handles both management and data traffic. Hence, to ensure enough bandwidth and link redundancy, I decided to set up LACP thus adding an additional interface. Adding another link on the FortiGate seemed like the way to go, but when I tried to replicate this on the switch, I hit a roadblock. There simply wasn't an option to do it on the switch - not unless you manage the switch directly.
Not to be deterred, I pressed on, connecting Port 47 on the switch to the firewall, fully expecting the link to activate. But to my surprise, it didn't. What followed were hours spent trying to understand why it wouldn't work, and the solution turned out to be another Fortinet twist.
The FortiLink 'split-interface' option was the culprit. Enabled by default, this option allows the FortiLink aggregate interface from one FortiGate unit to connect to two FortiSwitch units. However, when the split interface is enabled, only one link remains active. All I had to do was disable this feature, and like magic, the other link activated.
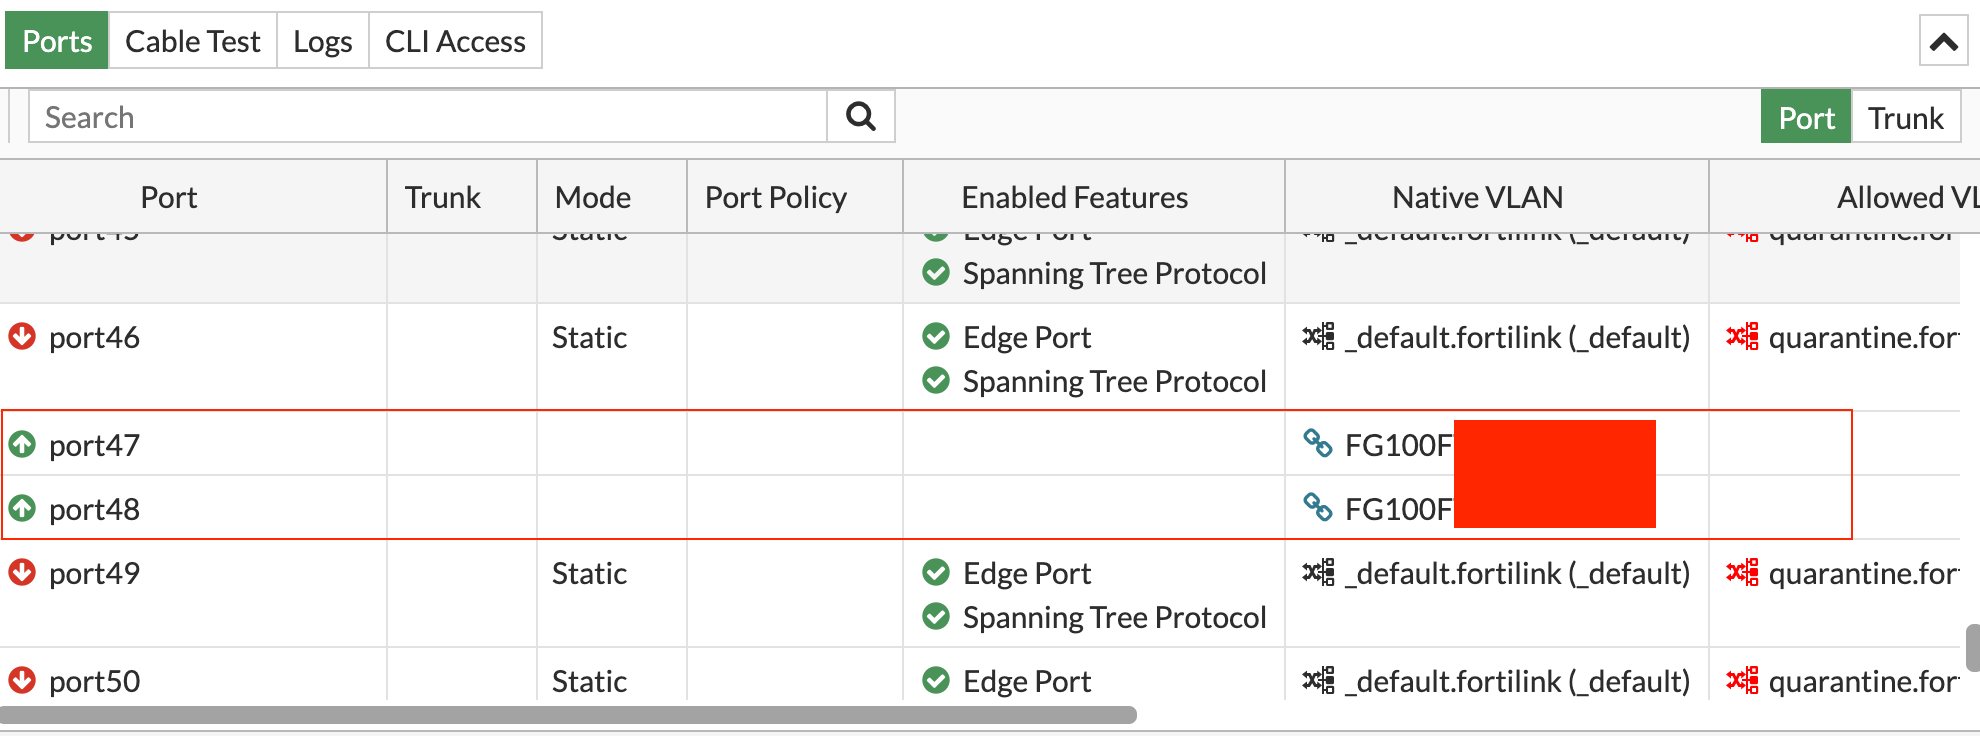
An added bonus was that the switch automatically detected this port as a FortiLink, eliminating the need for any manual configuration directly on the switch.
VLAN Configuration
Now, let's talk about VLAN configuration. Here's a fair warning - you might have to let go of your old VLAN habits. With Fortinet, things are a bit different - in a good way. I went in wanting to configure the rest of the ports as 'access ports' for client connections. The plan was simple: assign the first half of the ports to VLAN 10 and the rest to VLAN 20. But surprise, surprise, I couldn't find the usual 'access' or 'trunk' port options.
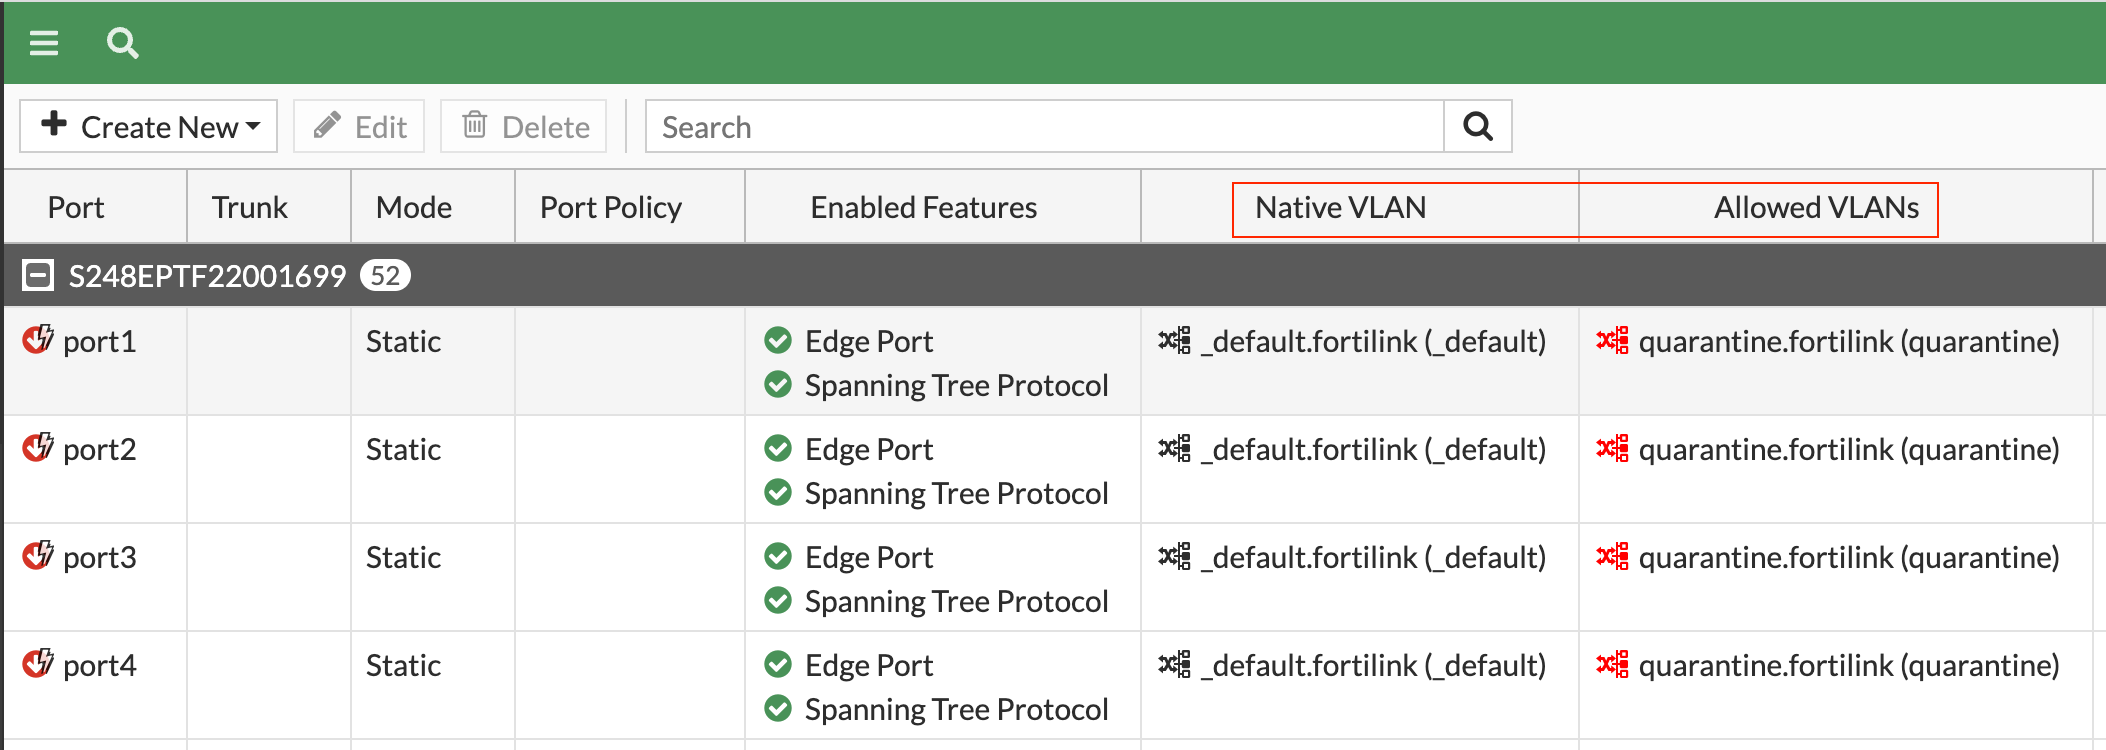
In Fortinet's world, they use different terminology. The 'Native VLAN' is the VLAN that a device gets assigned to by default when it's connected to a port, without any VLAN tag. Then there are 'Allowed VLANs' - these are VLANs that are permitted to pass through the port, but they must have a VLAN tag.
This was a little different from what I was used to, but once I understood these concepts, VLAN configuration became a breeze.
Native VLAN (Access) - Each port has a native VLAN. Think of it as the default VLAN for untagged packets coming in. If a packet arrives without a VLAN tag, it's assigned to the native VLAN. When a packet leaves (at an egress port) with a VLAN tag that matches the native VLAN, it's sent out untagged.
Allowed VLAN list (Trunk) - This is a list of VLAN tags that each port is allowed to send or receive packets from. If a packet comes in tagged, it must match a VLAN on the allowed list or the native VLAN. Similarly, when a packet leaves, its tag must match the native VLAN or a VLAN on the allowed list.
VLAN L3 Interfaces
When you create a VLAN on the switch, there's an option to specify an IP address. This IP address then acts as the gateway for all the devices that connect to that VLAN. The beauty of this is that when you create a VLAN under 'FortiSwitch VLANs', it automagically appears under 'FortiGate Firewalls' as well.
Even better, you can refer to this VLAN interface directly in your security policies. And if that wasn't enough, there's also the option to configure a DHCP server right within the VLAN settings. I found this to be an incredibly user-friendly feature.
FortiAP
Moving on to the final piece of the Fortinet stack - the FortiAP, or the access point. My task was to set up an SSID with the subnet of 10.1.10.0/24, the IP range from which the clients would get their IP addresses. The FortiGate firewall would act as the DHCP server.
However, Fortinet requires you to configure two separate subnets (at least that's my understanding) - one for the clients connecting to the SSID and another for the access points themselves. The latter, as I understand it, is used for management purposes.
Here's how I approached it - I created VLAN 6, named it Wi-Fi VLAN, and assigned it the subnet of 192.168.10.0/24. Then, I assigned this VLAN to a few ports on the switch, where the access points would be connected.
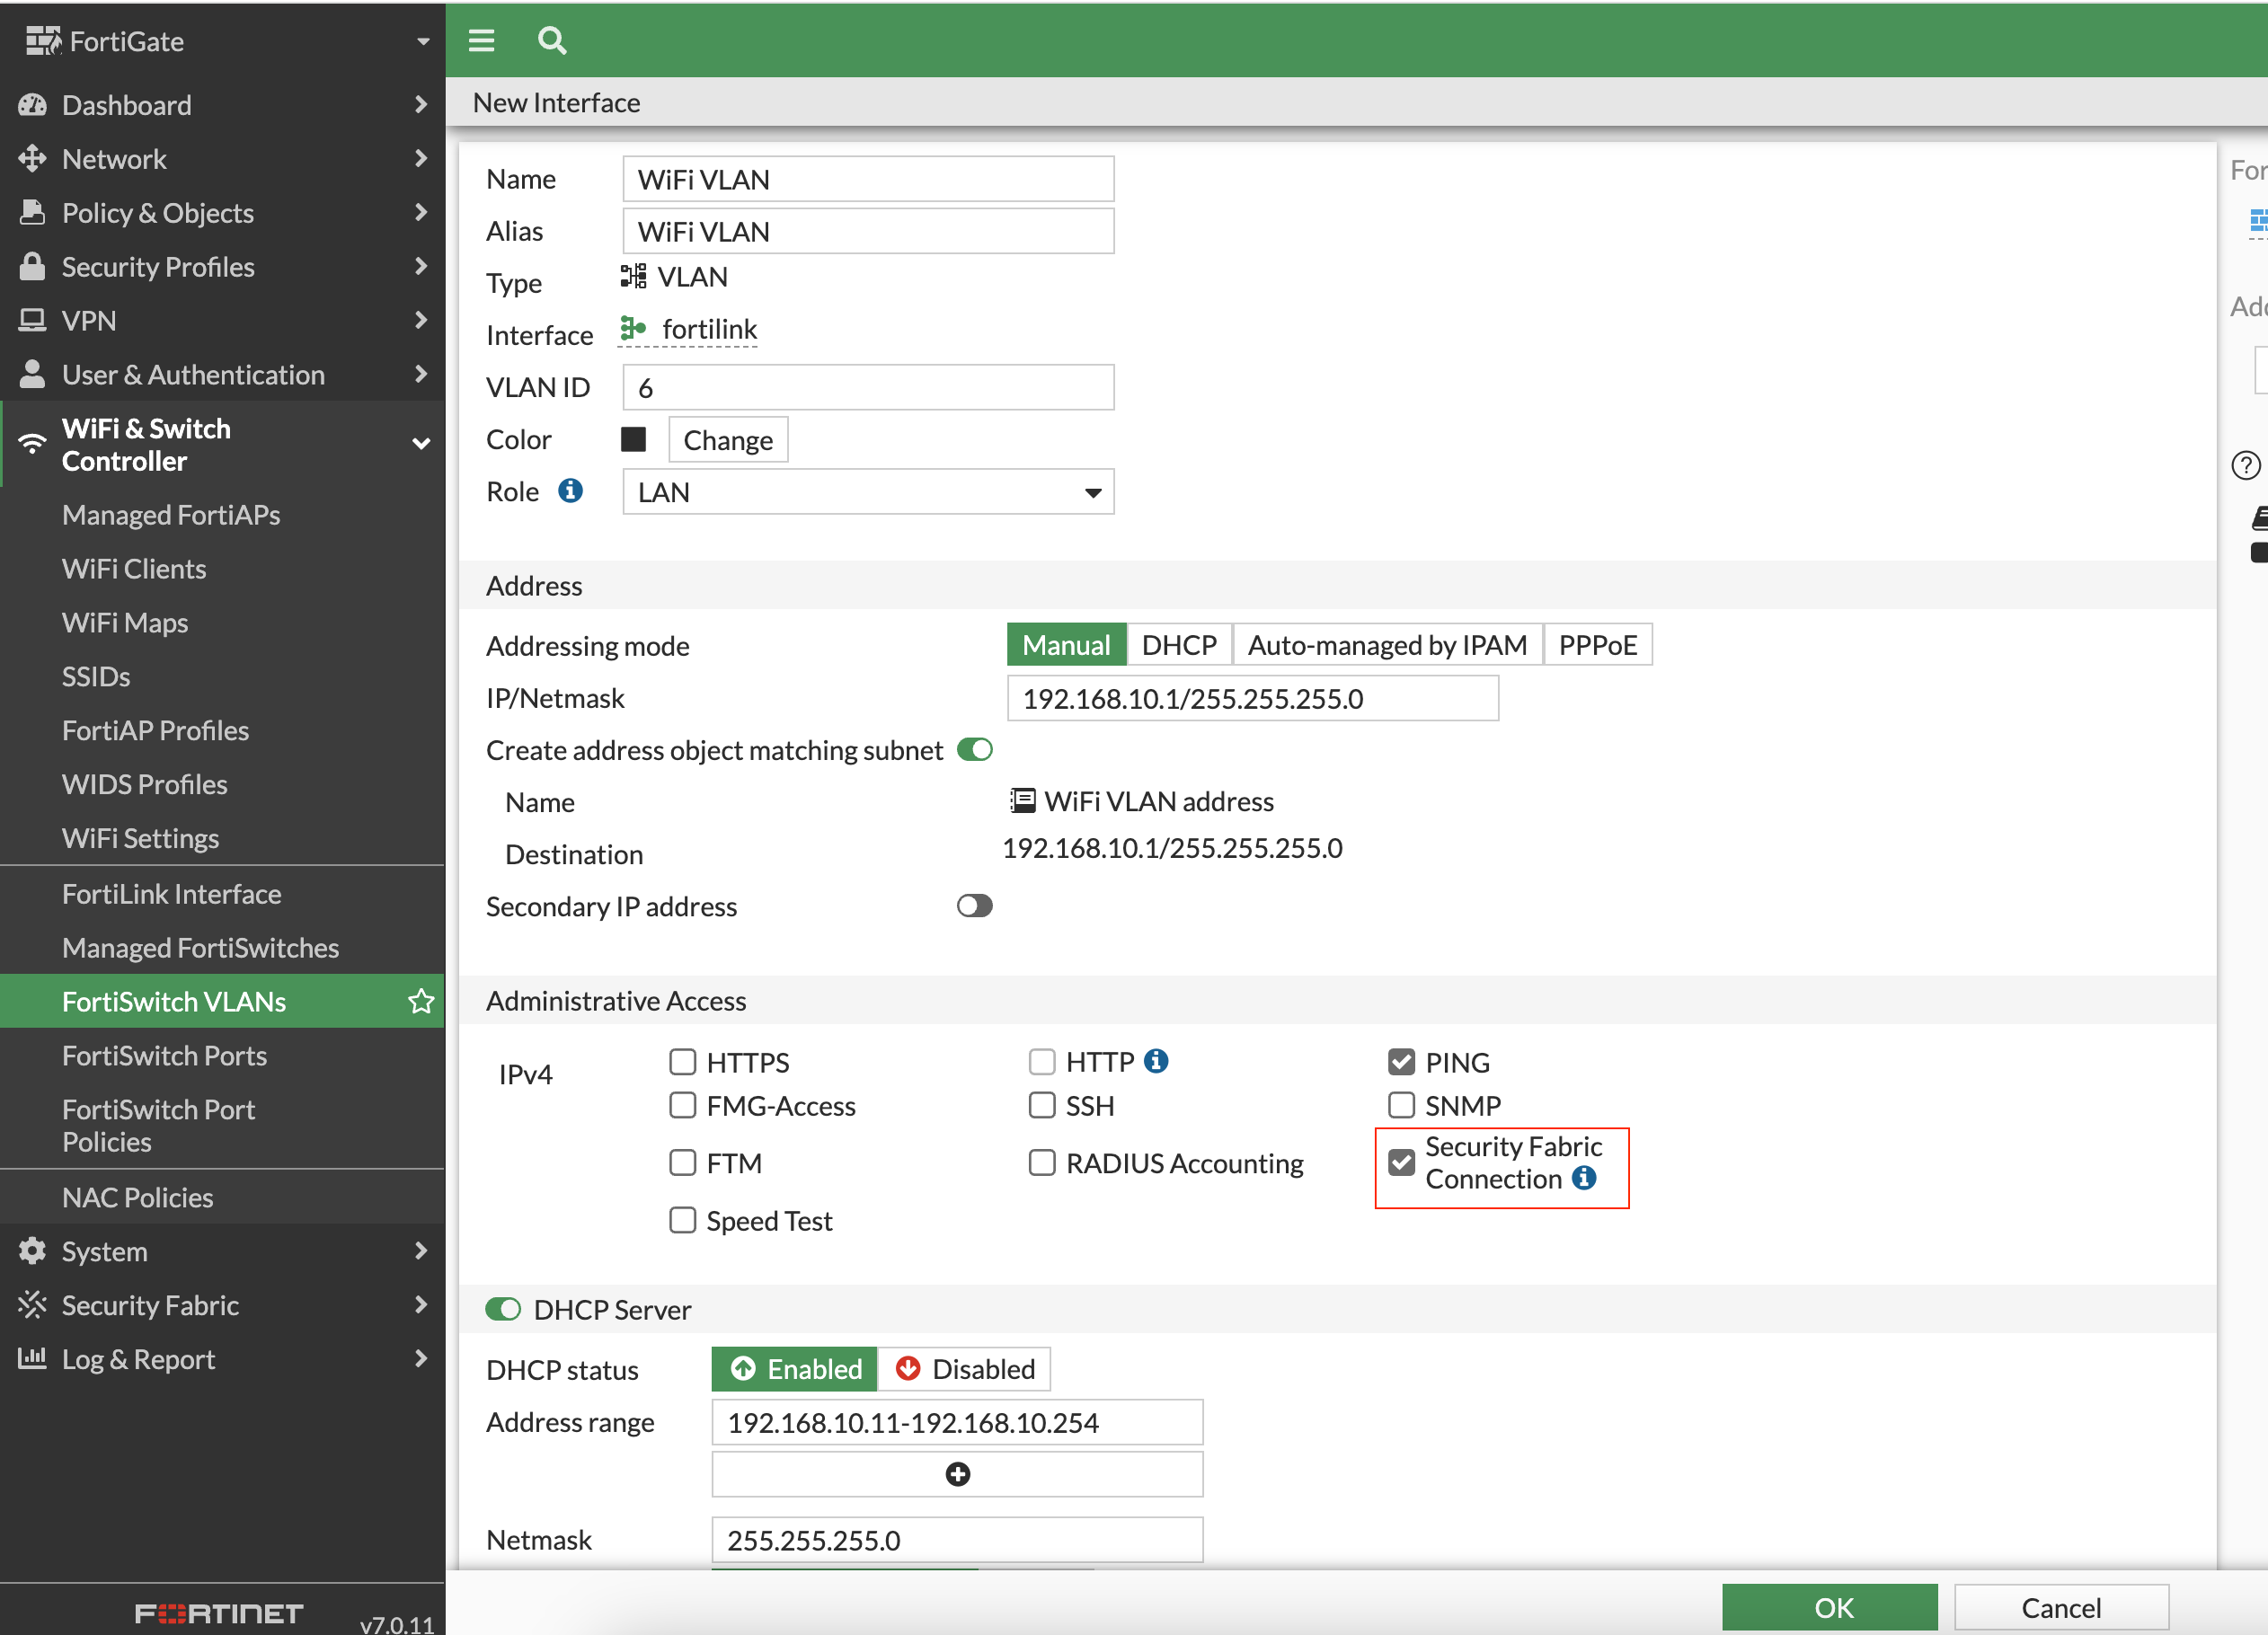
The key step here is when you create the VLAN, make sure to enable the 'Security Fabric Connection'. If this option is not enabled, the access points won't show up under the firewall. With this setting in place, the APs connected smoothly and were immediately visible under the firewall section in the FortiGate interface.
And then finally, configured the SSID with the client subnet of 10.1.10.0/24, created the appropriate Security Policies to finish off the stack.
This rounded off the Fortinet stack configuration - the FortiGate, FortiSwitch, and FortiAP are all setup and ready to go.
Closing Thoughts
To sum it up, setting up the full Fortinet stack was a new and interesting experience for me. It was a bit tricky at first because Fortinet does things a bit differently. But once I got the hang of it, managing everything from one place was really handy. It made me see why Fortinet's all-in-one approach to network security is worth considering. I learned a lot from this process and I'm excited to learn even more about Fortinet in the future.