In this blog post, we will look at how to use Entra-ID SAML SSO with GlobalProtect VPN. This guide assumes you are already familiar with GlobalProtect VPN and have an existing VPN solution with other forms of authentication. If you are new to GlobalProtect VPN, feel free to check out my other blog post, which is linked below.
Adding GlobalProtect to the Admin Centre
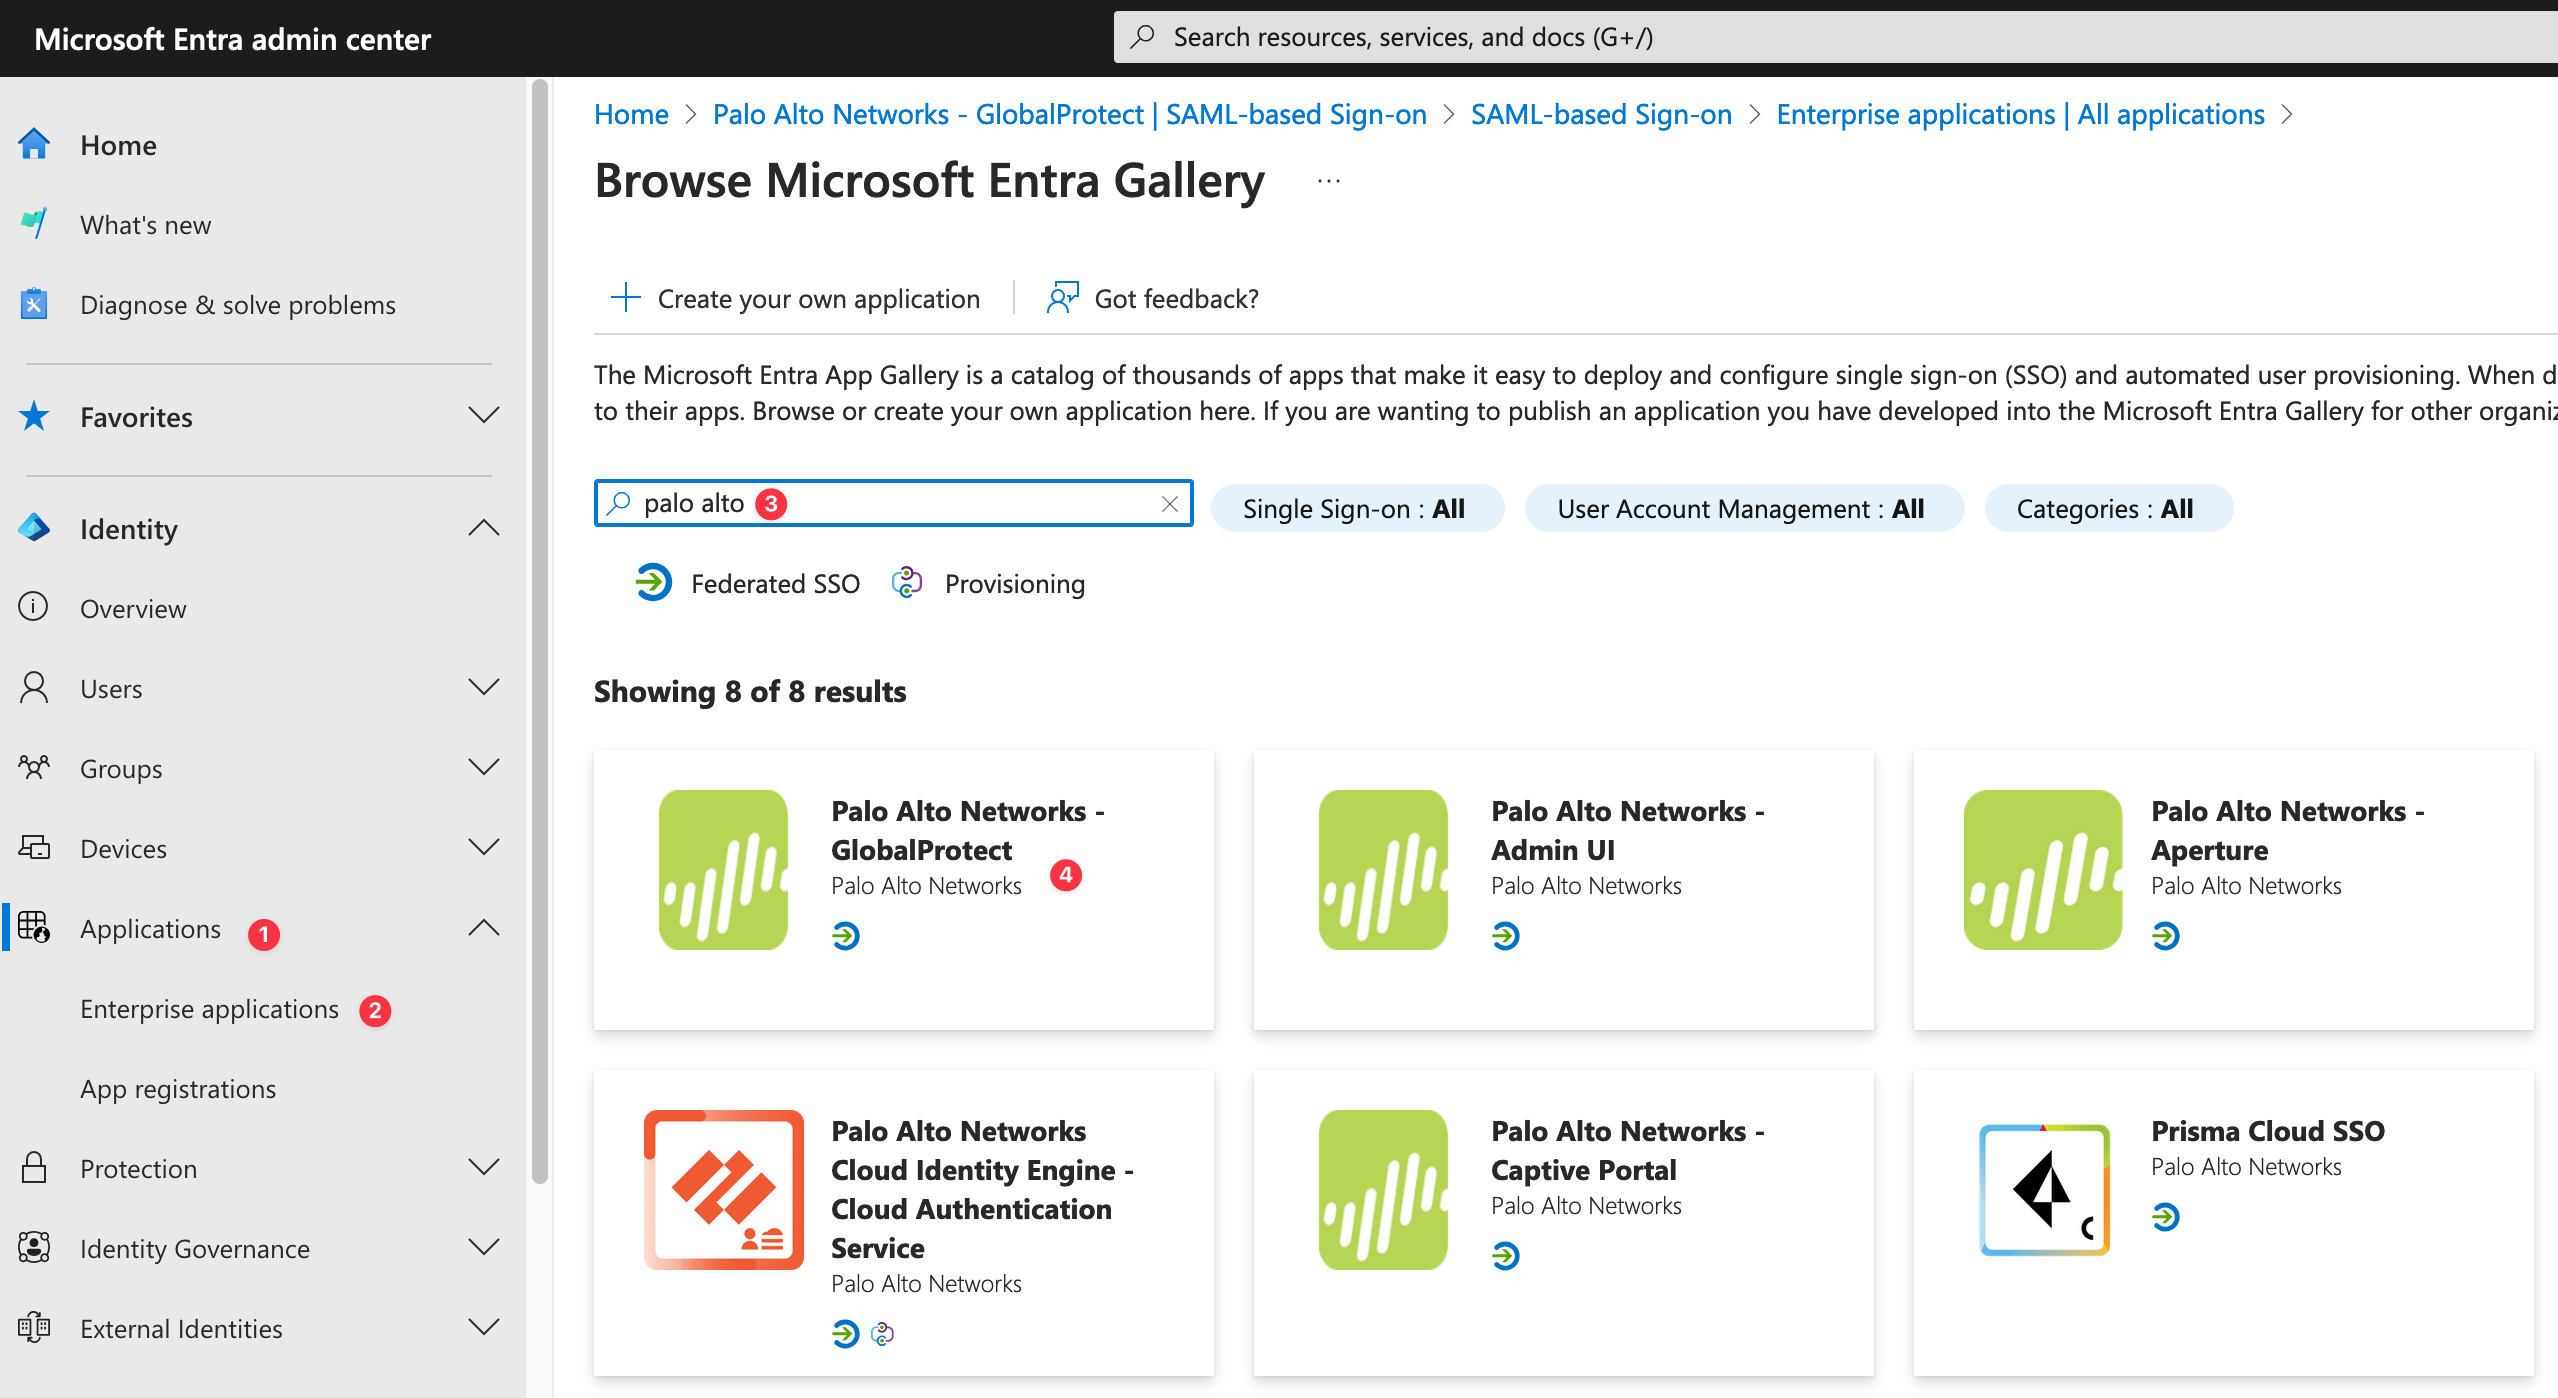
- Sign in to the Microsoft Entra admin centre and navigate to Identity > Applications > Enterprise applications > New application.
- Add the Palo Alto Networks - GlobalProtect application.
- Once added, select Palo Alto Networks - GlobalProtect > Single sign-on.
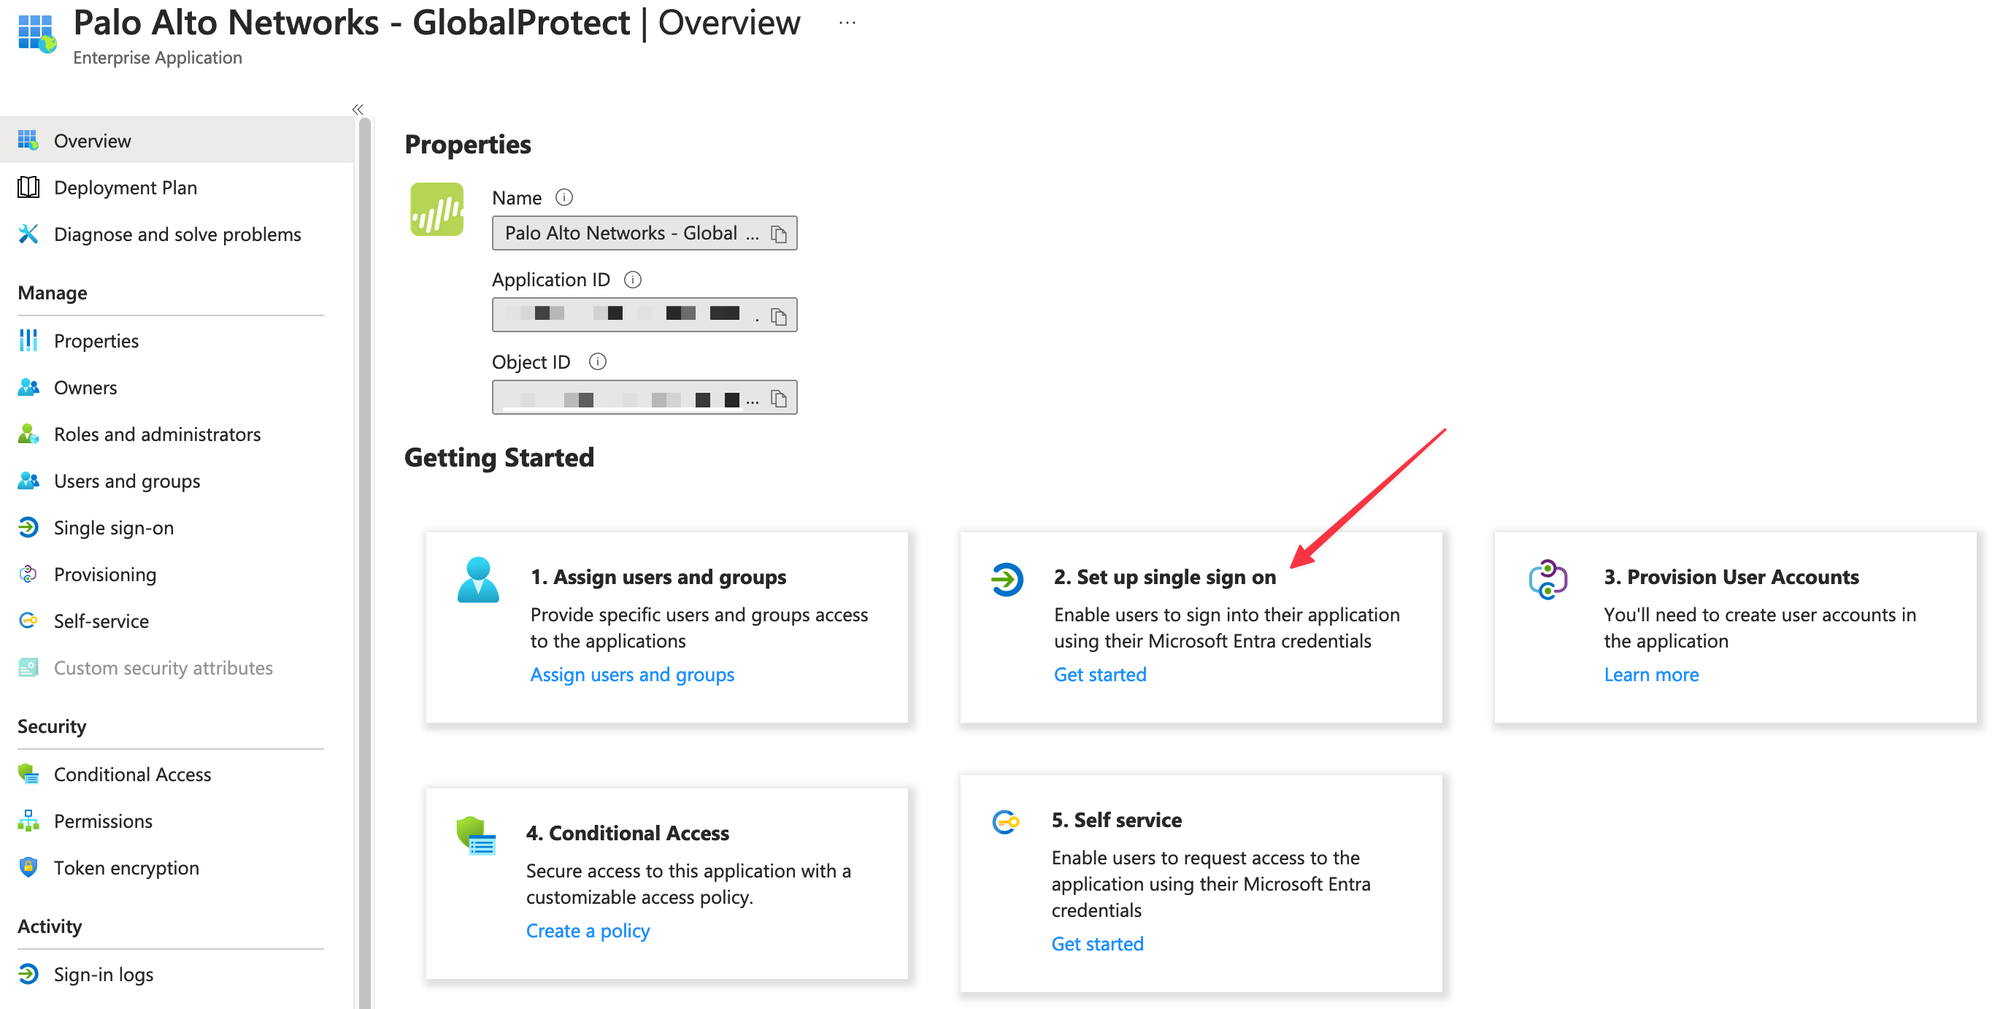
On the Set up single sign-on with SAML page, click the pencil icon in the Basic SAML Configuration section to edit the settings.
:443 after the URL, otherwise, it won't work. I learned this the hard way.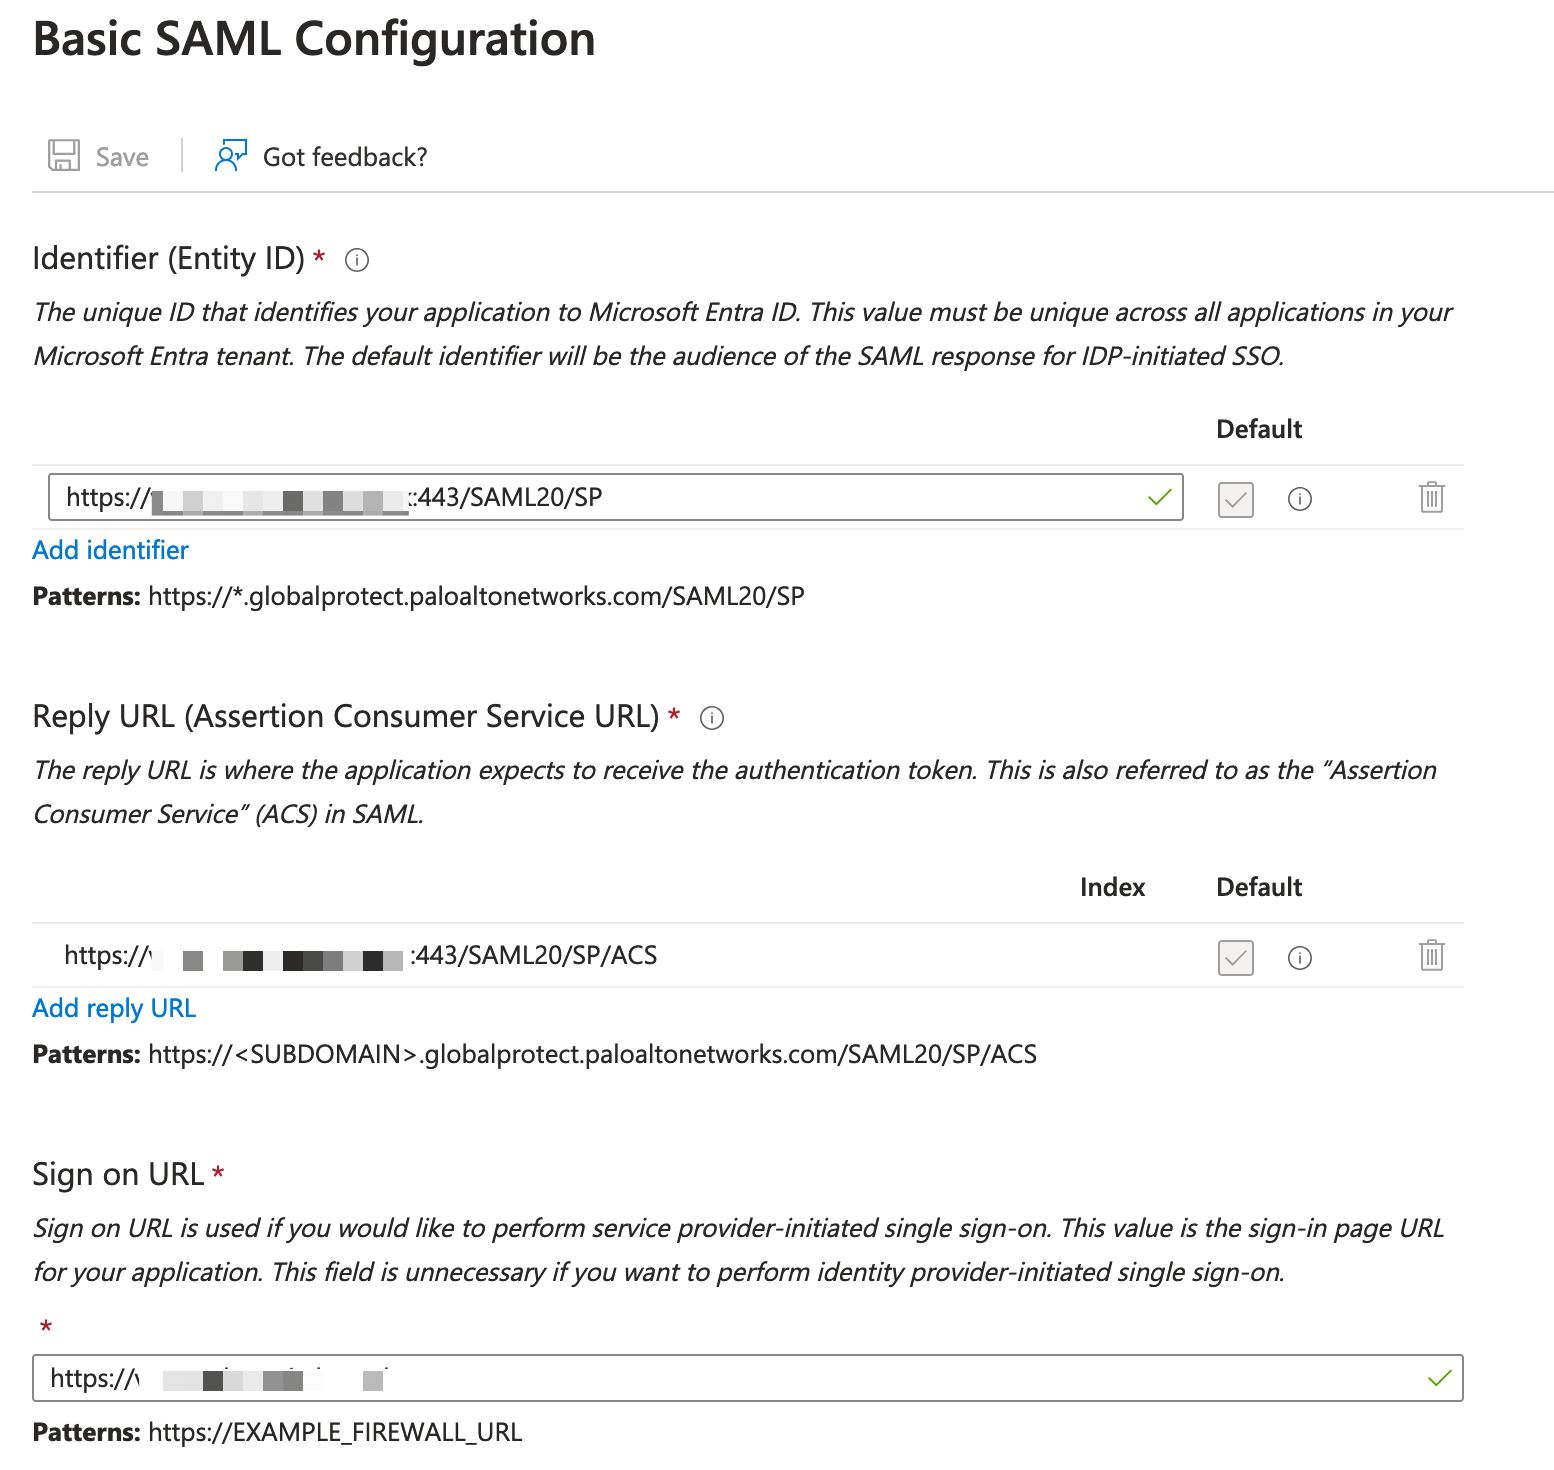
- In the Identifier (Entity ID) text box, enter a URL using the following pattern -
https://<Customer Firewall URL>:443/SAML20/SP. - In the Reply URL (Assertion Consumer Service URL) text box, enter a URL using the following pattern -
https://<Customer Firewall URL>:443/SAML20/SP/ACS. - In the Sign on URL text box, enter a URL using the following pattern -
https://<Customer Firewall URL>. - Save your changes and then, under SAML Certificates, download the Federation Metadata XML.
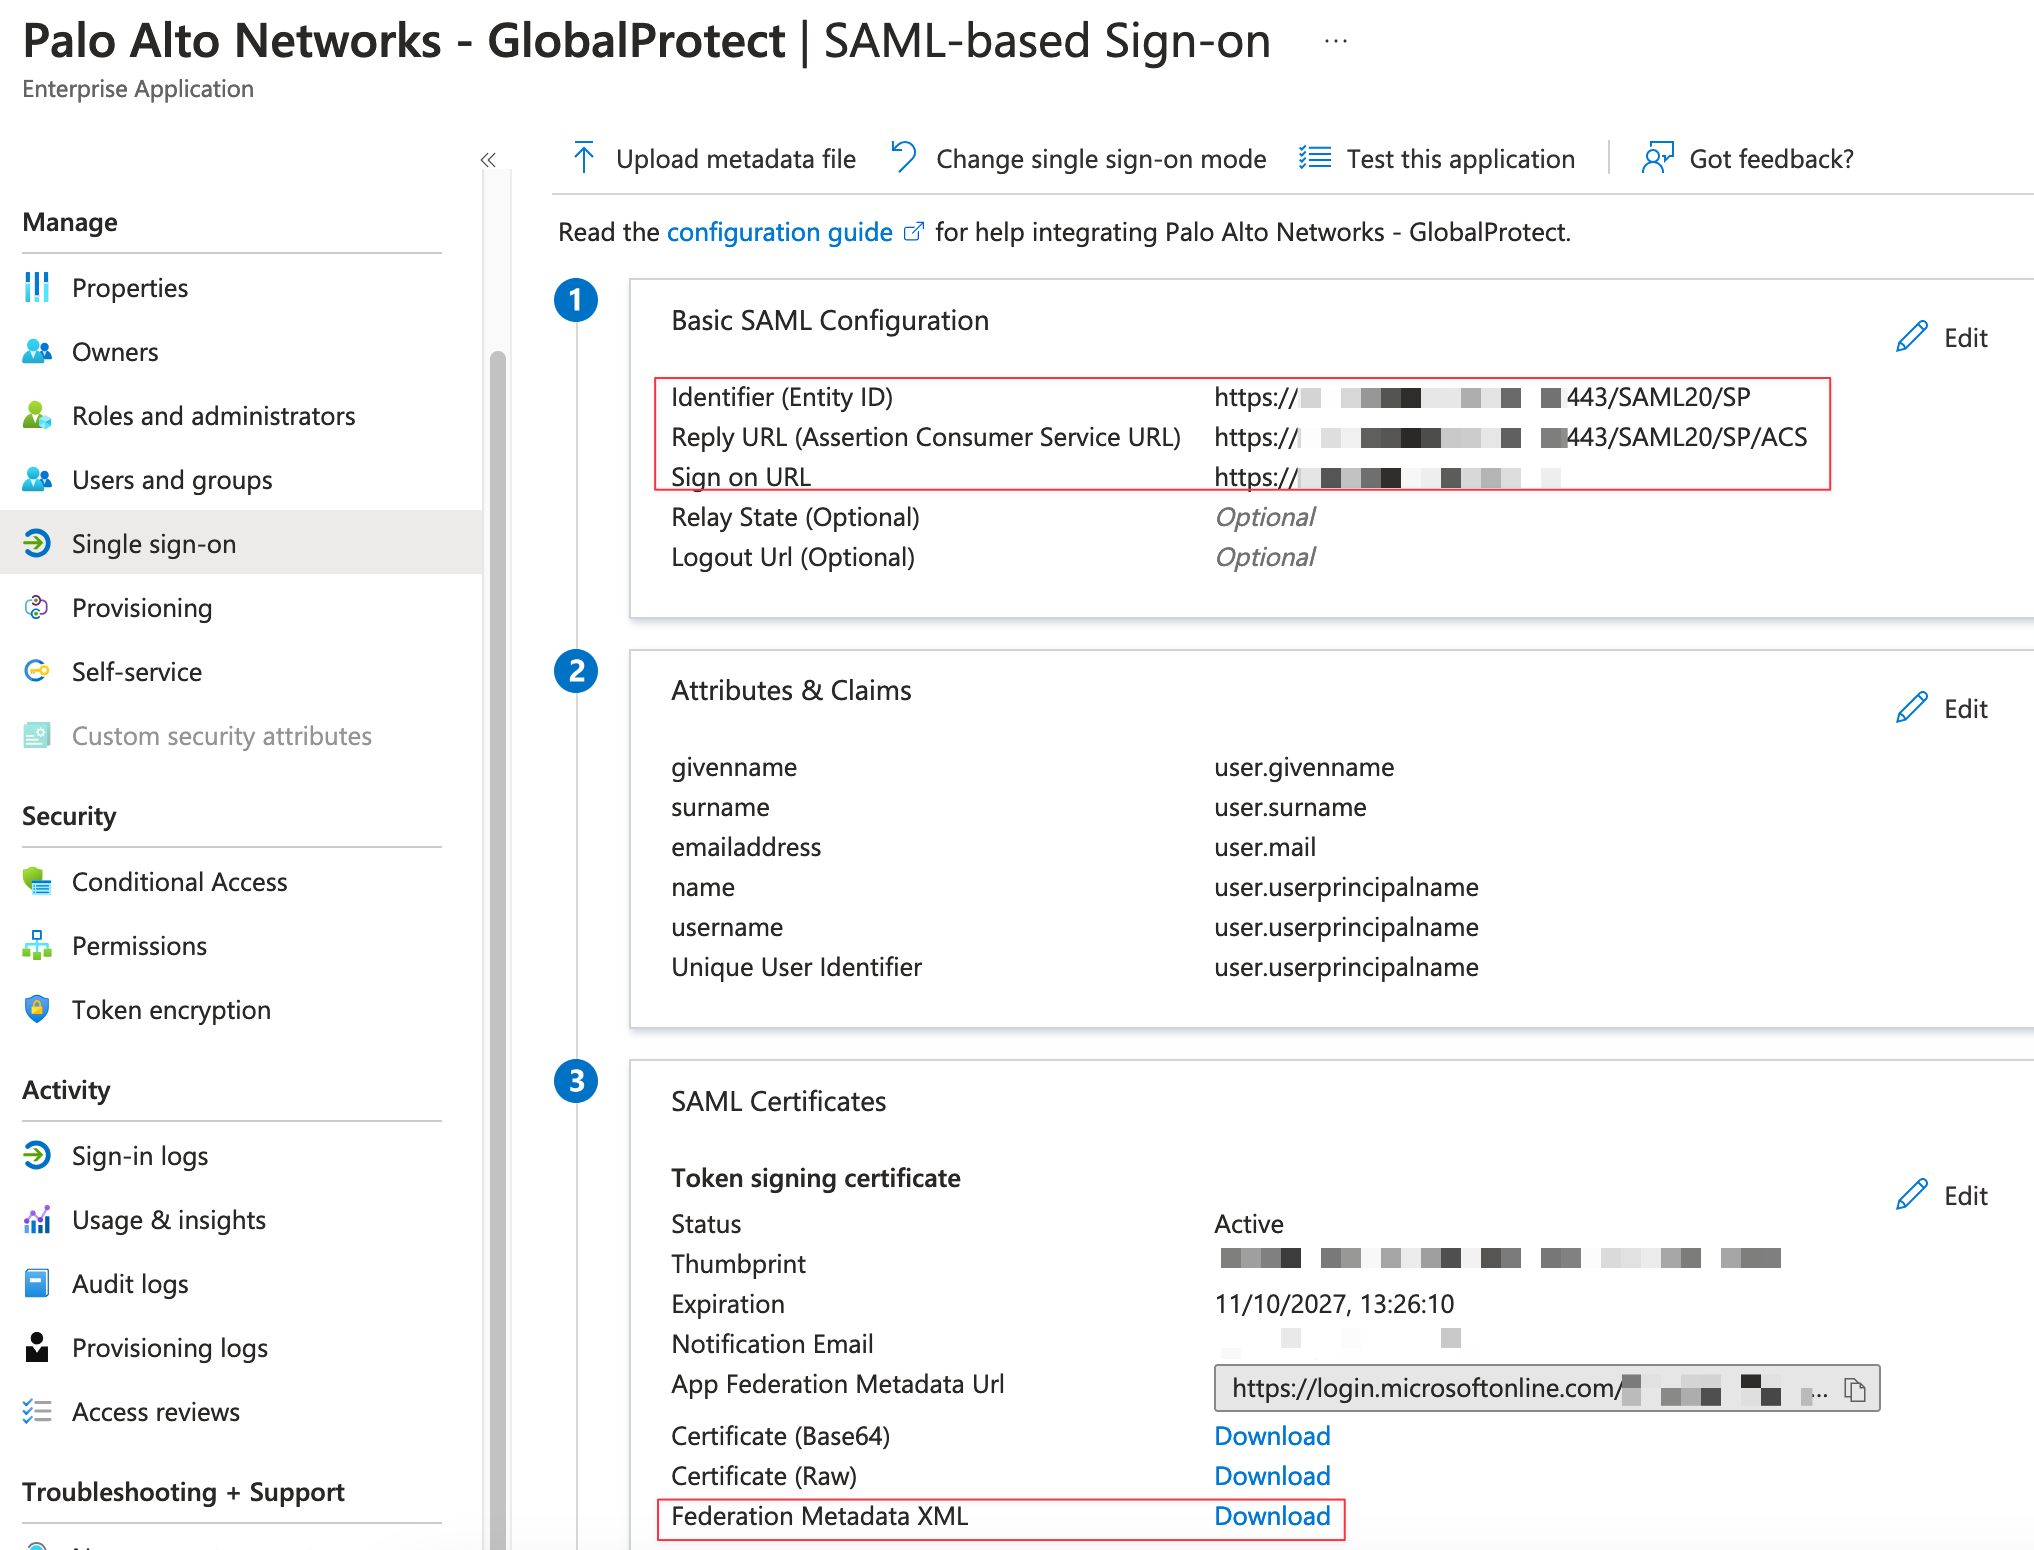
Next, under Users and Groups, select the user or group who should have access to login to this application.

Those are all the changes needed in the Entra admin centre.
Palo Alto Configuration
Now let's start the configuration on the Palo Alto side. Navigate to Device > Server Profiles > SAML Identity Provider and import the metadata file we downloaded from the Entra Admin Center.
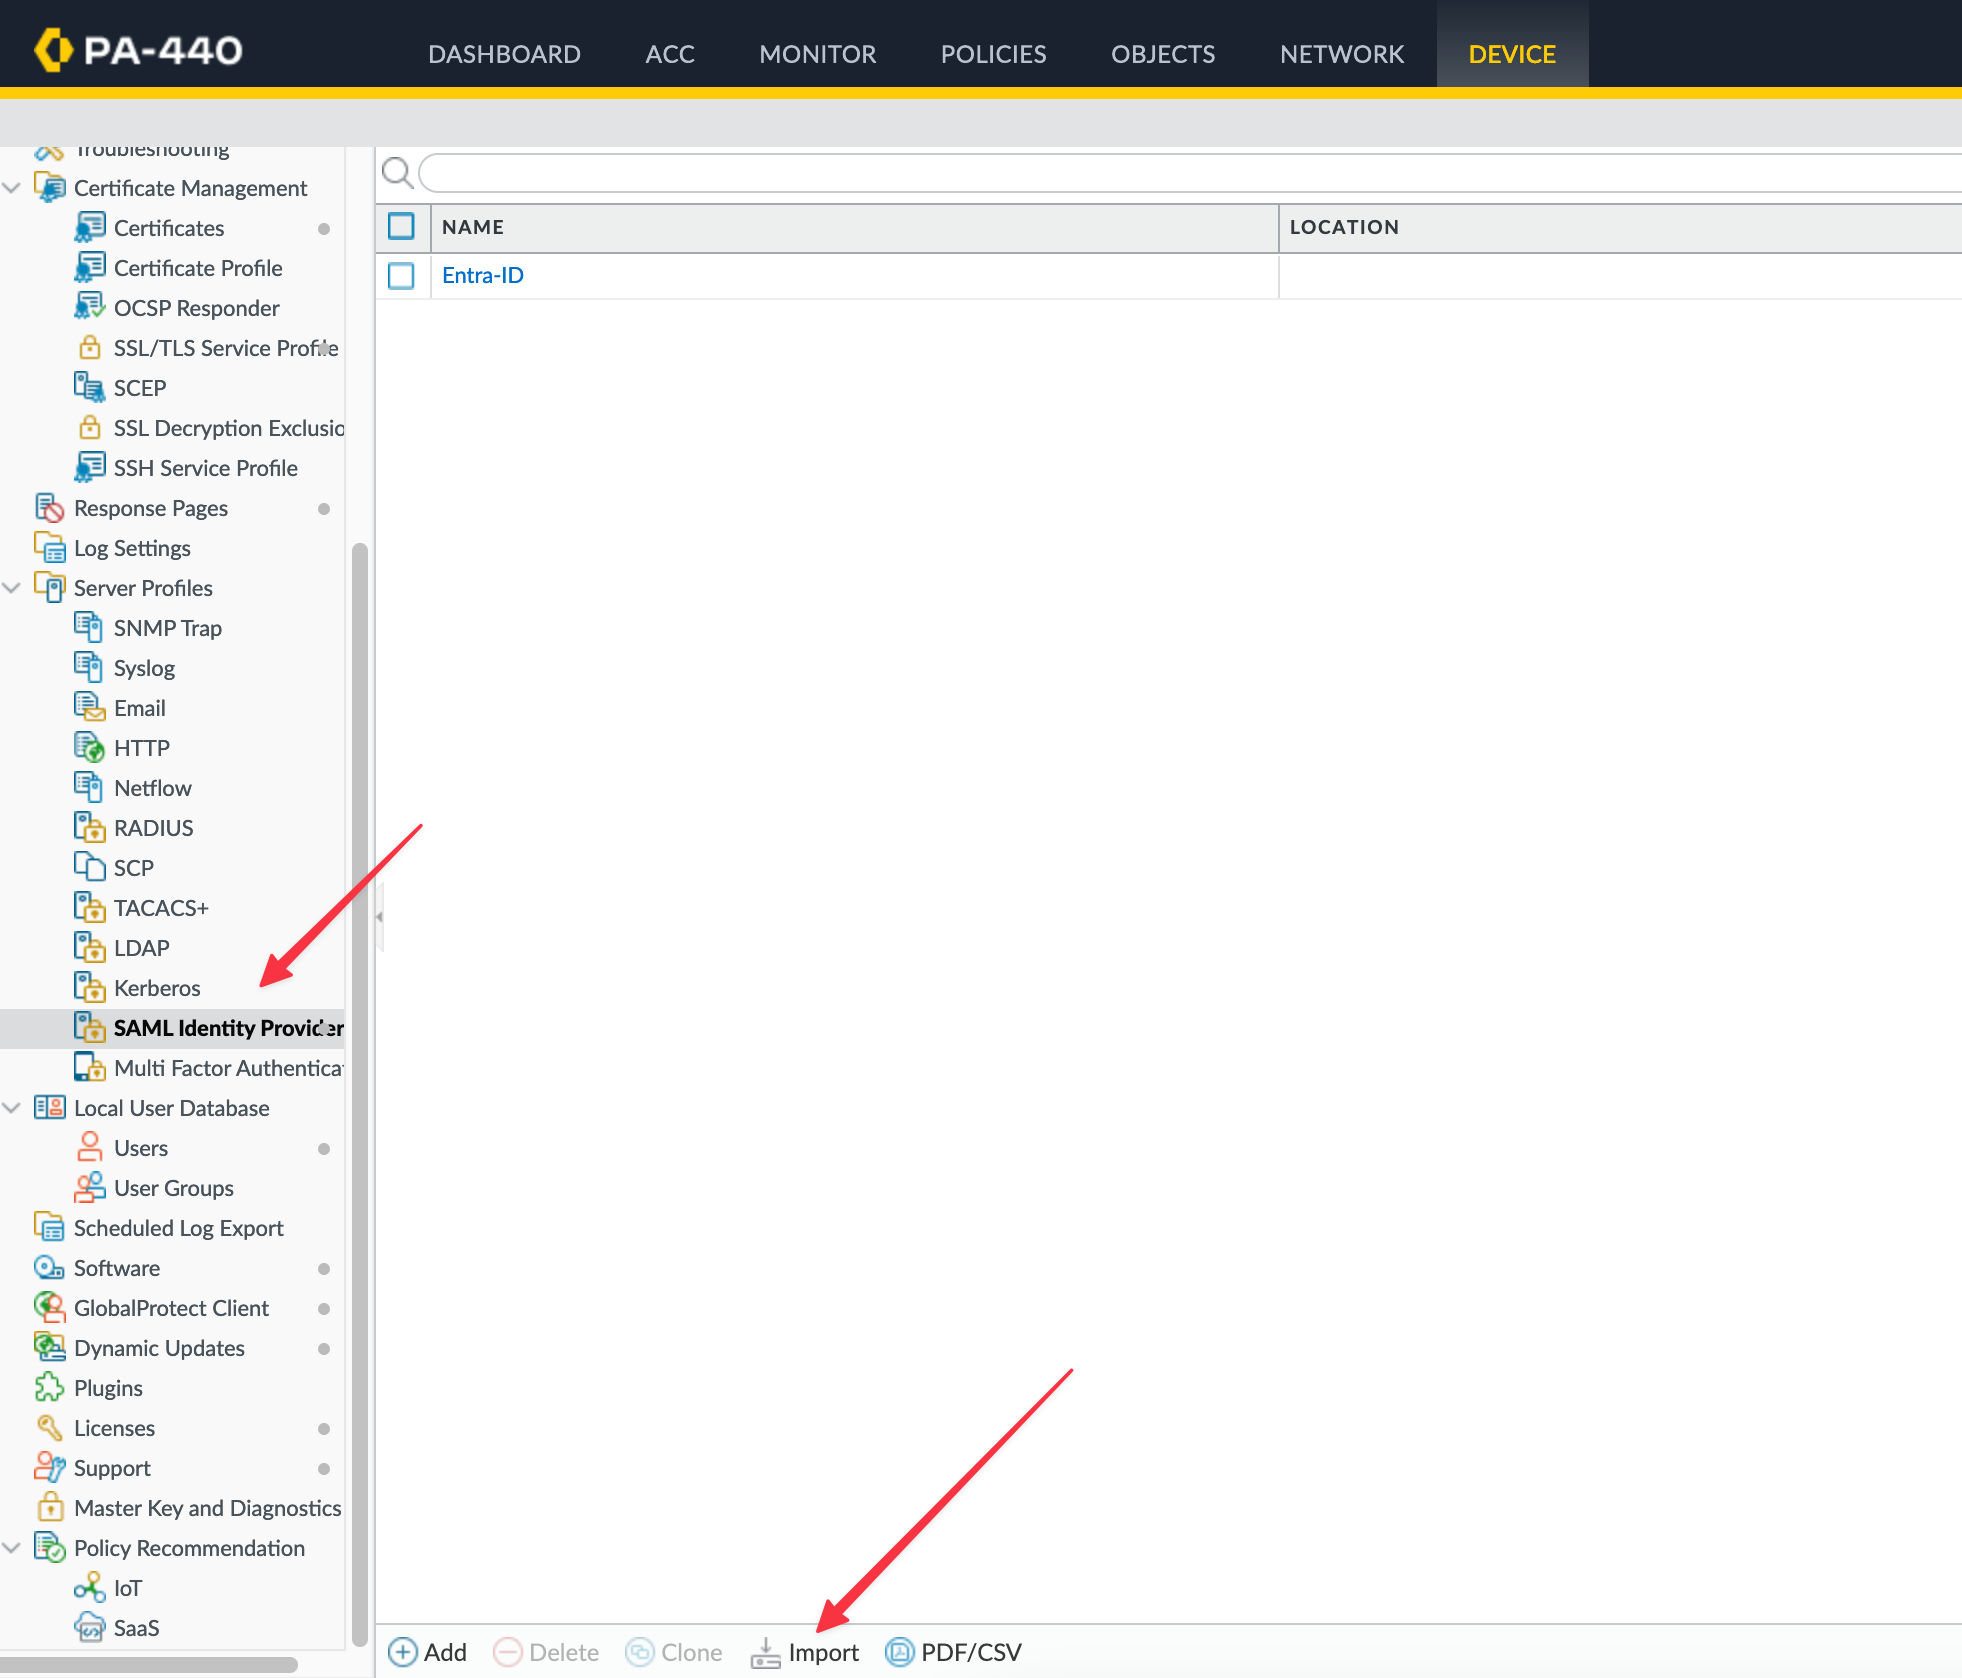
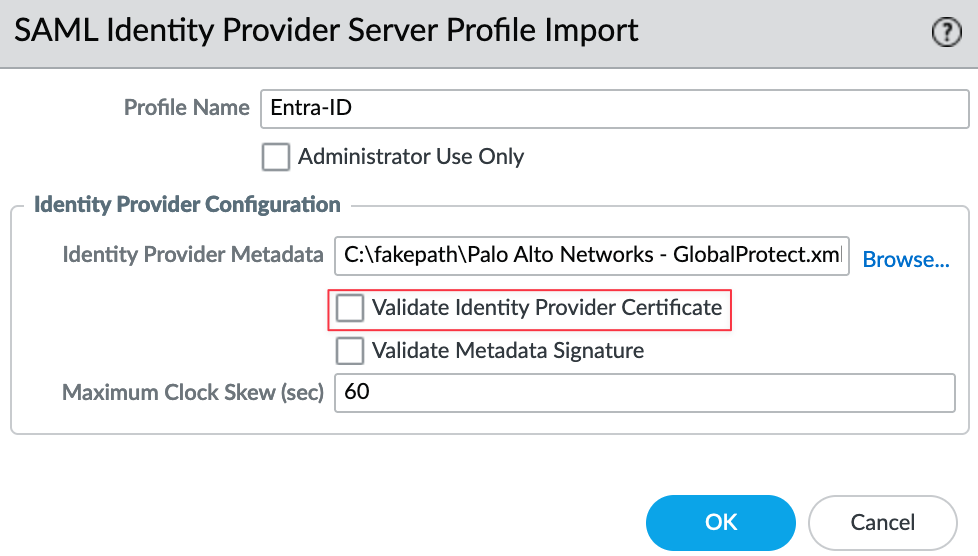
Give it a name and select the downloaded file. One of the most important things to do here is to decide on the checkbox for 'Validate Identity Provider Certificate'. In this example, I'm going to leave it unticked. I'll explain why you might want to validate the certificate at the end of this blog post.
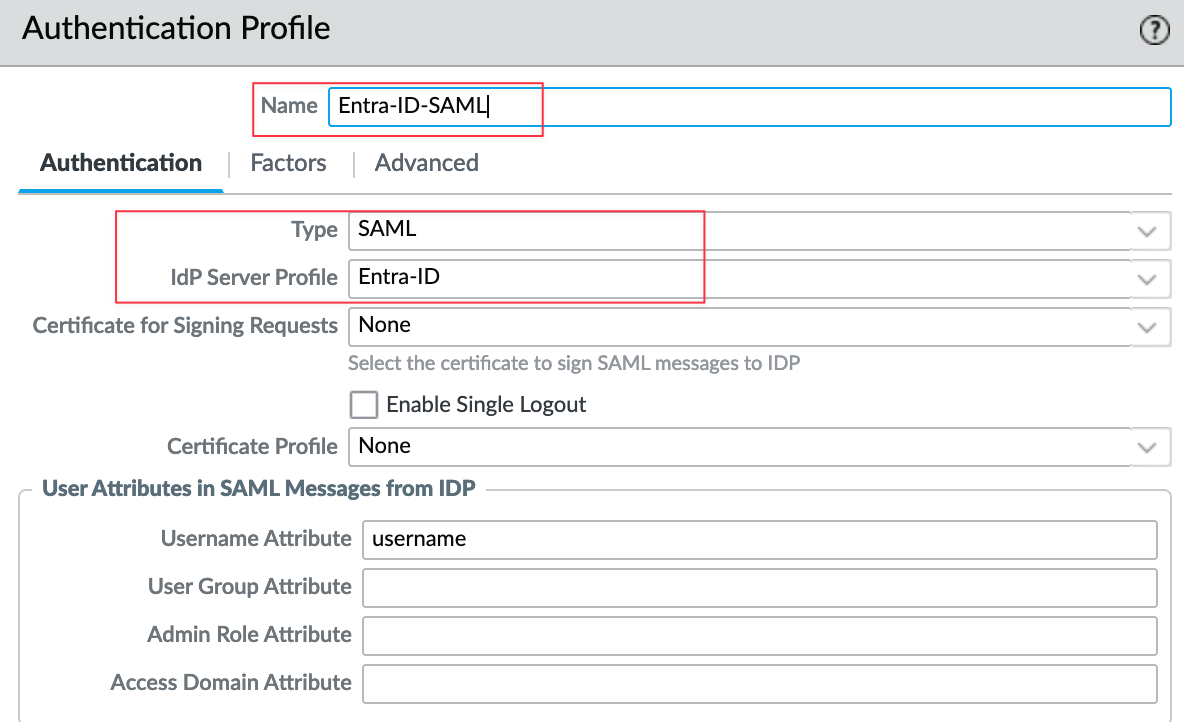
Next, create an authentication profile by navigating to Authentication Profile and creating a new one. Give it a name, select 'SAML' as the type, and choose the SAML Identity Provider you created in the previous step.
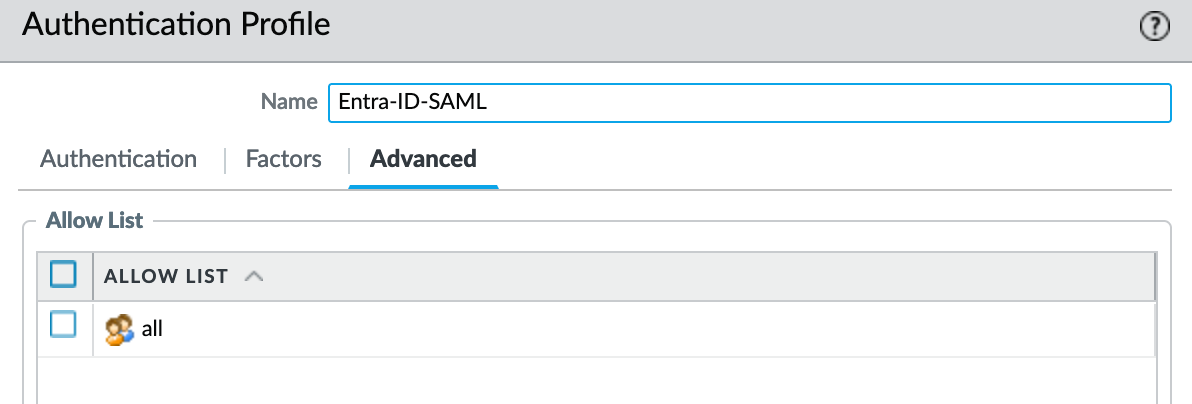
Under the Advanced tab, I'm going with 'all' since access is already controlled by Entra-ID.
Now, we need to attach the profile to both the GlobalProtect Portal and Gateway. First, navigate to Portal, select your portal, then go to Authentication, and use the authentication profile we just created.
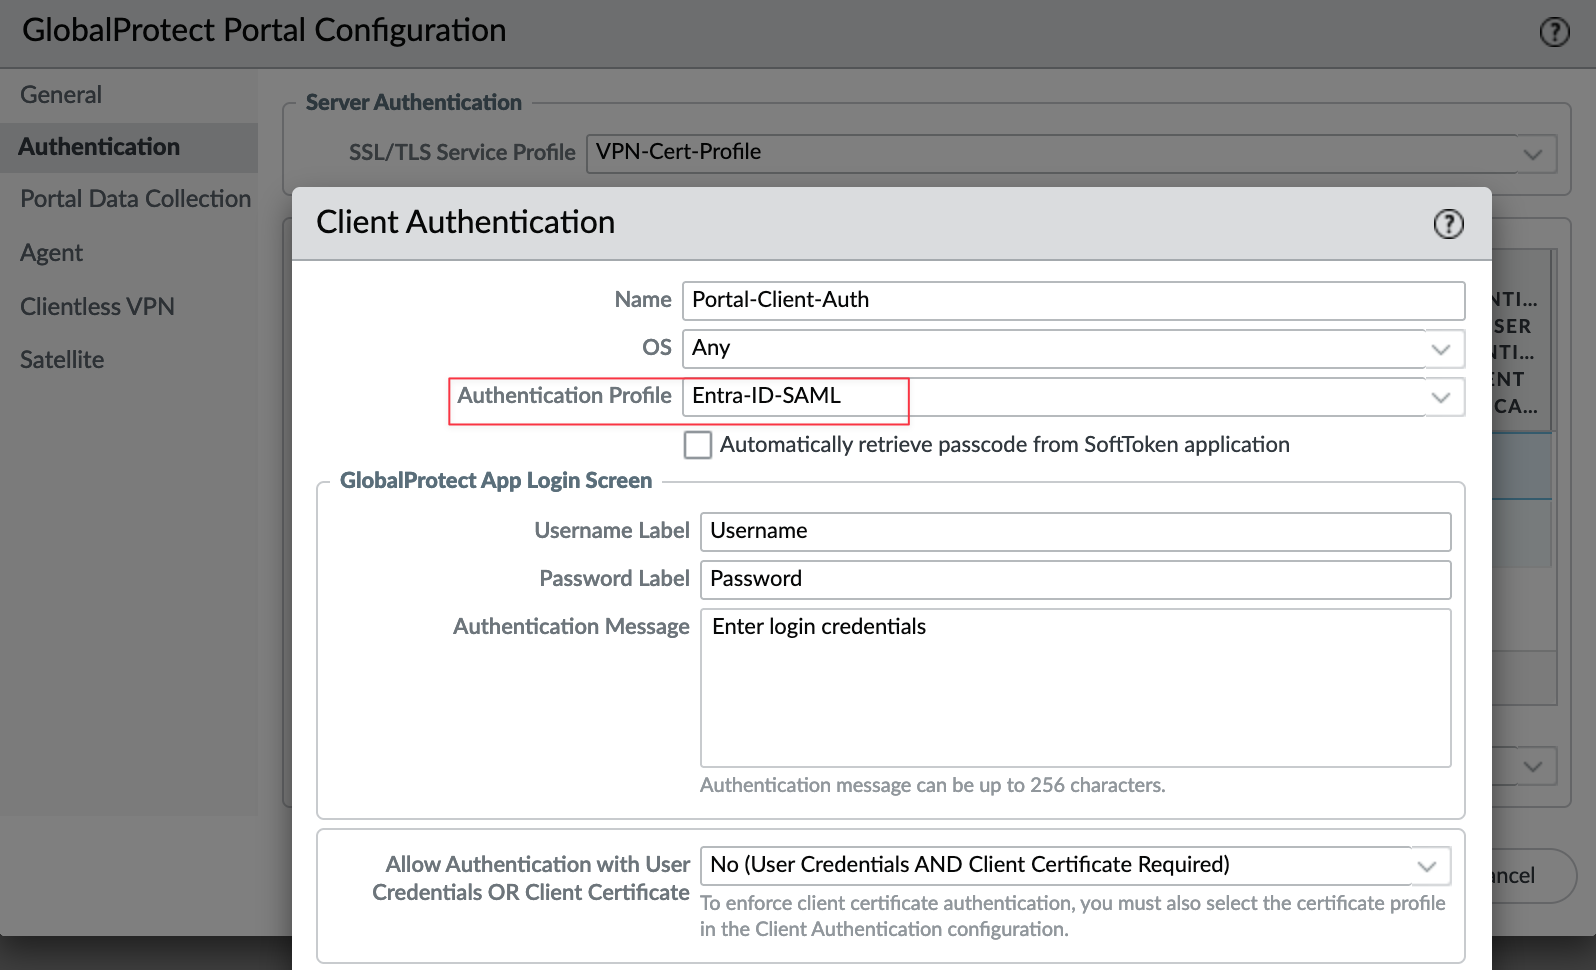
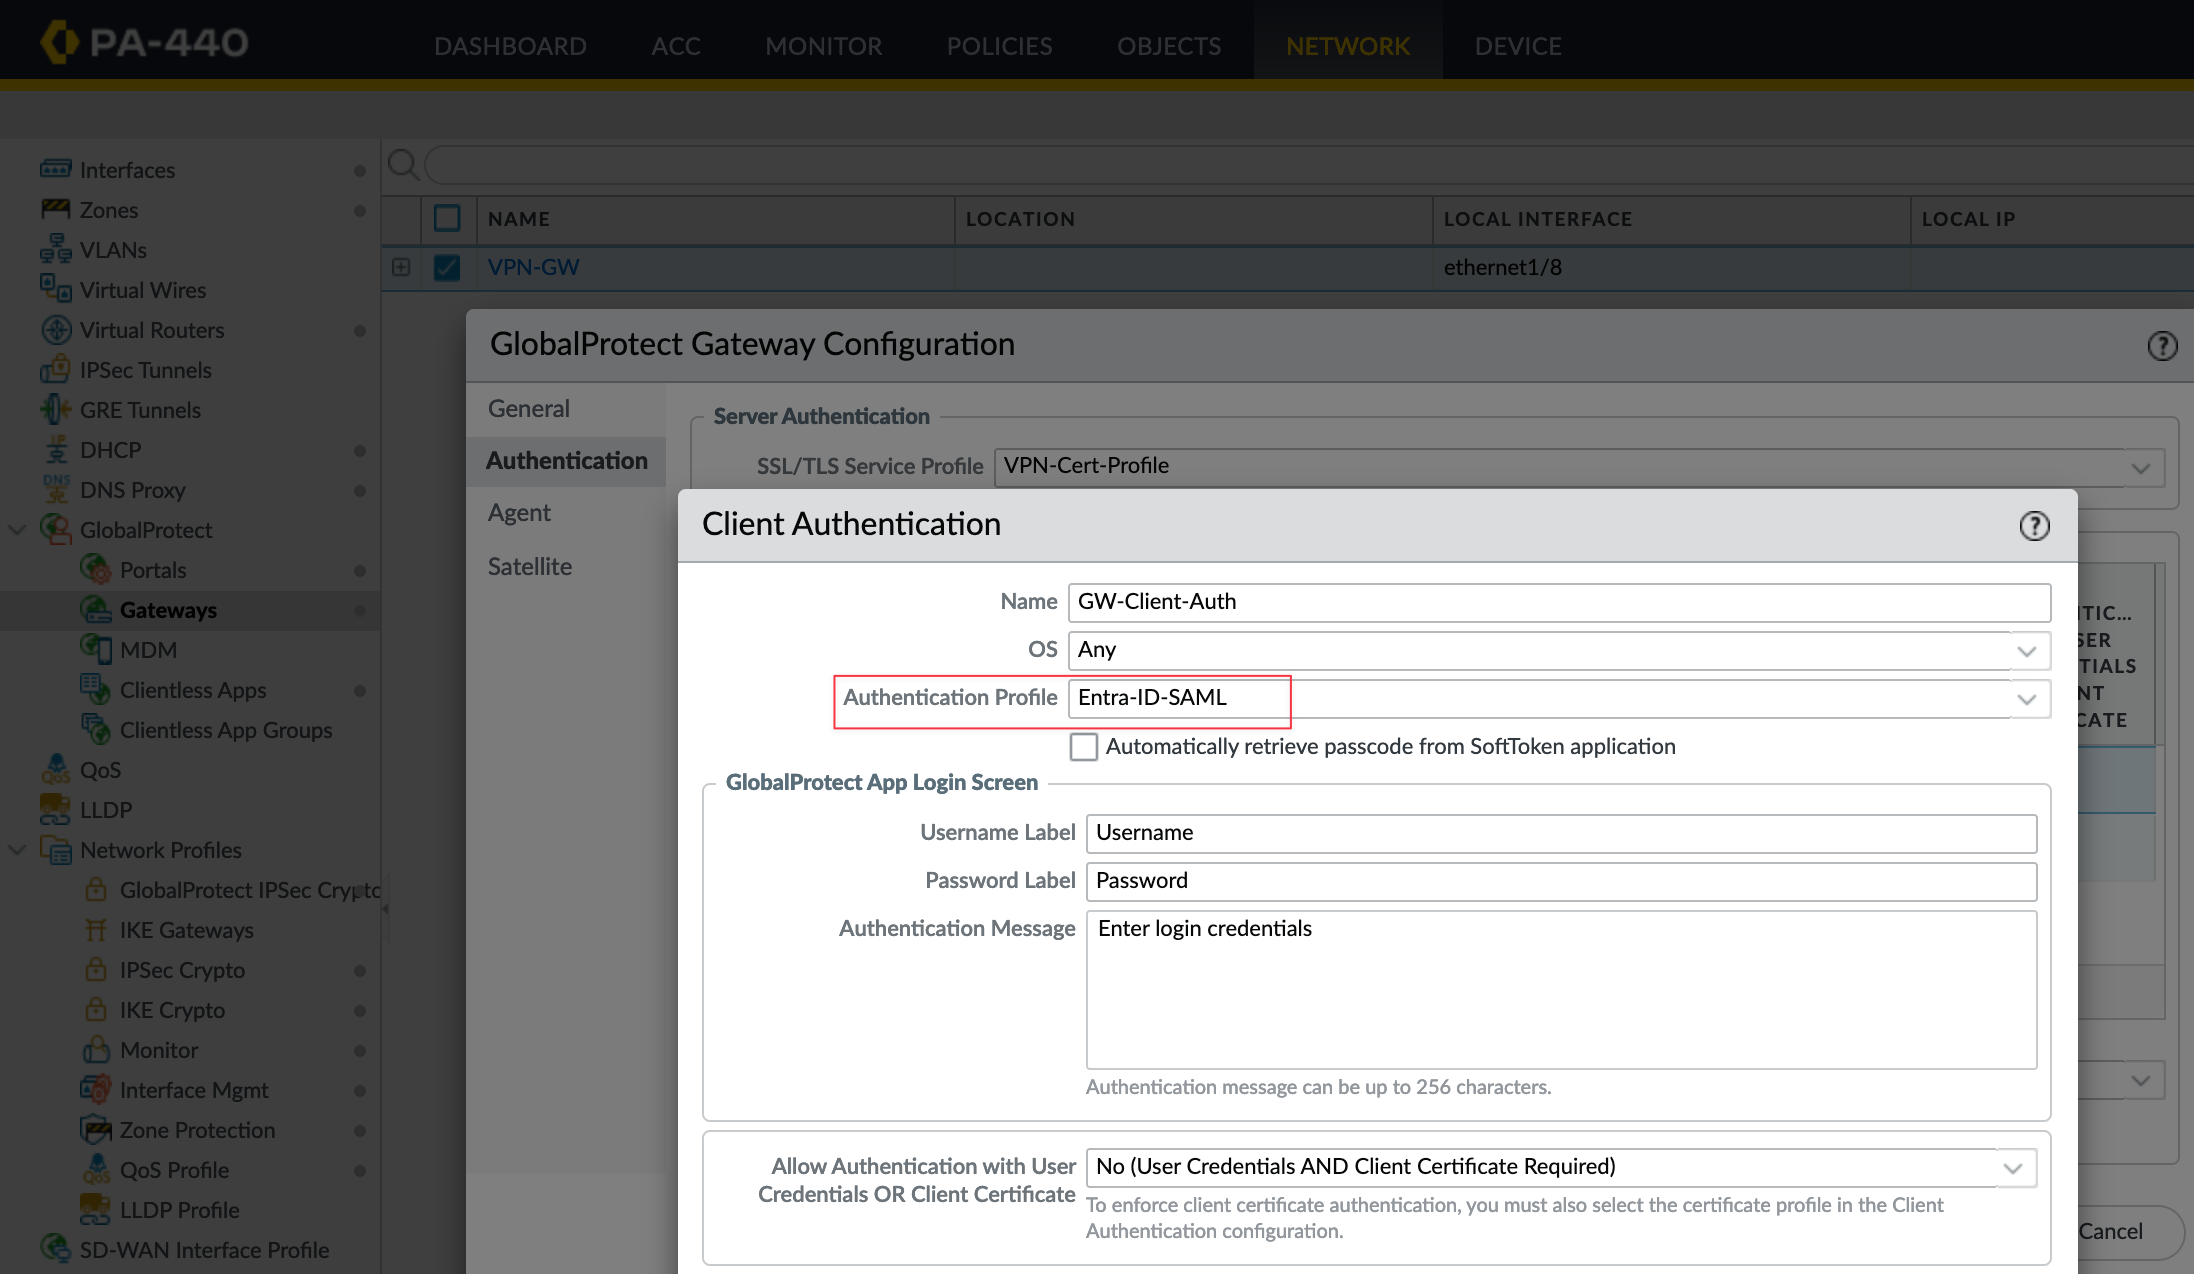
Do the same for the Gateway, navigate to Gateways, select your gateway, and assign the same Authentication Profile.
Verification
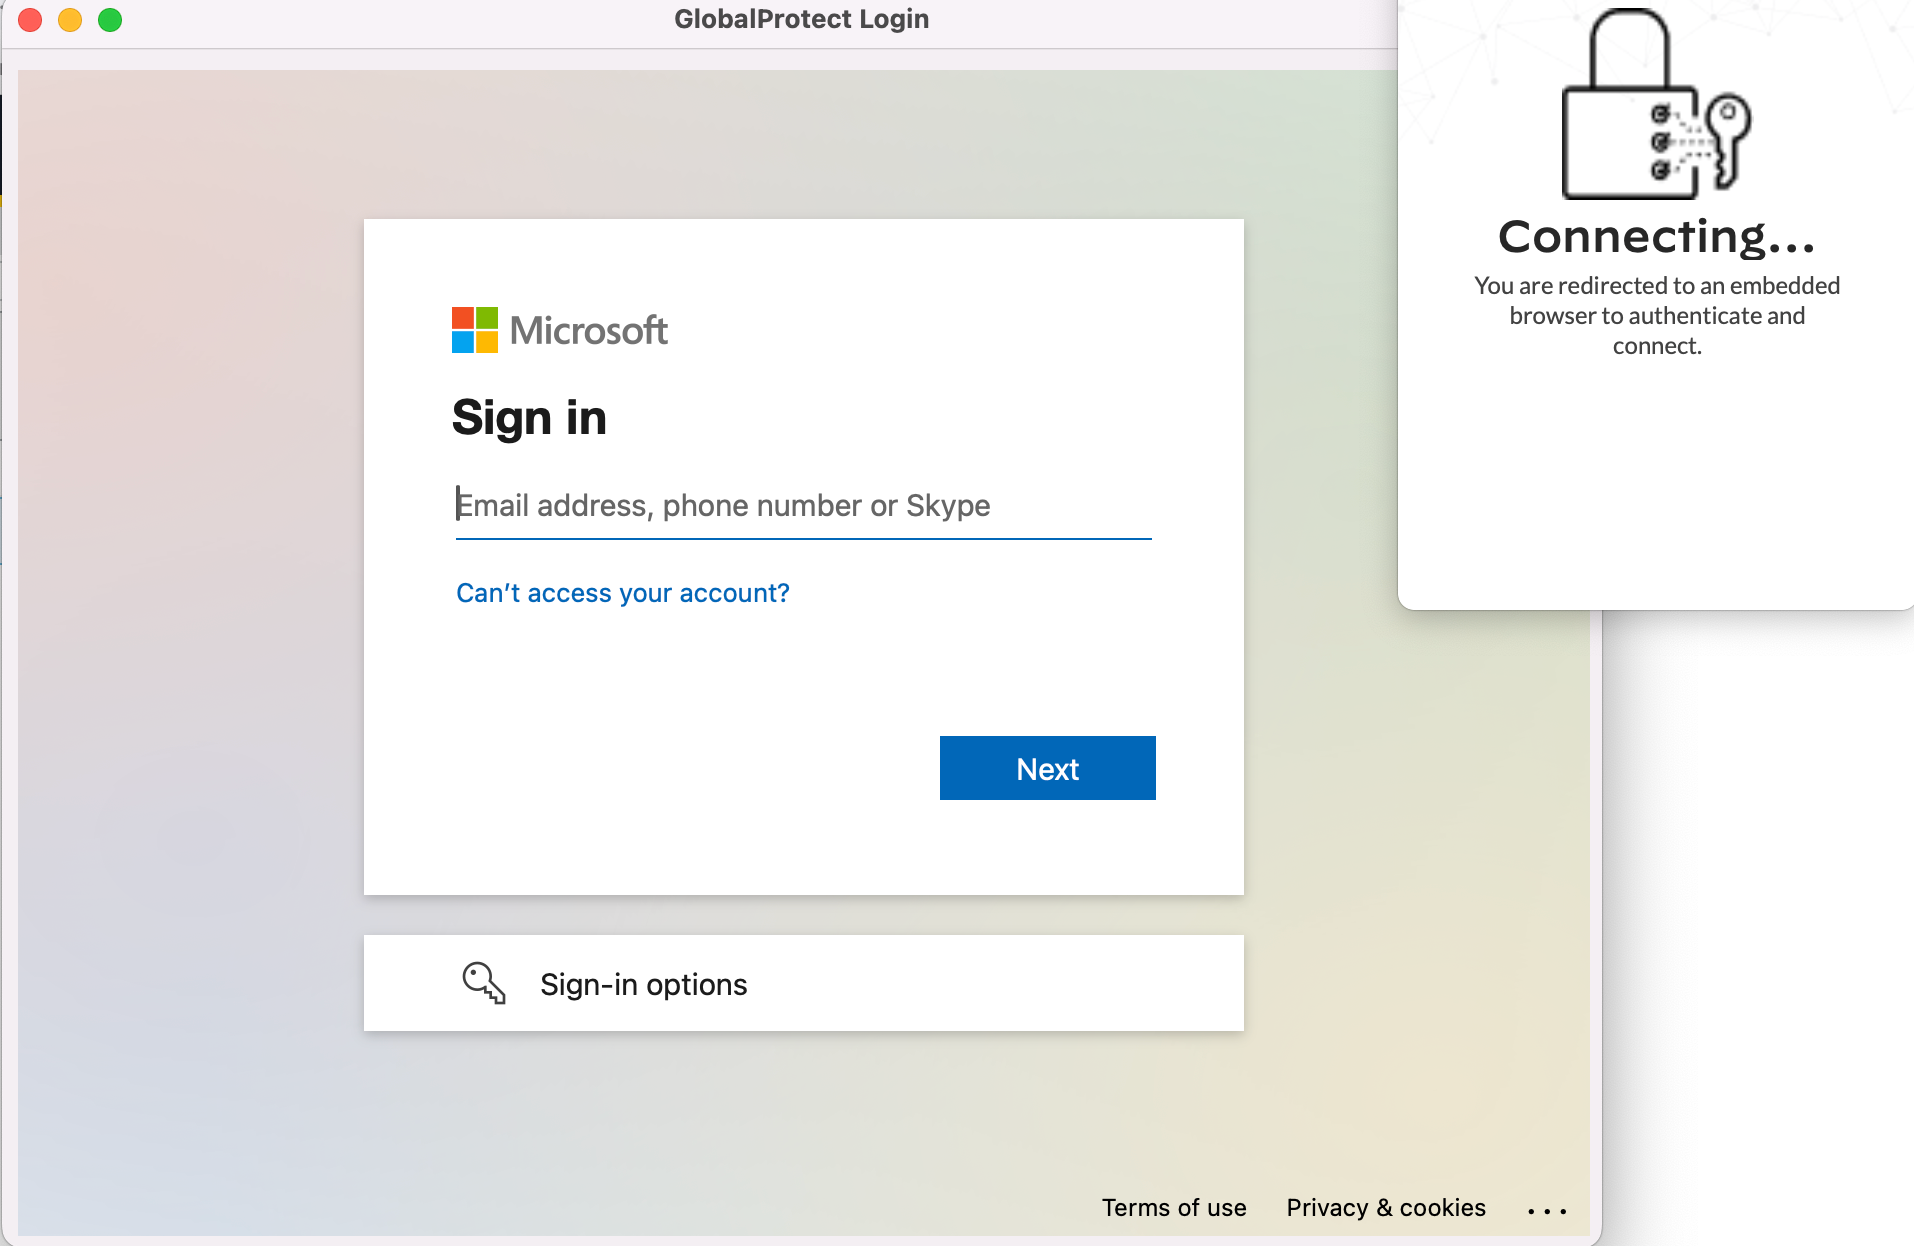
Now it's time for verification. Connect to the GlobalProtect VPN as you would normally do, and you should see the embedded browser window appear for login. Use your email, password, and complete the MFA process, and you're in.
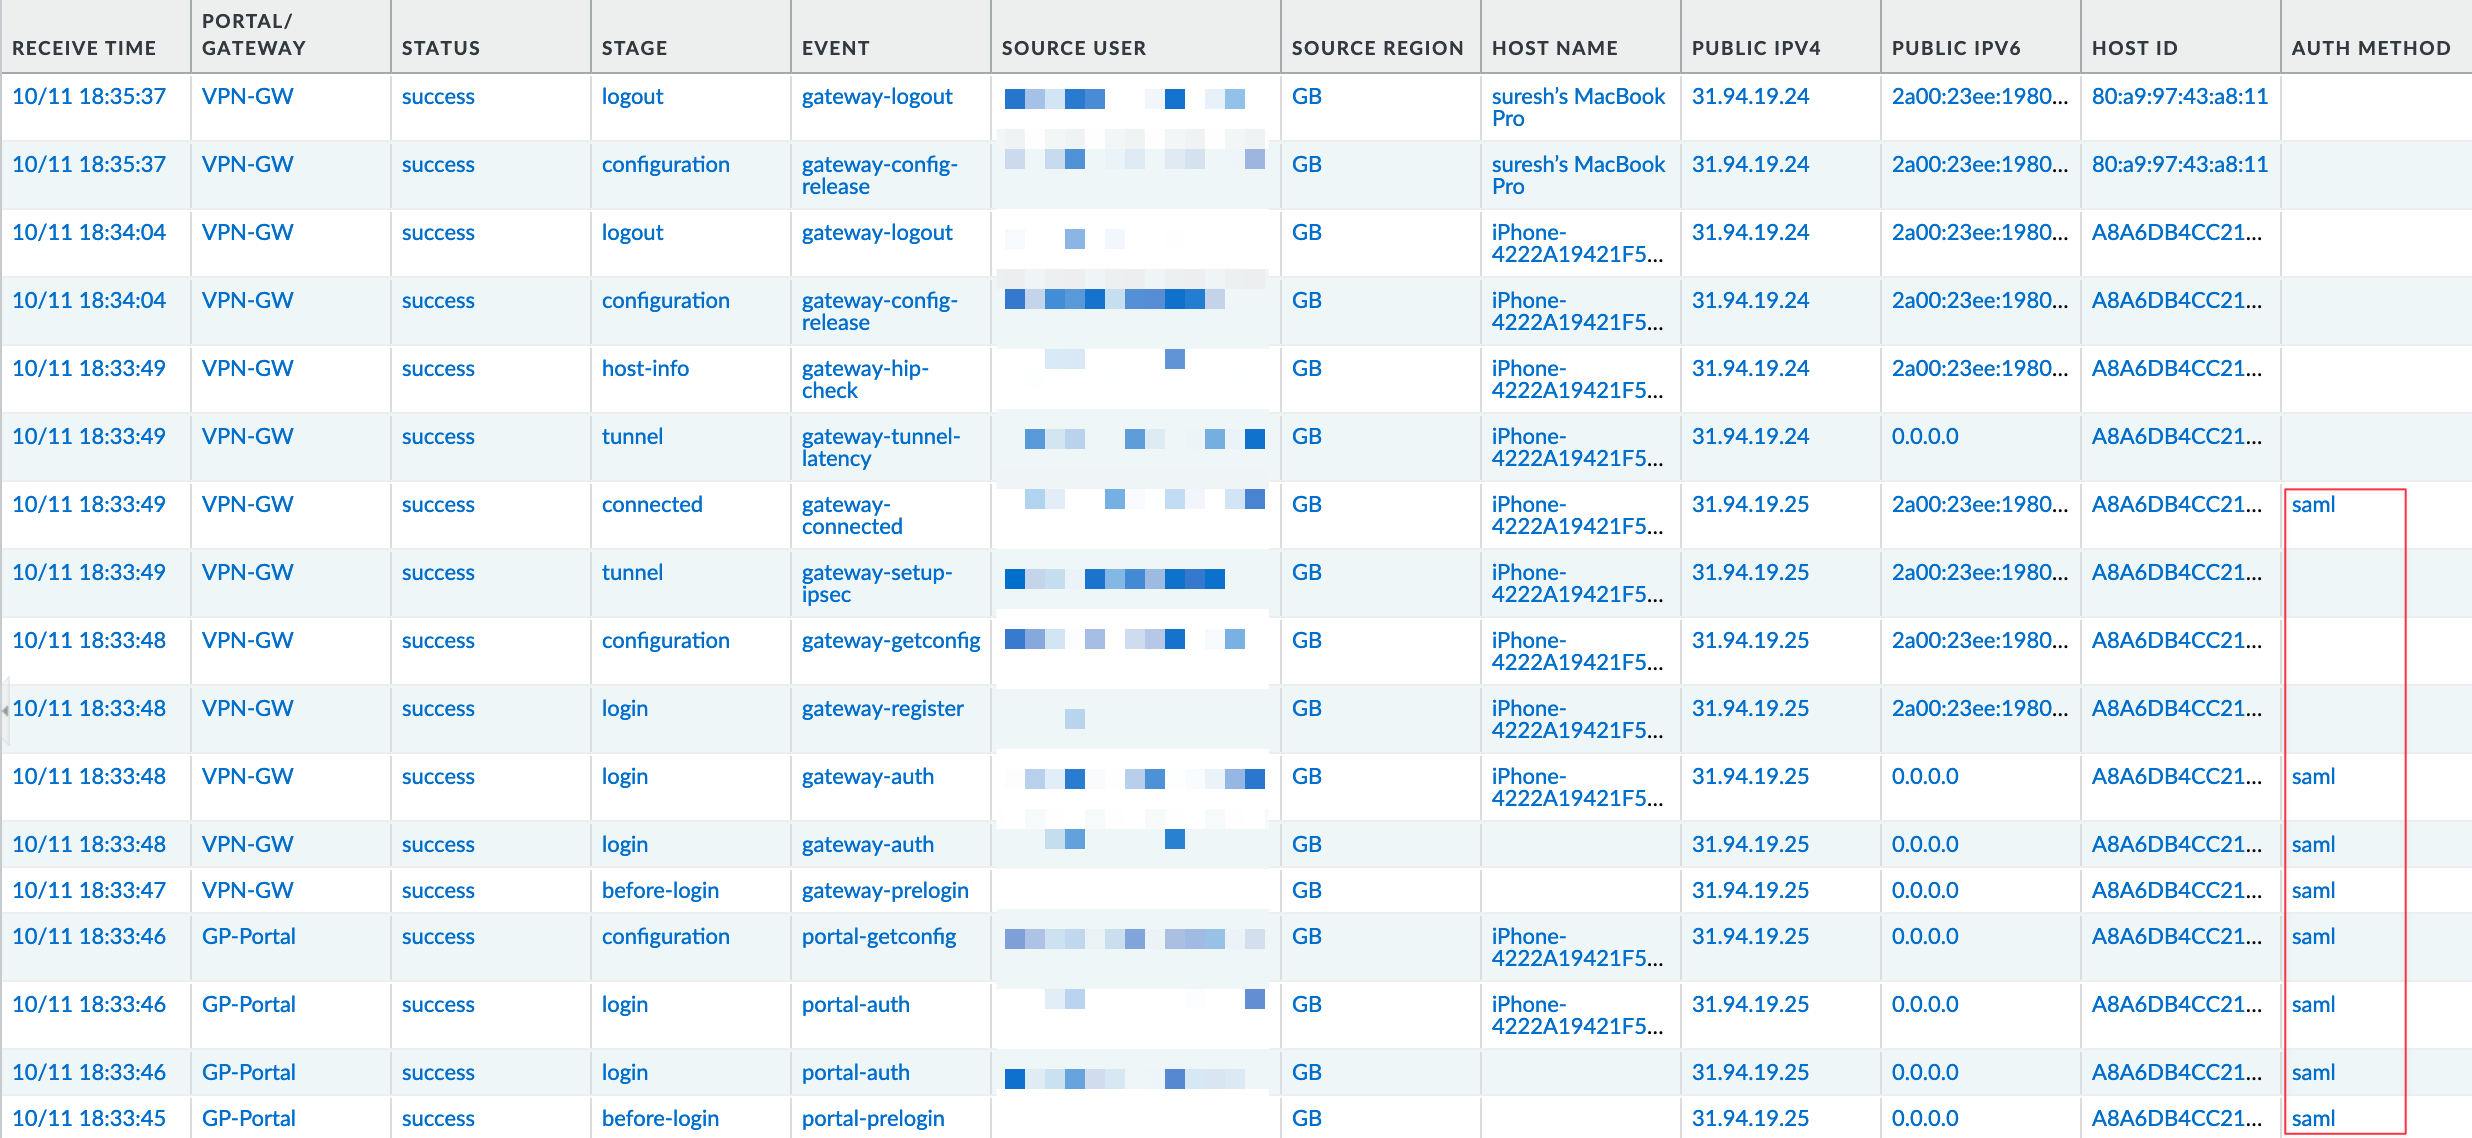
You can also check the GlobalProtect logs to verify that authentication was successfully performed using SAML.
SAML + iOS + Always-On Issues
When I tested this in my lab, I initially used the 'On-Demand' connection type. I set up SAML, and it worked perfectly on my iPhone. However, when I switched to 'Always-On' VPN, I faced an issue a few hours later when I tried to use the VPN again on my iPhone.

The portal authentication was successful according to the logs, but the gateway authentication kept failing. I spent at least 4-5 hours troubleshooting this before discovering the cause that 'Always-On' + iOS + SAML won't work due to the way Apple has implemented VPN on iOS devices.
It appears iOS blocks any external access until the VPN connection is fully established. You can refer to the GlobalProtect compatibility matrix for more information on this limitation.
Validate Identity Provider Certificate
If you remember, we left the 'Validate Identity Provider Certificate' option unticked when importing the SAML metadata. You can refer to a high-scoring CVE from a few years ago, which states that
When Security Assertion Markup Language (SAML) authentication is enabled and the 'Validate Identity Provider Certificate' option is disabled (unchecked), improper verification of signatures in PAN-OS SAML authentication enables an unauthenticated network-based attacker to access protected resources. The attacker must have network access to the vulnerable server to exploit this vulnerability.
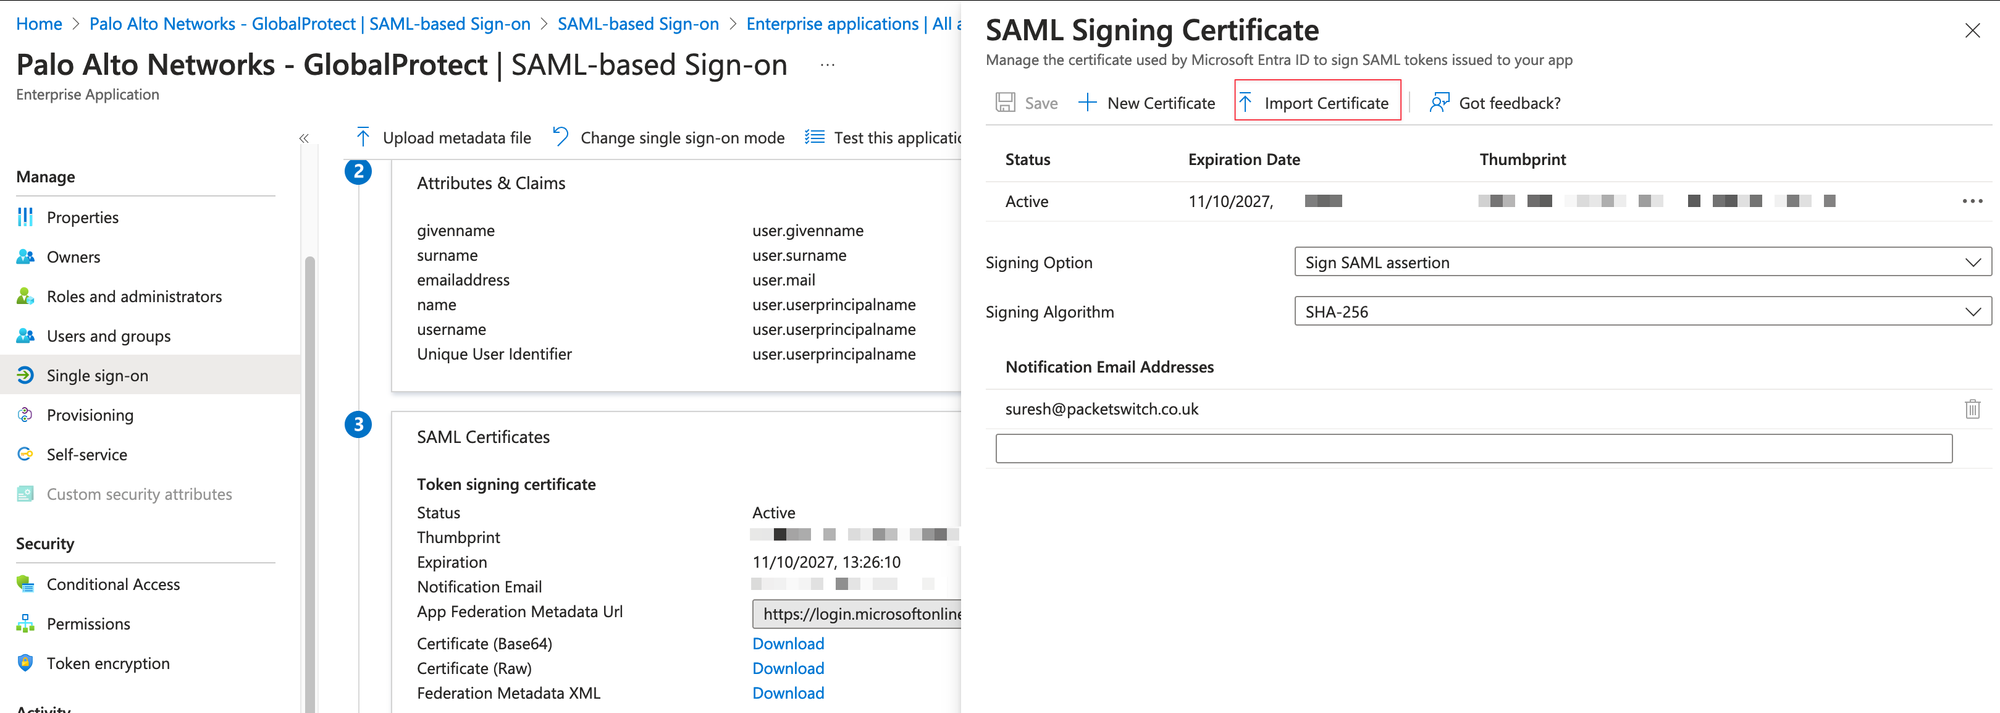
This vulnerability was patched shortly after it was identified, but it is something to keep in mind when using SAML. If you decide to validate server certificates, you need to use your own PKI. By default, Entra uses a self-signed certificate. When you imported the SAML metadata, the self-signed certificate was also imported to the firewall. However, this certificate is not a CA certificate, and in order to validate it, you need to import the CA that issued the certificate.
To address this, you need to use your own PKI to issue the Entra certificate. First, create a certificate using your PKI and import it into the Entra Admin Center, including the private key. Then, import your CA certificate (the one that issued the Entra certificate) into the firewall. After that, create a Certificate Profile using this imported CA and reference it in the Authentication Profile.
