As soon as you configure GlobalProtect and go to the monitor tab, you will see hundreds or even thousands of attempts on your firewall's public IP on port 443. While protecting your portal with MFA generally mitigates major concerns, it’s still wise to implement as many security measures as possible. In this blog post, we will look at some simple ways to protect your GlobalProtect deployment.
We will look at the following methods.
- Disable GlobalProtect Portal
- Block access from malicious IPs (EDL)
- Security policy based on geo IPs
- Blacklist IPs using a Vulnerability Profile
Understanding Intrazone Policy
Before we proceed, just a quick note on how Intrazone policy works. By default, the firewall comes with two predefined security rules at the very bottom. The Interzone rule denies traffic between two zones that are not matched by a specific policy above.

However, the default intrazone action is to allow, so traffic within the same zone is allowed by default. If someone initiates traffic from the WAN zone to Palo Alto’s public interface in the WAN zone, the traffic will be allowed via the security policy. This does not include management traffic or anything like that. It simply means any traffic destined for the firewall itself will be allowed through.
I typically create a deny rule (called 'Deny-All' in the screenshot) above the default one and set the action to deny. I then create allow rules above to allow specific traffic like IPsec or GlobalProtect.
Disable GlobalProtect Portal
From my experience, accessing the GlobalProtect portal via a browser can be useful in two scenarios. First, it allows users to download the GlobalProtect app directly from the portal after logging in. Users can browse the portal's FQDN, login, and then download the client. Another scenario is when someone says they can't log in to the GlobalProtect VPN, I usually ask them to try logging into the portal to see if the authentication succeeds, so I can narrow down the issue.
If the above two scenarios are not important to you, you can just disable the portal by navigating to Portal > Portal Login Page and disabling it. This will keep more attackers away because there is no page to load.
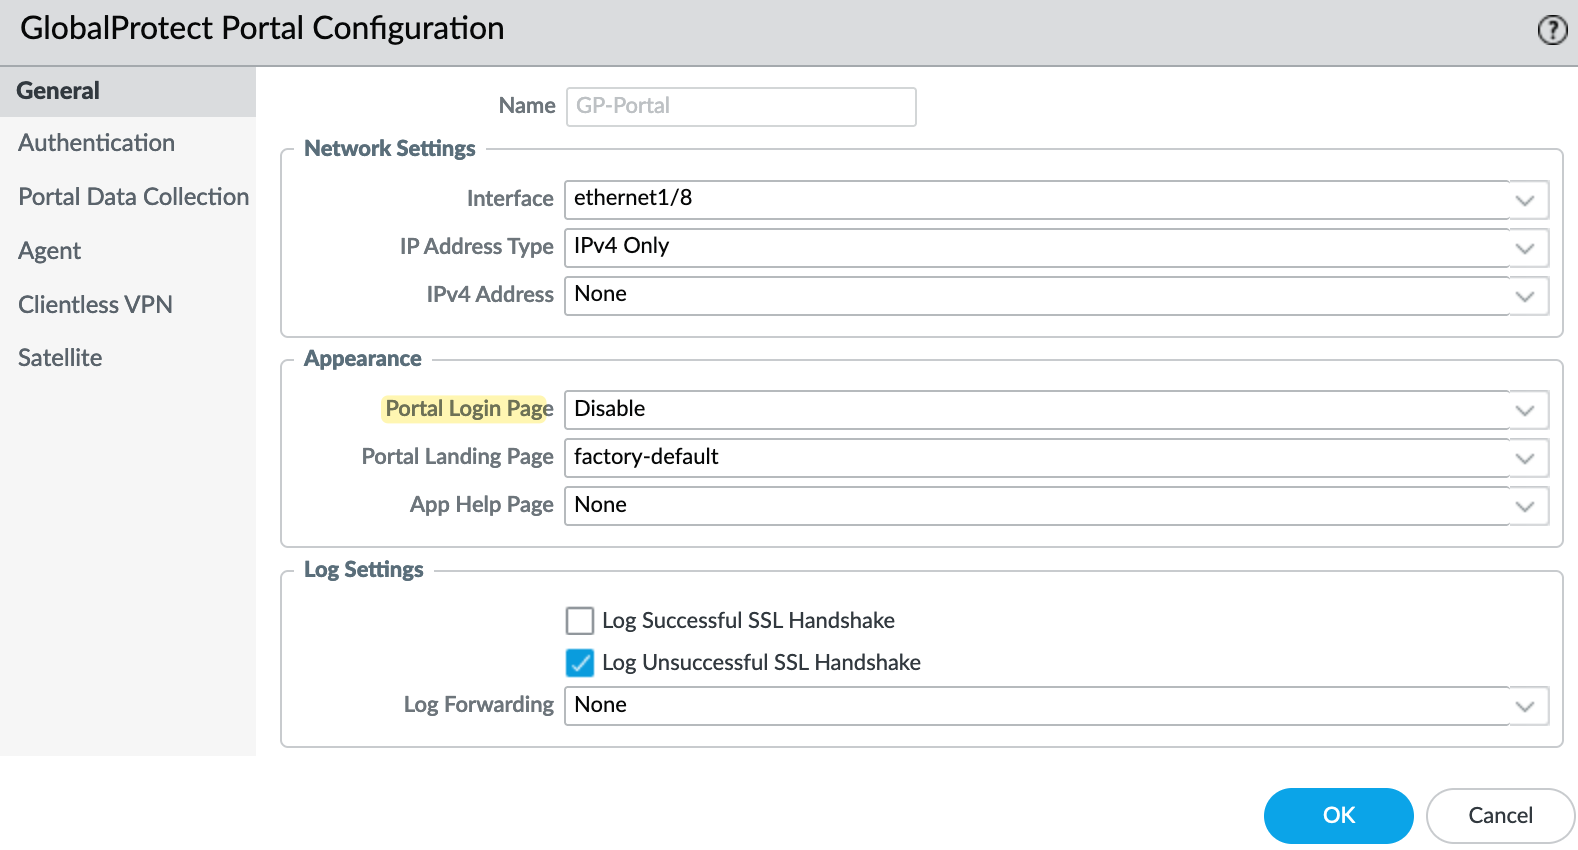
The VPN will continue to work as normal, but you won't be able to access the portal's page through your browser. Please remember that if you use a Clientless VPN, you can't use this option.
Block Access from Malicious IPs (EDL)
I always create two rules at the very top to block traffic to and from the malicious IP addresses that Palo Alto provides. If you navigate to Objects > External Dynamic Lists, you will see the EDLs Palo Alto provides.
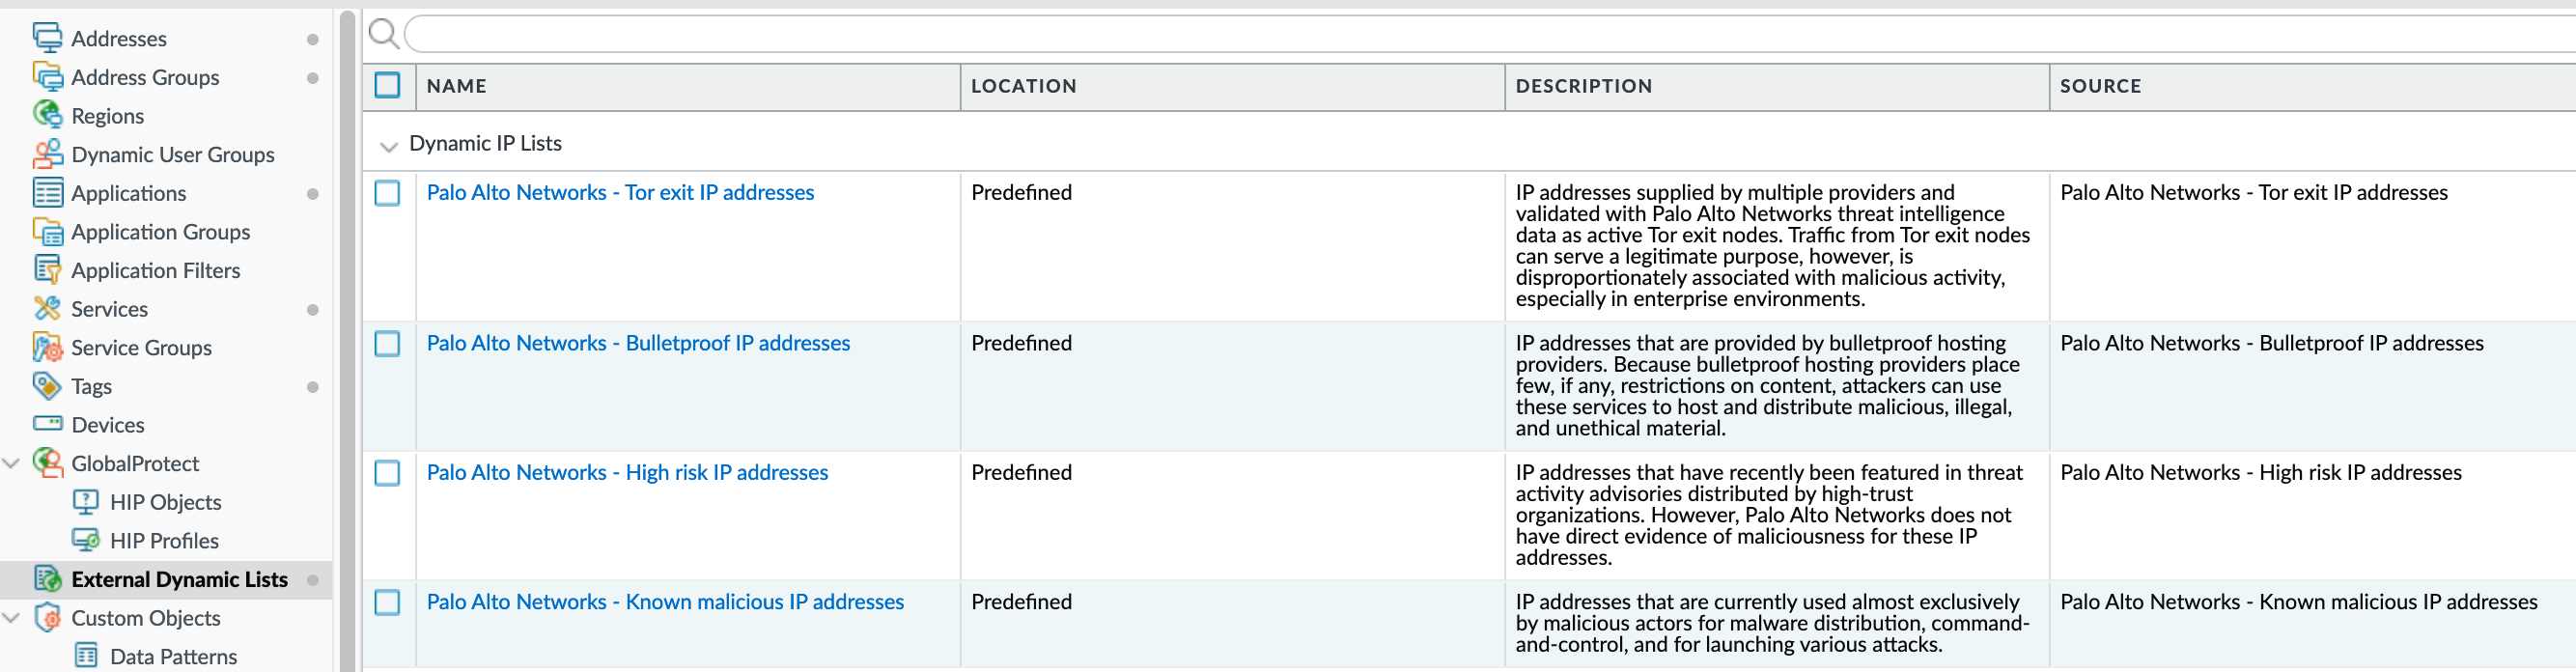
The first thing I do is create two rules, one to block outbound access to these ranges and another one to block inbound traffic from these ranges. This way, if someone wants to brute-force login to the portal, the traffic will be blocked straightaway.

As you can see from the hit counter, the firewall is already blocking some traffic that is coming from these malicious IP ranges.
Security Policy Based on Geo IP and App-ID
Another simple way to block some attacks is to create rules based on Geo IP and App-ID. You can either permit traffic from specific countries or block traffic from specific countries. The former works better because you just need to allow traffic from where your users are based. For example, if you have users across the USA and UK, you just need to allow IPs from these two locations.
In my example, I only allow traffic from UK IPs. This will reduce the number of login attempts dramatically.
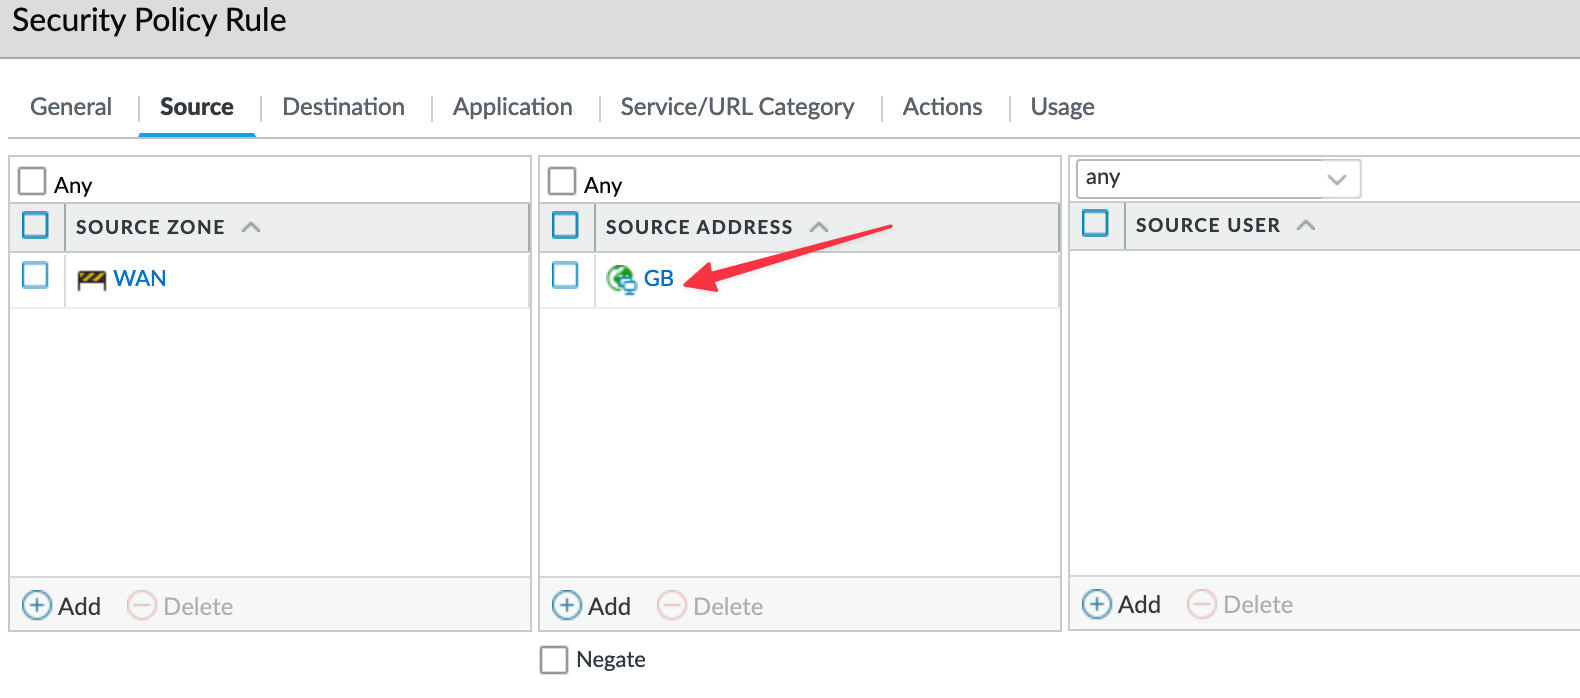
You can also use App-IDs on the rule that allows traffic to the portal/gateway. So, instead of using port numbers like TCP/443 or UDP/500 (for IPSec), I'm using SSL, IPSec and panos-global-protect App-IDs.

Blacklist IPs Using a Vulnerability Profile
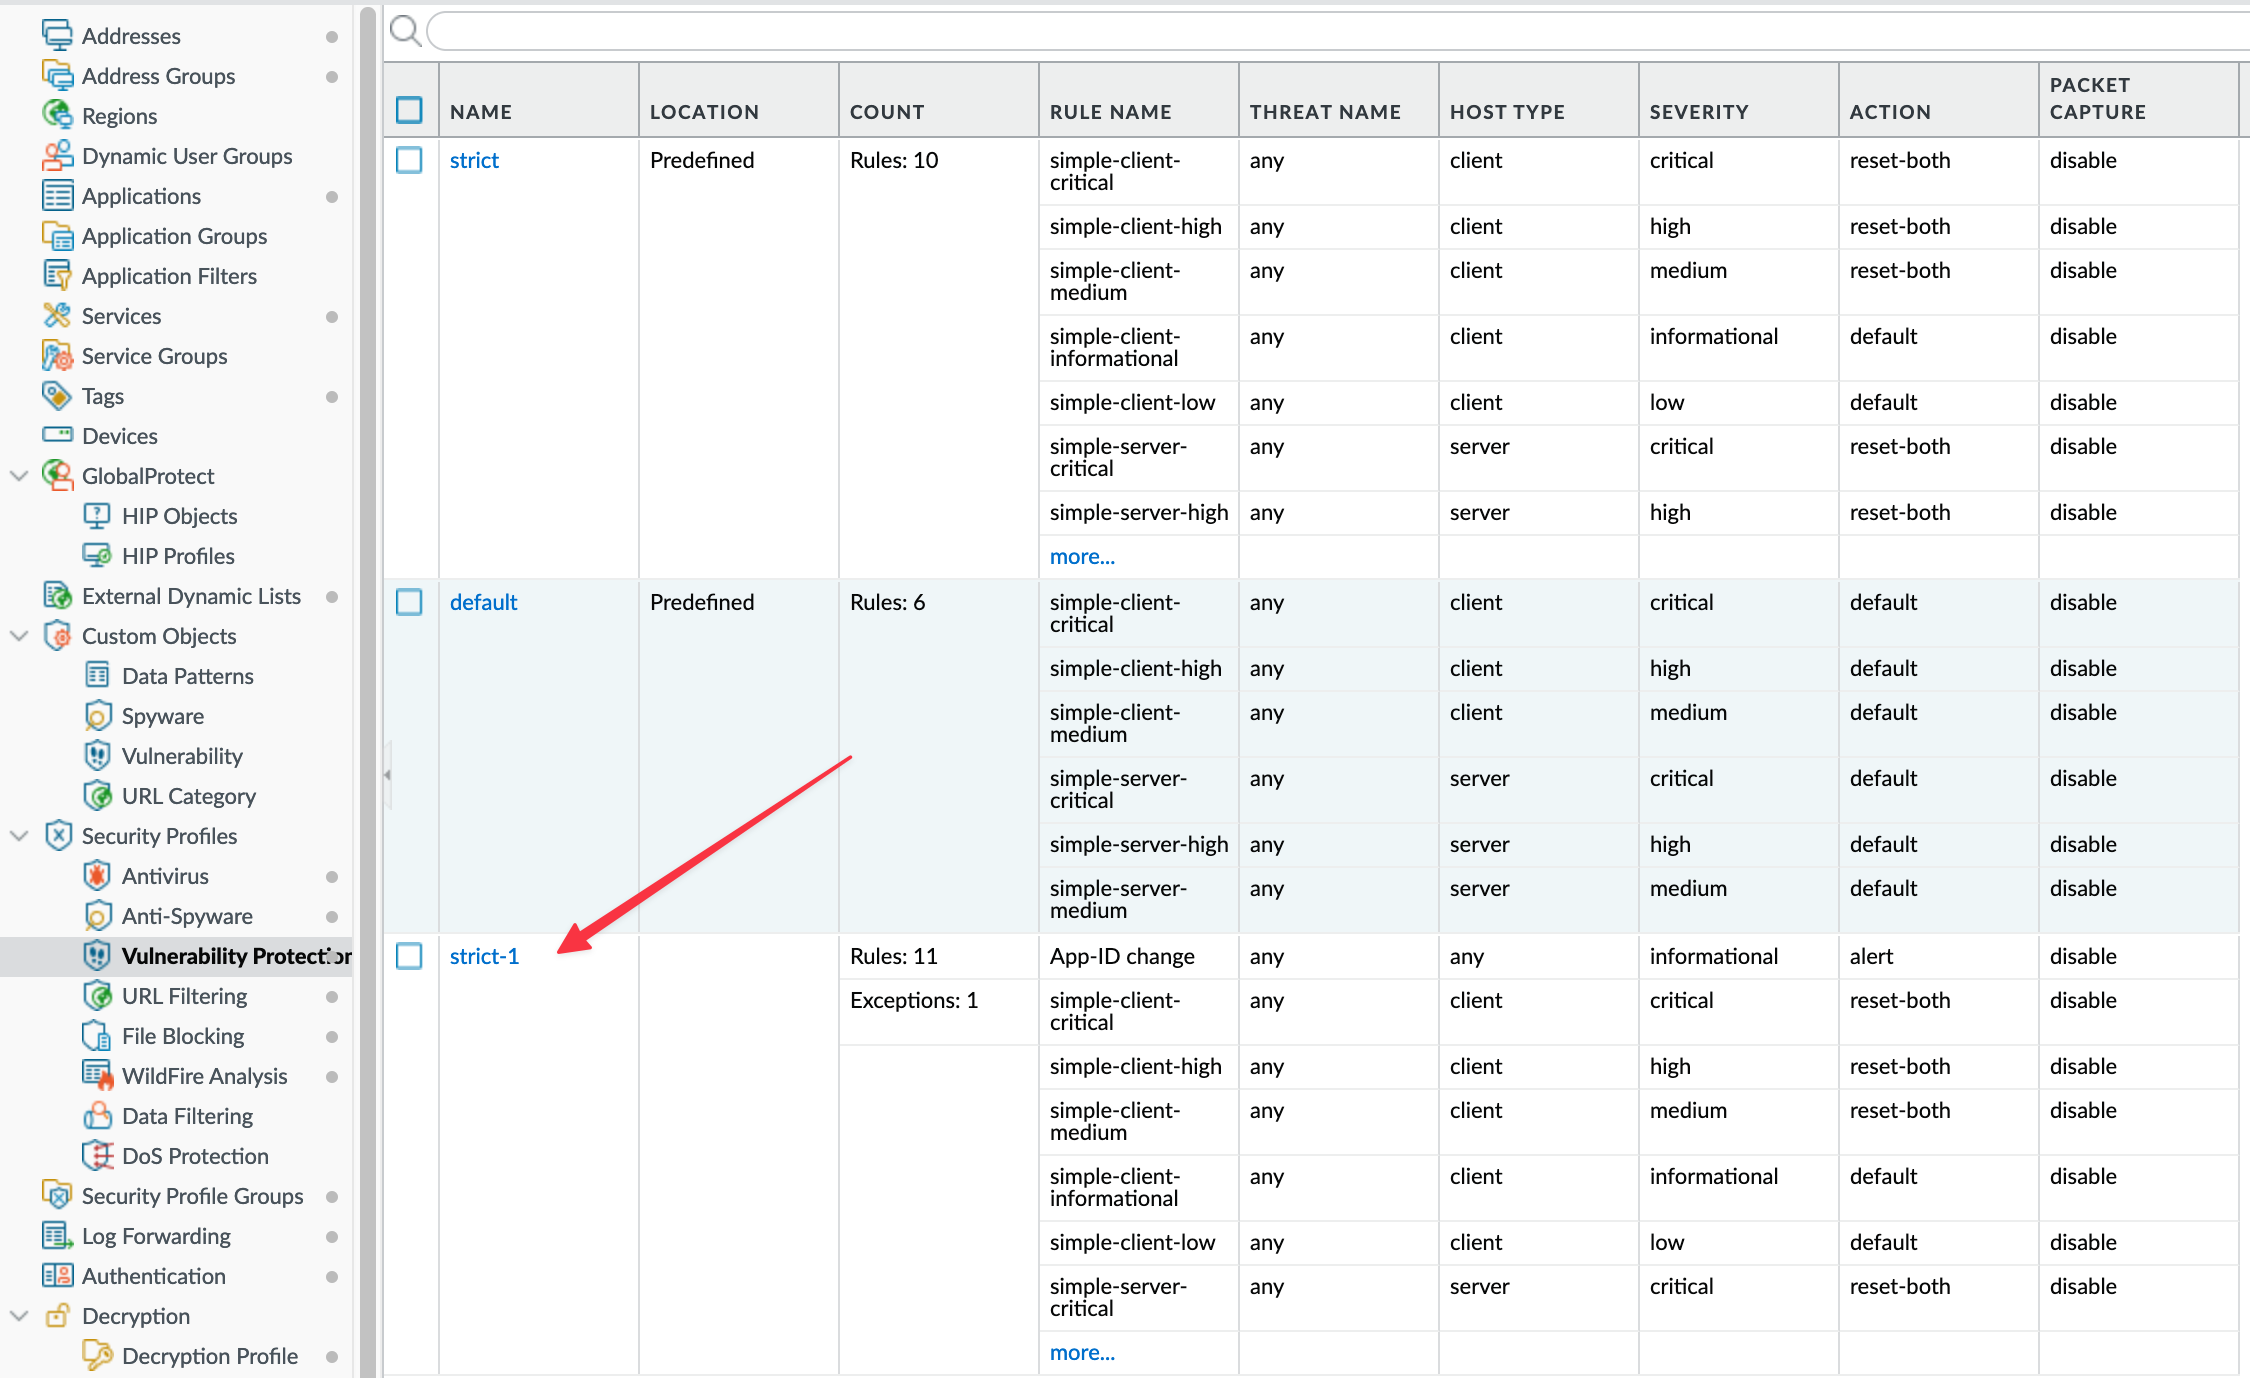
In the rule we've seen in the previous example (called 'Allow-GP-VPN'), I applied the default strict Vulnerability Profile. With the default profile (named 'strict-1'), if someone tries to brute-force by logging in with multiple usernames and passwords, after 10 failed attempts, it resets the connection but they can still continue the attack.
To experiment, I tried random username passwords on the GlobalProtect Portal and after the 10th attempt, the firewall generated a threat log and reset my connection.

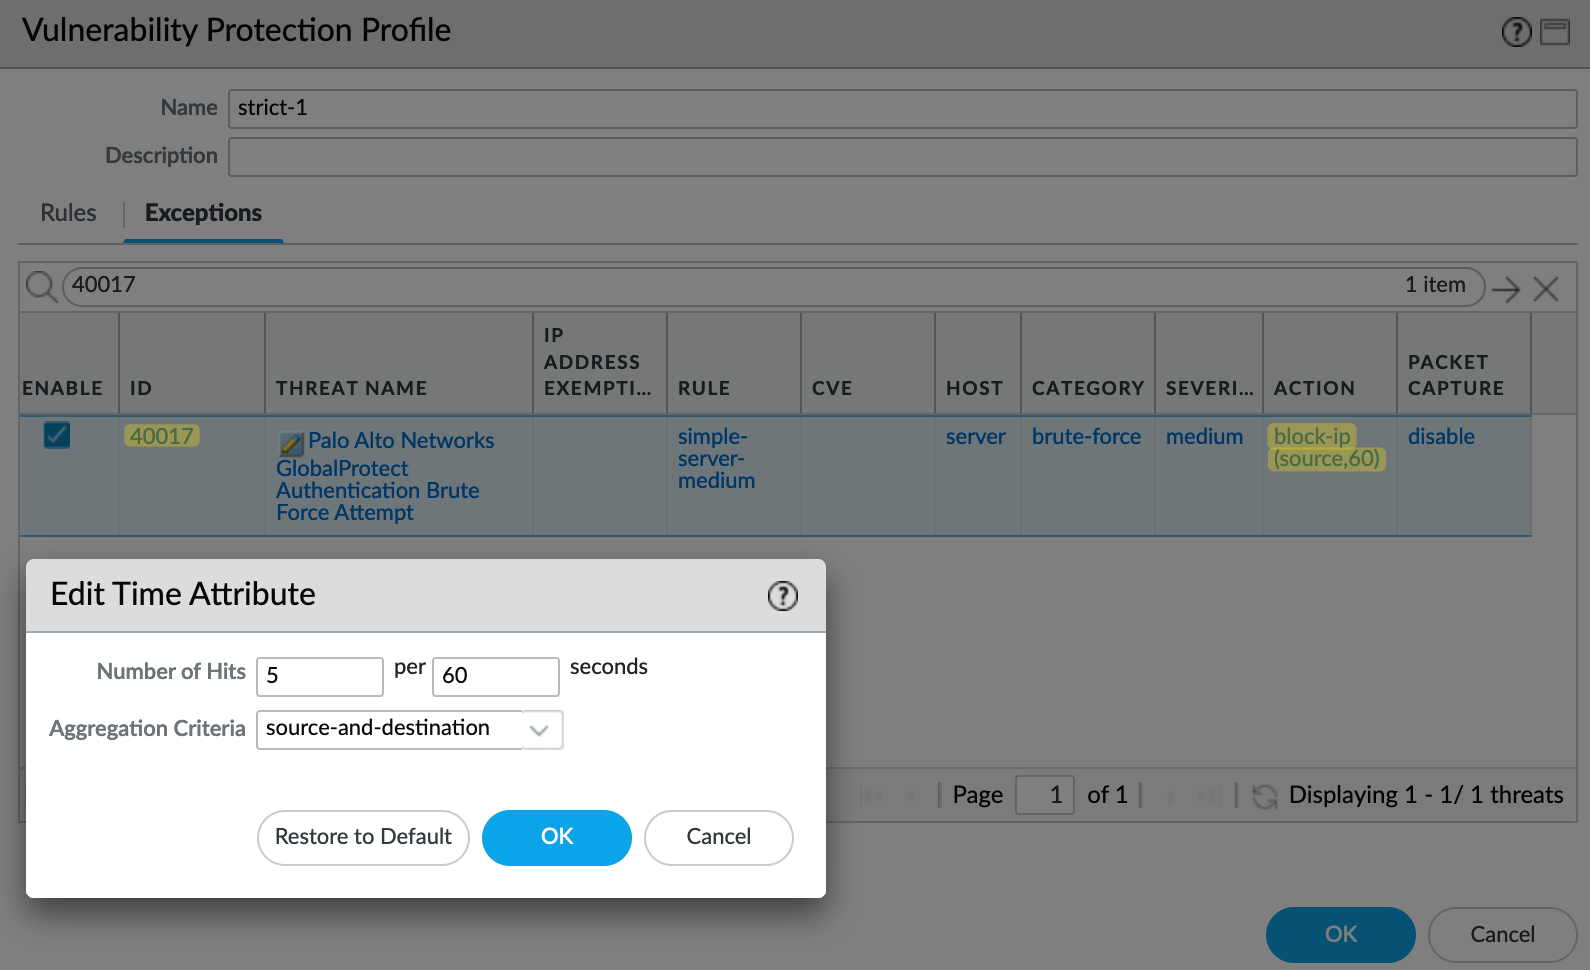
By making changes to the default profile, which detects 10 attempts within 60 seconds and then resets the connection, we can modify the behaviour. Here, I'm going to set it to 5 attempts within 60 seconds and set the action to block the IP for 60 seconds.
To make this change, navigate to Objects > Vulnerability Profile and select your profile. Inside the profile, navigate to 'Exceptions' and search for the signature ID 40017. Click on the pencil icon to edit the behaviour as shown below. You can also set the action to block the source IP.
Again, I experimented by trying out random credentials but after the 5th attempt, the page didn't load and my IP address got blocked for 60 seconds.

You can use the debug dataplane show dos block-table CLI command to check the currently blocked IPs.
sureshv@PACKET-440> debug dataplane show dos block-table

entp:0xe142863750, bucket:268, entry:0
  Key:
    vsys_id:1, src_zone:3
    ip:31.94.36.217, dst_ip:
    is_ipv6:0, is_src_dst_both:0

  Value:
    block_until:55766 (Unblock after:52 sec)