Okay, you're probably thinking, "This has to be a clickbait. How can you run 802.1X without a RADIUS server? Is this some kind of magic?" Well, there's no magic involved. In this blog post, we'll walk you through setting up secure Wi-Fi access using EAP-TLS, and all you'll need are Meraki MR access points. No external RADIUS server is required!
Overview
What if I told you that Meraki MR access points come with a built-in RADIUS server. That's right—you don't need an external RADIUS server to use 802.1X. If you're in search of a simple, straightforward setup without the hassle of external servers, this could be your best bet. This approach is especially useful for protecting remote sites or smaller businesses without breaking the bank. However, it's worth noting that while this method is simple and cost-effective, it doesn't offer the same level of control and flexibility as more complex solutions like Cisco ISE or Clear Pass.
Even though this example focuses on EAP-TLS, Local Auth also supports EAP-TTLS/PAP and PEAP-GTC.
Prerequisites and How It Works
Of course, for EAP-TLS to work, there's a prerequisite: you must have already issued user or device certificates to all the endpoints from a root CA. If you want to learn more about how to issue user and machine certificates, please check out my other blog post here.
 Suresh Vina
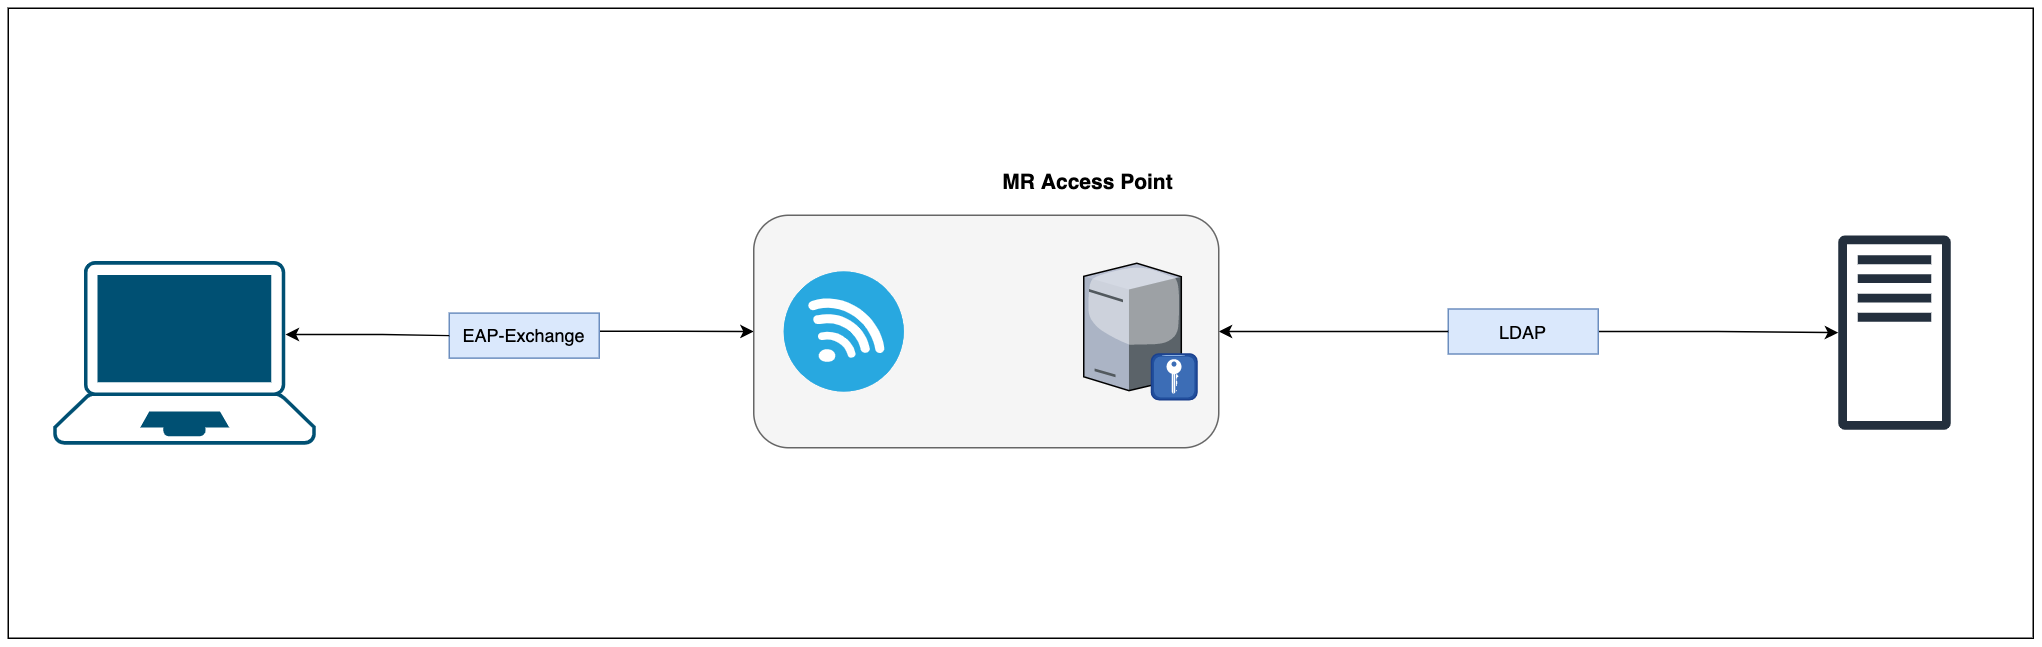
So, how does this all come together? It's simple:
- First, you upload the root CA that has issued the client certificates to Meraki Portal
- Download Meraki's root CA and install it on all the client devices. Please remember EAP-TLS is based on mutual authentication so, both parties need to trust each other.
- After that, the access point will automatically grant access to any device that presents a certificate signed/issued by the uploaded root CA.
A Note on LDAP Validation
Now, you might be wondering, "Doesn't the access point need to check with an LDAP/AD server to verify if the certificate is actually valid?" Good question! While the AP can function without this step, you do have the option to instruct it to cross-check each certificate against an LDAP server. To make this work, however, you'll need to ensure you have connectivity to the LDAP server and the appropriate credentials for authentication.
If you opt for password-based authentication instead of using certificates, configuring an LDAP server becomes a must. Why? Because the access point needs to validate the credentials against a trusted source, like your Active Directory (AD), to grant or deny access.
Configuration
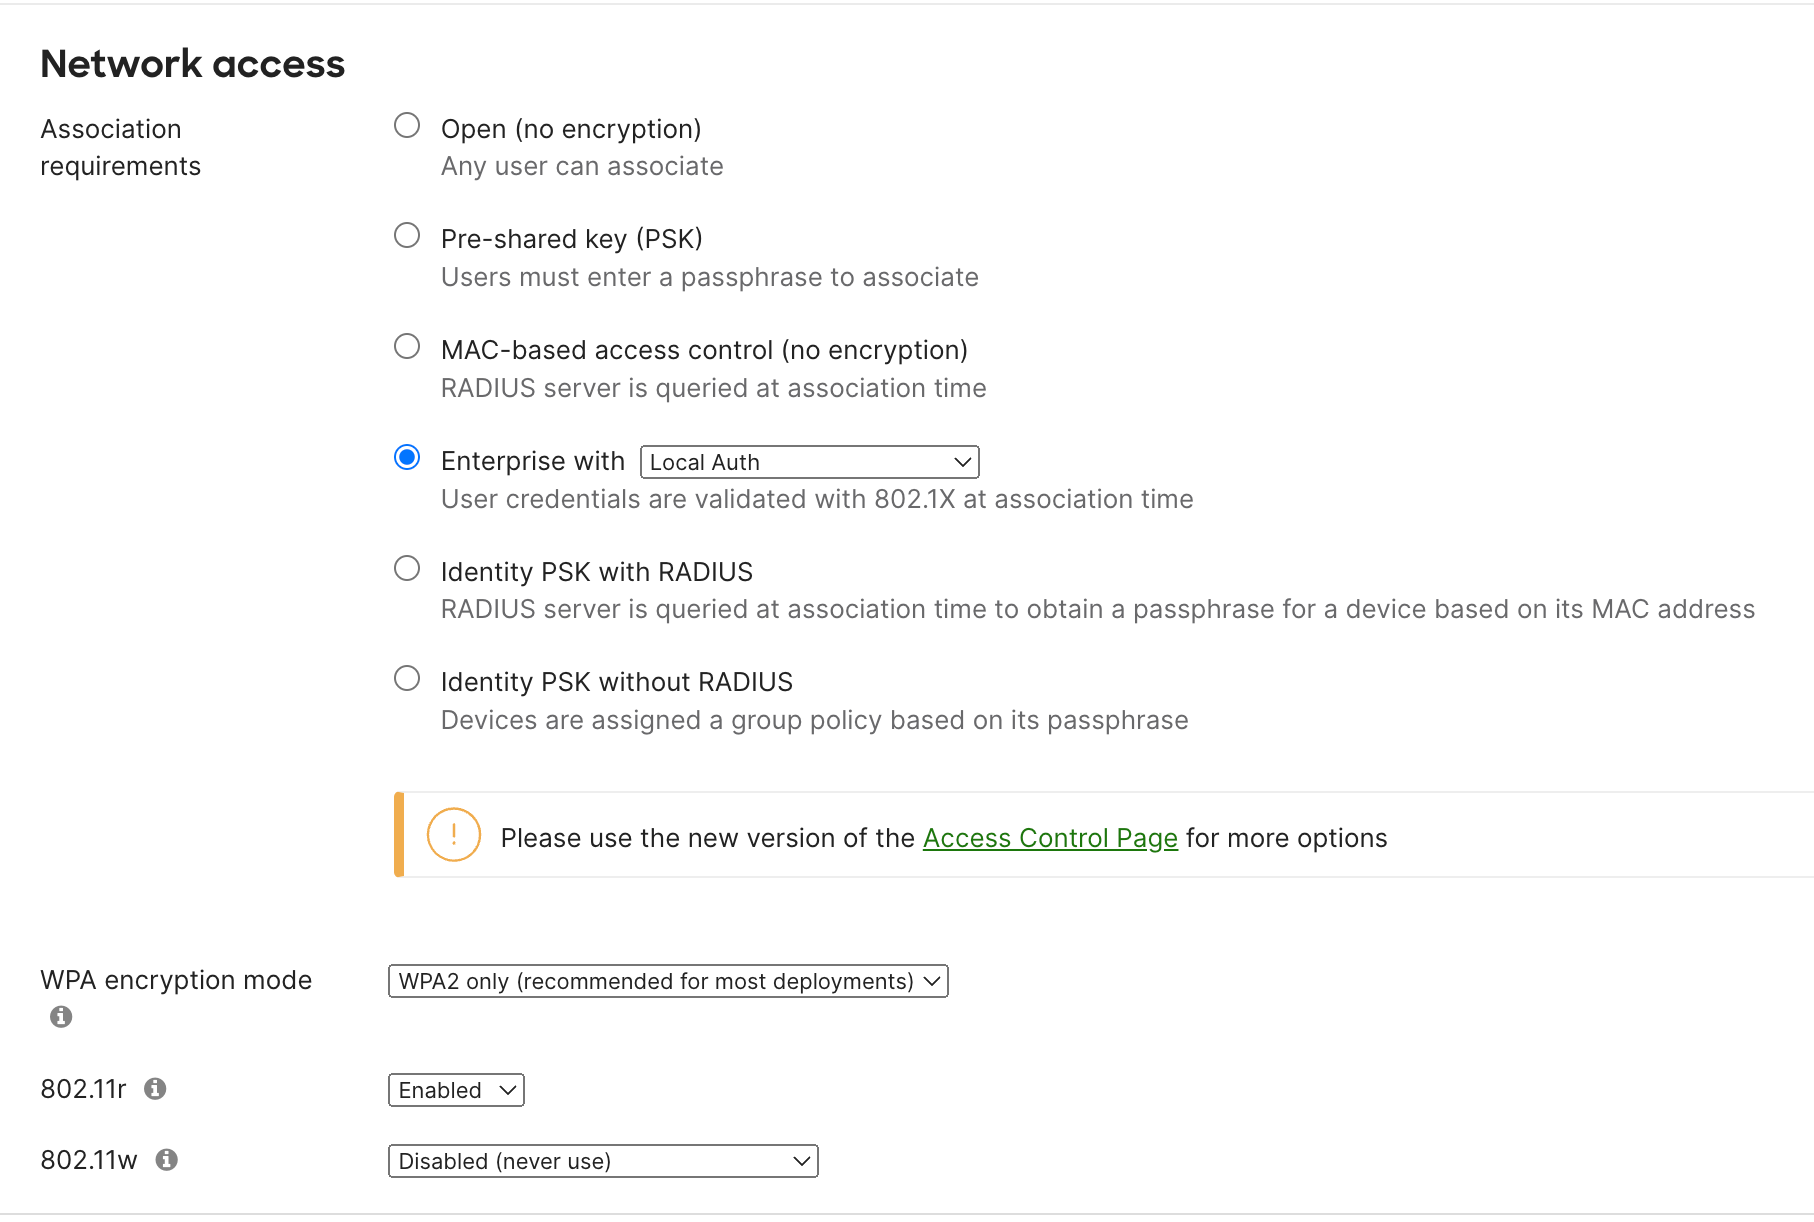
Setting things up is incredibly straightforward. First, select 'Meraki Local Auth' under 'Network Access'.
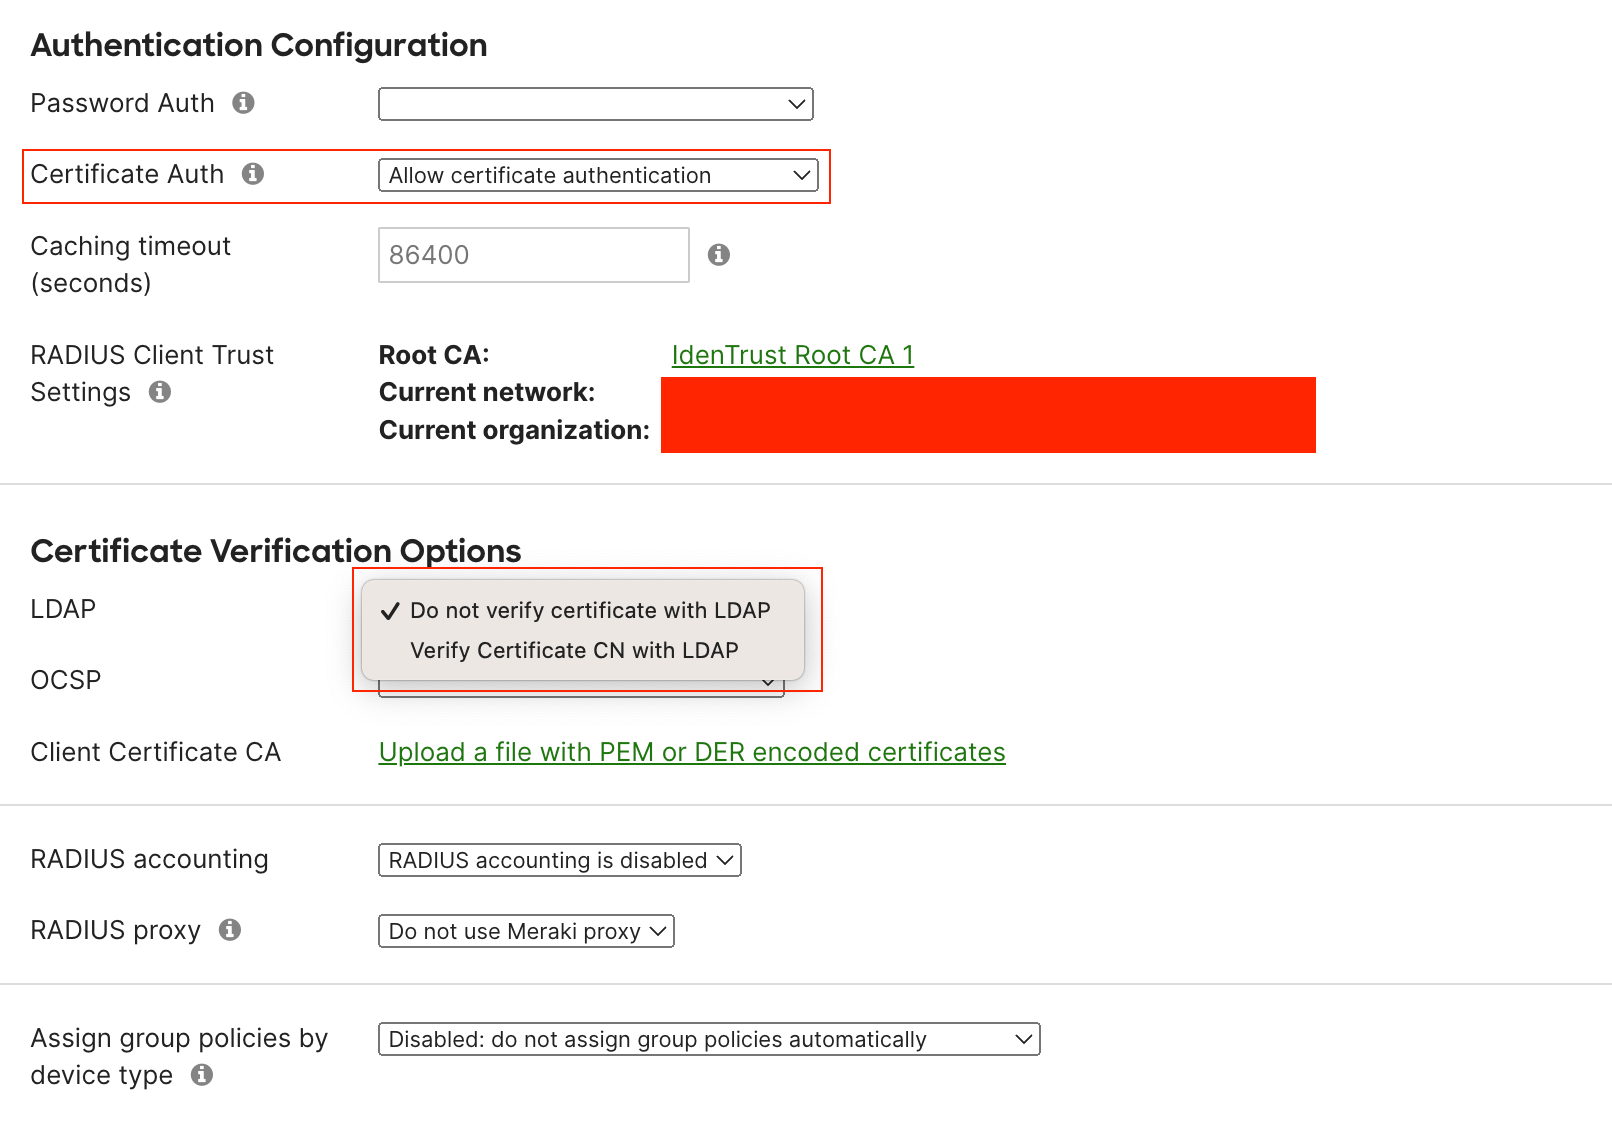
As mentioned earlier, you also have the option to cross-verify certificates with an LDAP server. These settings can be found under 'Certificate Verification Options'.
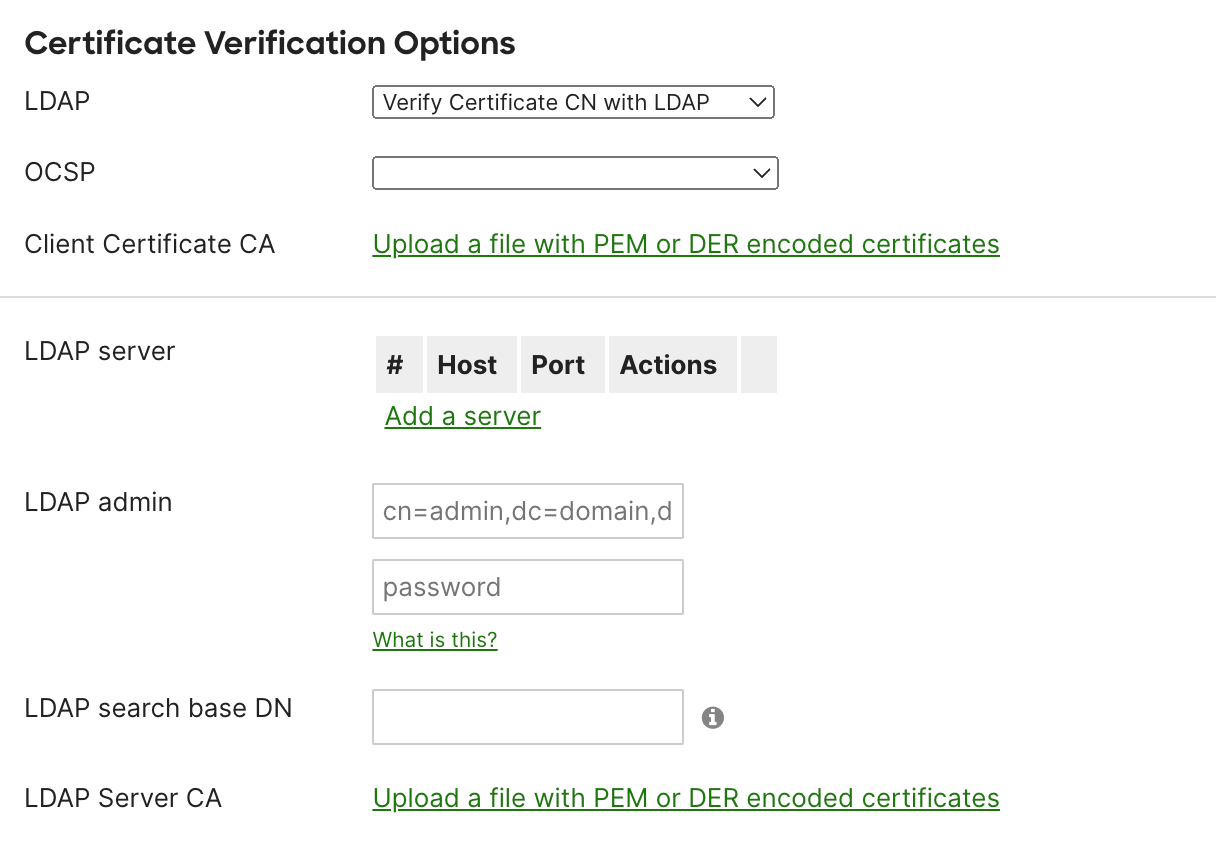
Then, in the 'Authentication Configuration', you'll have the option to choose between password or certificate-based authentication. Since we're focusing on EAP-TLS, I've chosen the certificate-based option. Make sure to download Meraki's root certificate and ensure that your supplicant trusts them. The most crucial step here is to upload the root CA certificate that issued your client certificates. You'll find this option under 'Client Certificate CA'.
.cer file and upload it to Meraki. The dashboard should show both certificates and you are good to go.Conclusion
And that's all there is to it—a simple yet incredibly useful feature of Meraki access points that's often overlooked. With just a few steps, you can secure your Wi-Fi network without the extra hassle and costs associated with external RADIUS servers.