Hi all, welcome back to our Network CI/CD blog series. In the previous posts, we covered what CI/CD is and why you need it for Network Automation. We also covered GitLab basics and how to set up your first pipeline. In this post, we’ll look into how to keep your credentials secure by hiding them from the repository and using GitLab variables. Let’s get to it!
GitLab Variables
In GitLab CI/CD, variables play an important role in managing dynamic values throughout your pipeline. These variables can store anything from environment-specific settings to sensitive information like credentials. By using variables, you can easily manage and change values without hardcoding them in your scripts or playbooks.
GitLab provides a secure way to store sensitive data such as passwords or API tokens. You can define these variables in your project’s Settings > CI/CD > Variables section, and they will be securely injected into your pipeline during runtime.
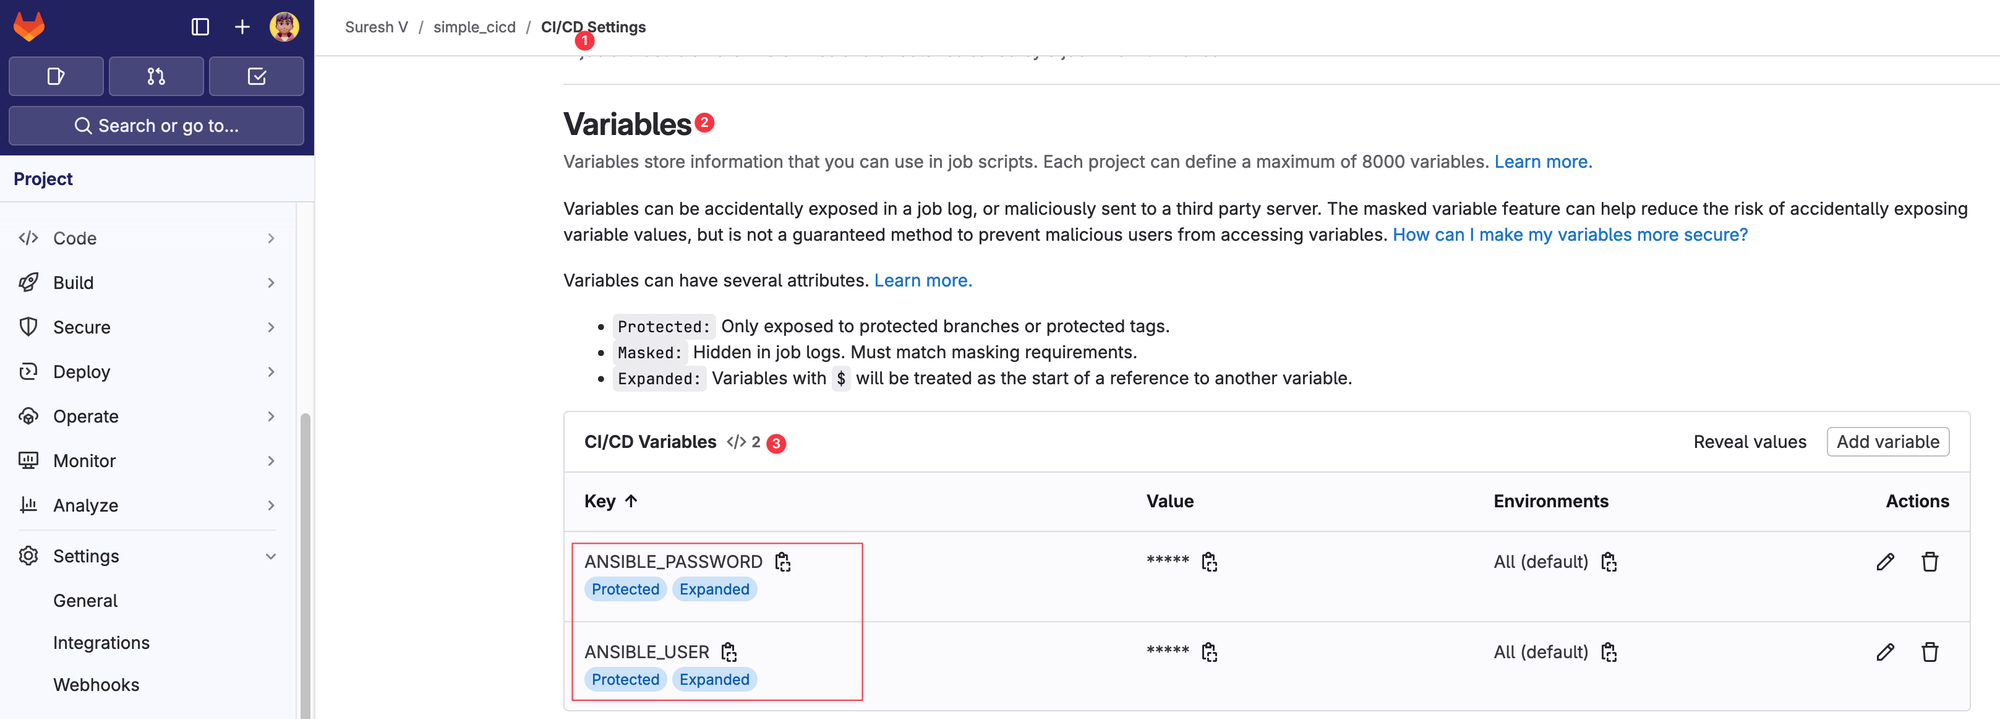
If you recall, in our previous examples, we had the username and password hardcoded in the Ansible variables file. This is not secure at all, and you should never expose sensitive information like credentials directly in your repository. By using GitLab variables, you can securely store these values in GitLab and reference the variable names in your playbooks or variables.
For example, here’s how you can update your switches.yml file to reference environment variables.
#switches.yml
---
ansible_connection: ansible.netcommon.network_cli
ansible_network_os: arista.eos.eos
ansible_become: yes
ansible_become_method: enable
ansible_user: "{{ lookup('env', 'ANSIBLE_USER') }}"
ansible_password: "{{ lookup('env', 'ANSIBLE_PASSWORD') }}"
ansible_become_password: "{{ lookup('env', 'ANSIBLE_PASSWORD') }}"
What is a 'Protected' Variable?
When we created the variable, you might have noticed that there was a tick box for 'Protected'. What exactly does that mean?
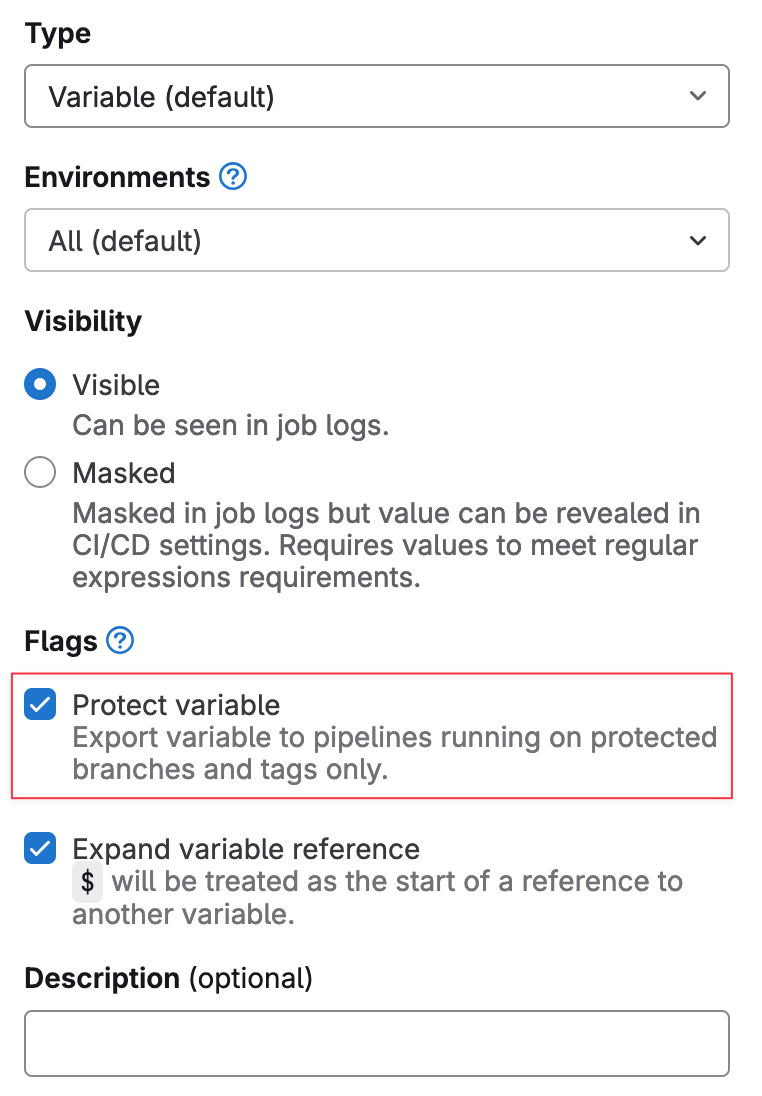
In GitLab, when you create a CI/CD variable, the “Protected” option determines which branches or tags the variable will be accessible to.
- Protected Variables - These are only available to protected branches and protected tags. Typically, protected branches are your production branches, like main or master, where you want to apply stricter controls. By marking a variable as protected, you ensure that it can only be used in pipelines running on those protected branches or tags. This prevents the variable from being used in pipelines triggered by unprotected branches, like feature branches or forks, which may not be as secure.
- Unprotected Variables - These can be accessed by pipelines running on any branch or tag in the project.
Adding Variables Inside Jobs
In GitLab CI/CD, you can also pass environment variables directly to your jobs. This is particularly useful when your scripts or commands expect certain environment variables to be set. You can define these variables inside specific jobs, and they will be available only for those jobs during the pipeline execution.
For example, if one of your Python scripts requires an environment variable, you can pass it to the job where the script is executed.
stages:
  - deploy

deploy_job:
  stage: deploy
  variables:
    DRY_RUN: "True"
  script:
    - echo "Running deploy job"
    - python3 deploy_script.py
In your Python script (deploy_script.py), you can access the environment variable using the os module
import os

dry_run = os.environ.get('DRY_RUN')
This can be useful when you want to use different variables at different stages of your pipeline. For example, you might want to set dry_run=True during the test stage to simulate the deployment without making any actual changes and then set dry_run=False during the deploy stage to execute the changes for real.
This approach allows you to control the behaviour of your scripts dynamically, ensuring that different stages of your pipeline behave as expected.
 Suresh Vina