Hi all, welcome back to our Network CI/CD blog series. In this part, we’ll discuss what exactly GitLab is and the role it plays in the whole CI/CD process. We’ll explore how to use GitLab as a Git repository, how to install GitLab runners, and how to write a GitLab CI/CD pipeline, among other topics. So let’s get to it.
Prerequisites
Before we proceed, let’s go over some prerequisites. This part of the series assumes you have some familiarity with Git, Ansible, and basic Docker concepts. I’m not an expert in any of these, but I have a basic understanding of what each tool does and how to configure and use them. Even if you’re not very familiar, you can still follow along as we go step by step.
Using GitLab as a Git Repo
Git is a version control system that allows you to track changes to your code, collaborate with others, and manage different versions of your projects. It's a fundamental tool for network automation that works with code or configuration files.
 Suresh Vina
GitLab is a platform built around Git that provides a web interface for managing your Git repositories, along with additional tools for CI/CD, issue tracking, and more. It’s similar to other platforms like GitHub or BitBucket but with its own set of features. There are two main variants of GitLab
- GitLab.com - A managed solution, similar to GitHub, where you don’t need to worry about the infrastructure, GitLab takes care of everything for you.
- Self-Managed GitLab - This option allows you to install and manage your own GitLab instance on your servers, giving you full control over your environment.
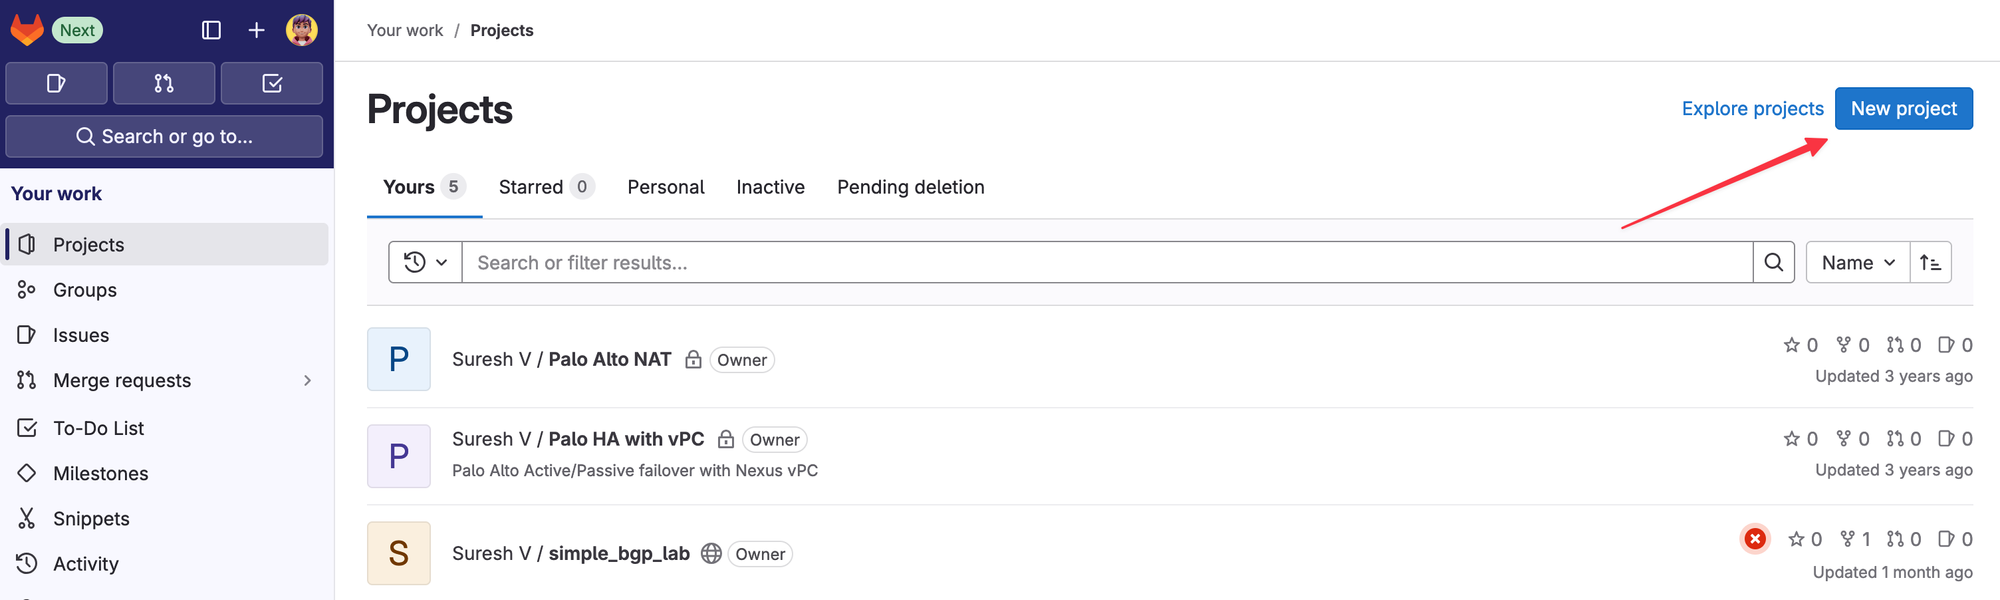
For this blog series, we will focus solely on GitLab.com, the managed solution, to keep things simple. Please note that I've already created an account on GitLab.com, set up a repository, and cloned it locally to my laptop. My Ansible files are stored in this repository. If you want to clone it and follow along, here is the link.


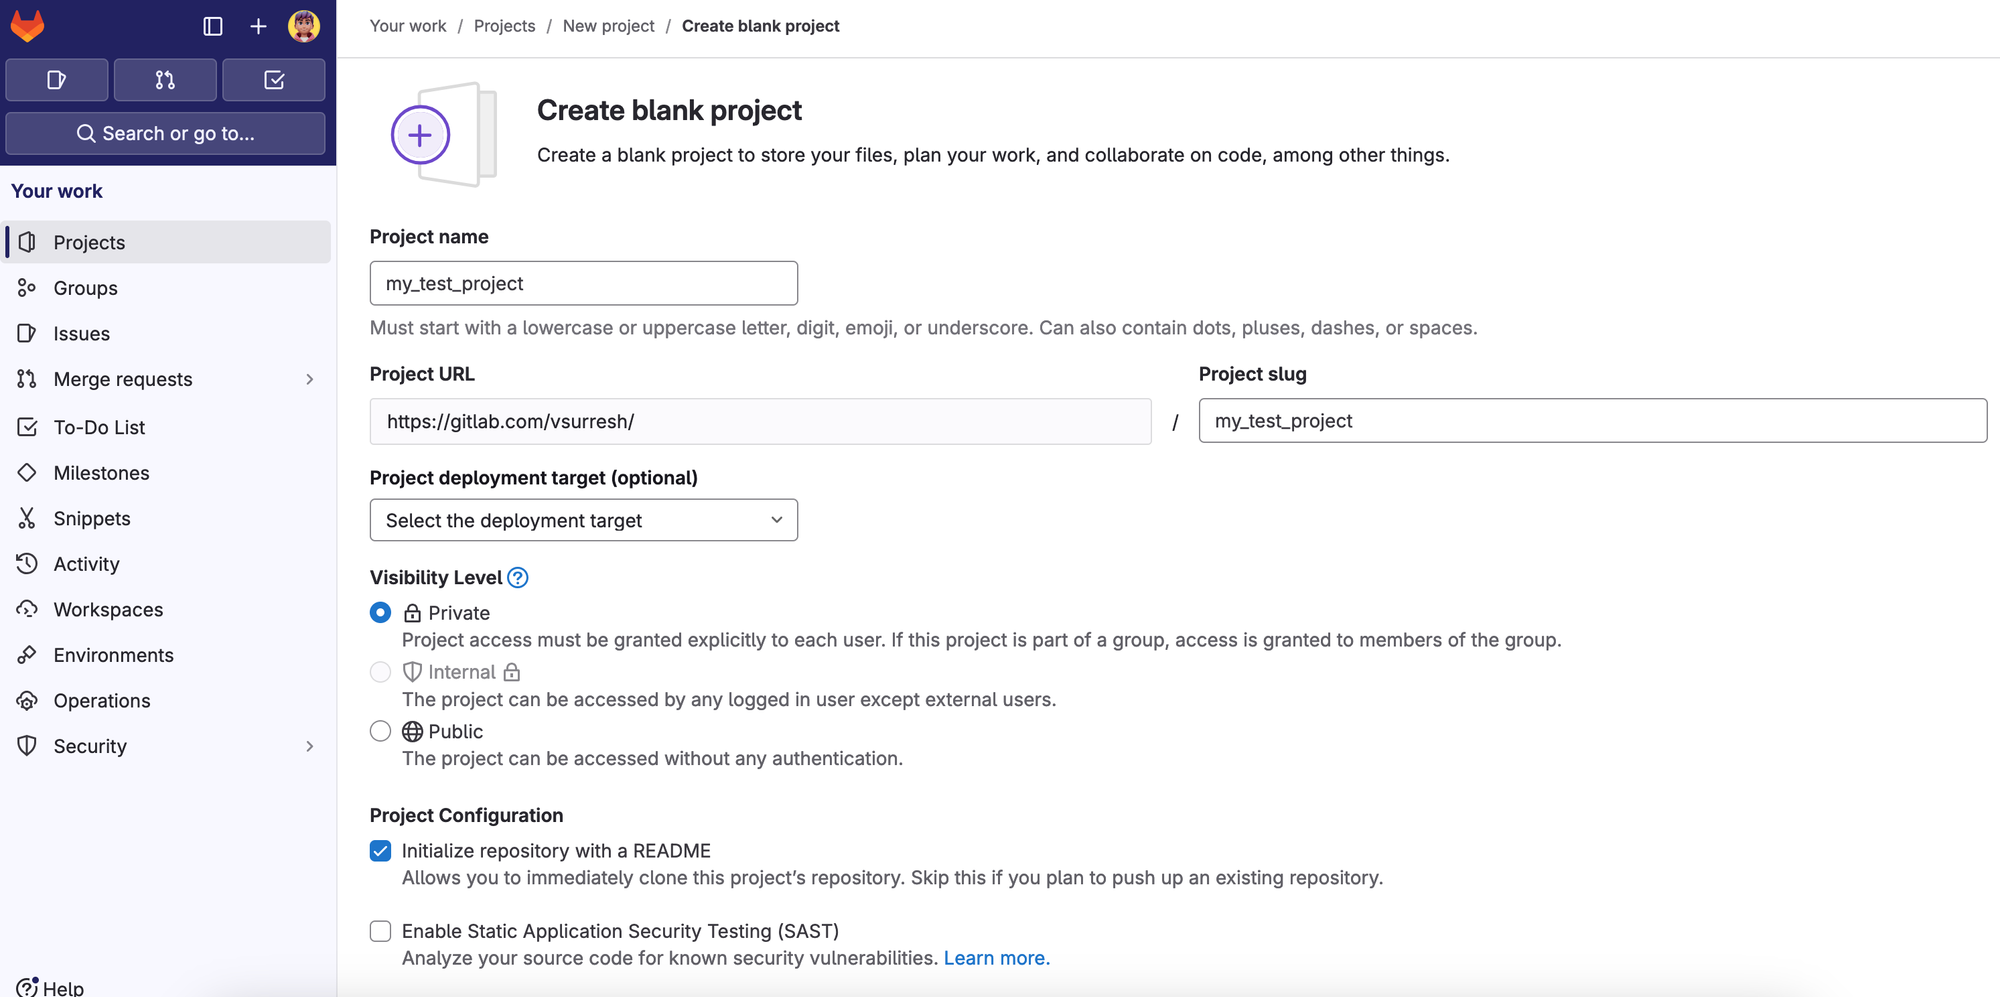
If you want to create your own project, click on 'New Project' On the next screen, give it a name, choose whether it should be private or public, and that's it. It's similar to creating a project in any other Git repository platform, like GitHub or BitBucket.
GitLab Runners
GitLab Runners are the engines that execute the tasks in your CI/CD pipelines. They handle jobs such as running tests or deploying code. When you push code to your GitLab repository, the runner pulls that code and executes the pipeline tasks in a predefined environment.
Simply put, you can think of a runner as the machine that runs the commands and scripts. Instead of you running them locally on your laptop, you have a centralized server (called a runner) do this for you. There are three types of GitLab Runners.
- Instance Runner - This runner is available to all projects within your entire GitLab instance. It can be shared across multiple projects.
- Group Runner - This type of runner is shared across all projects within a specific group in GitLab. If you have multiple related projects under one group, a group runner can execute jobs for any project within that group.
- Project Runner - A project runner is dedicated to a single project. It will only execute jobs for that particular project.
For this example, we are using a Project Runner, which is registered to handle CI/CD jobs for a single project.
Installing GitLab Runner in Ubuntu 22.04 Server
I’m going to install GitLab Runner on an Ubuntu 22.04 server. The server is a fresh installation, with Docker already installed. Once the server is up and ready, installing GitLab Runner is as simple as downloading the package file and installing it.
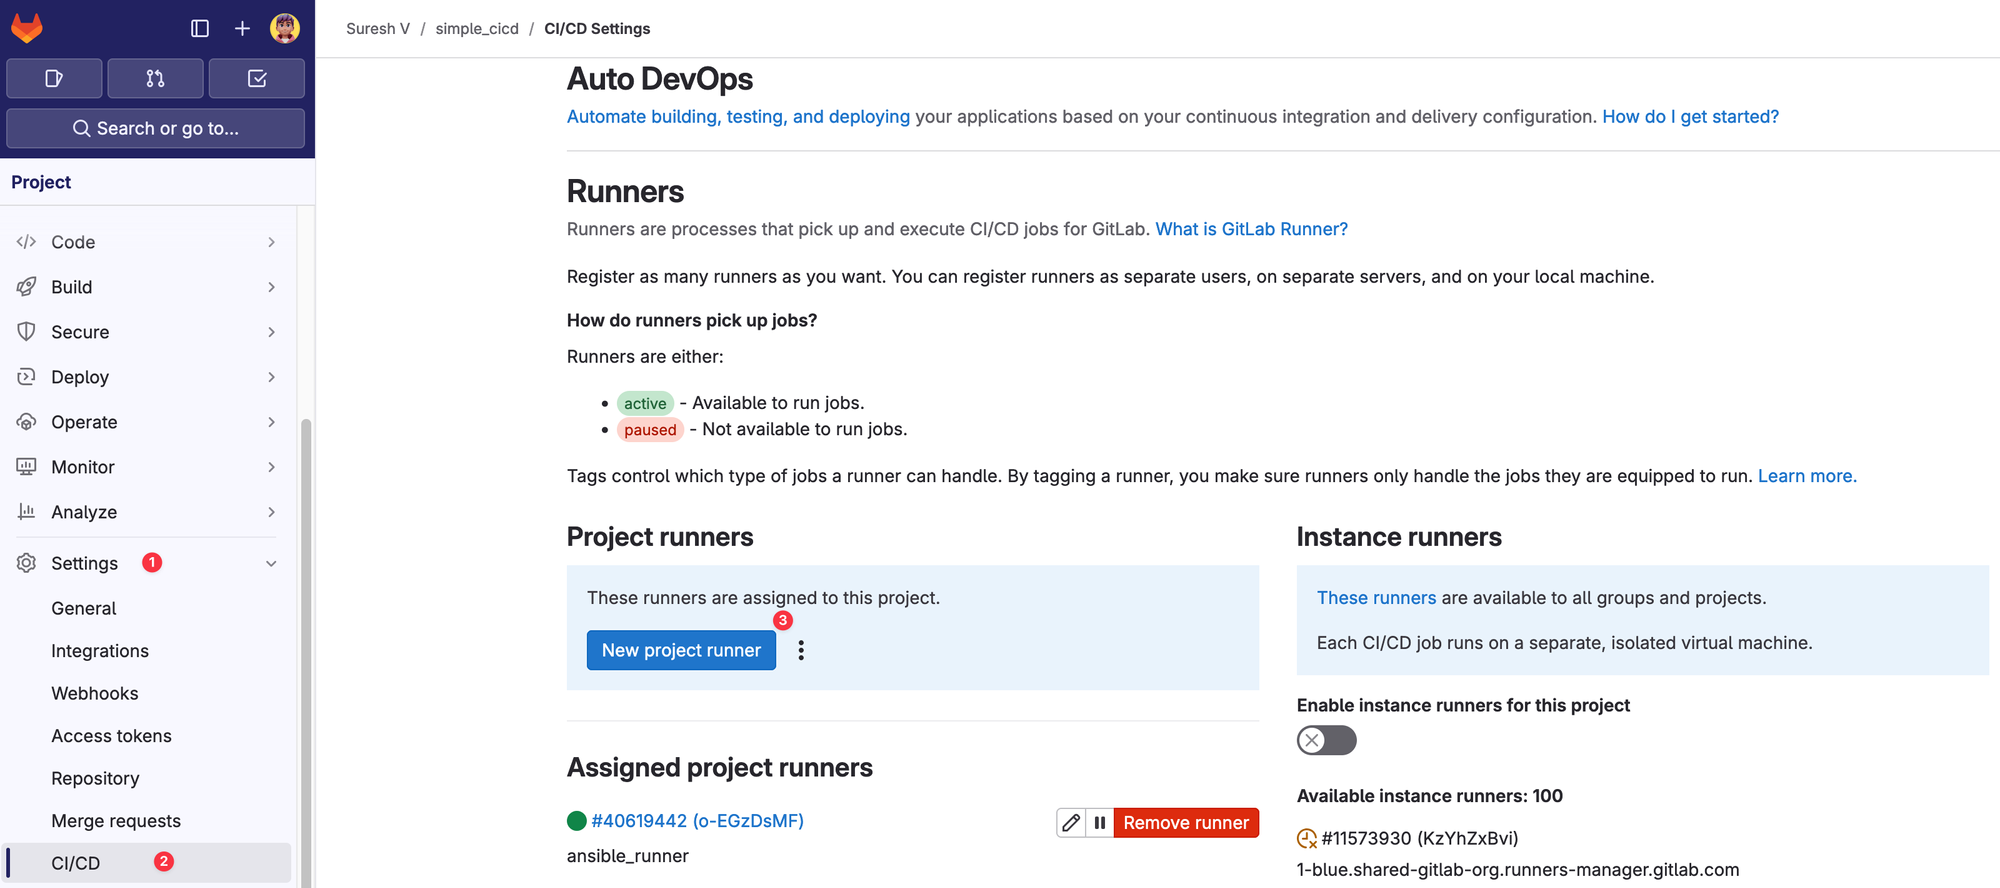
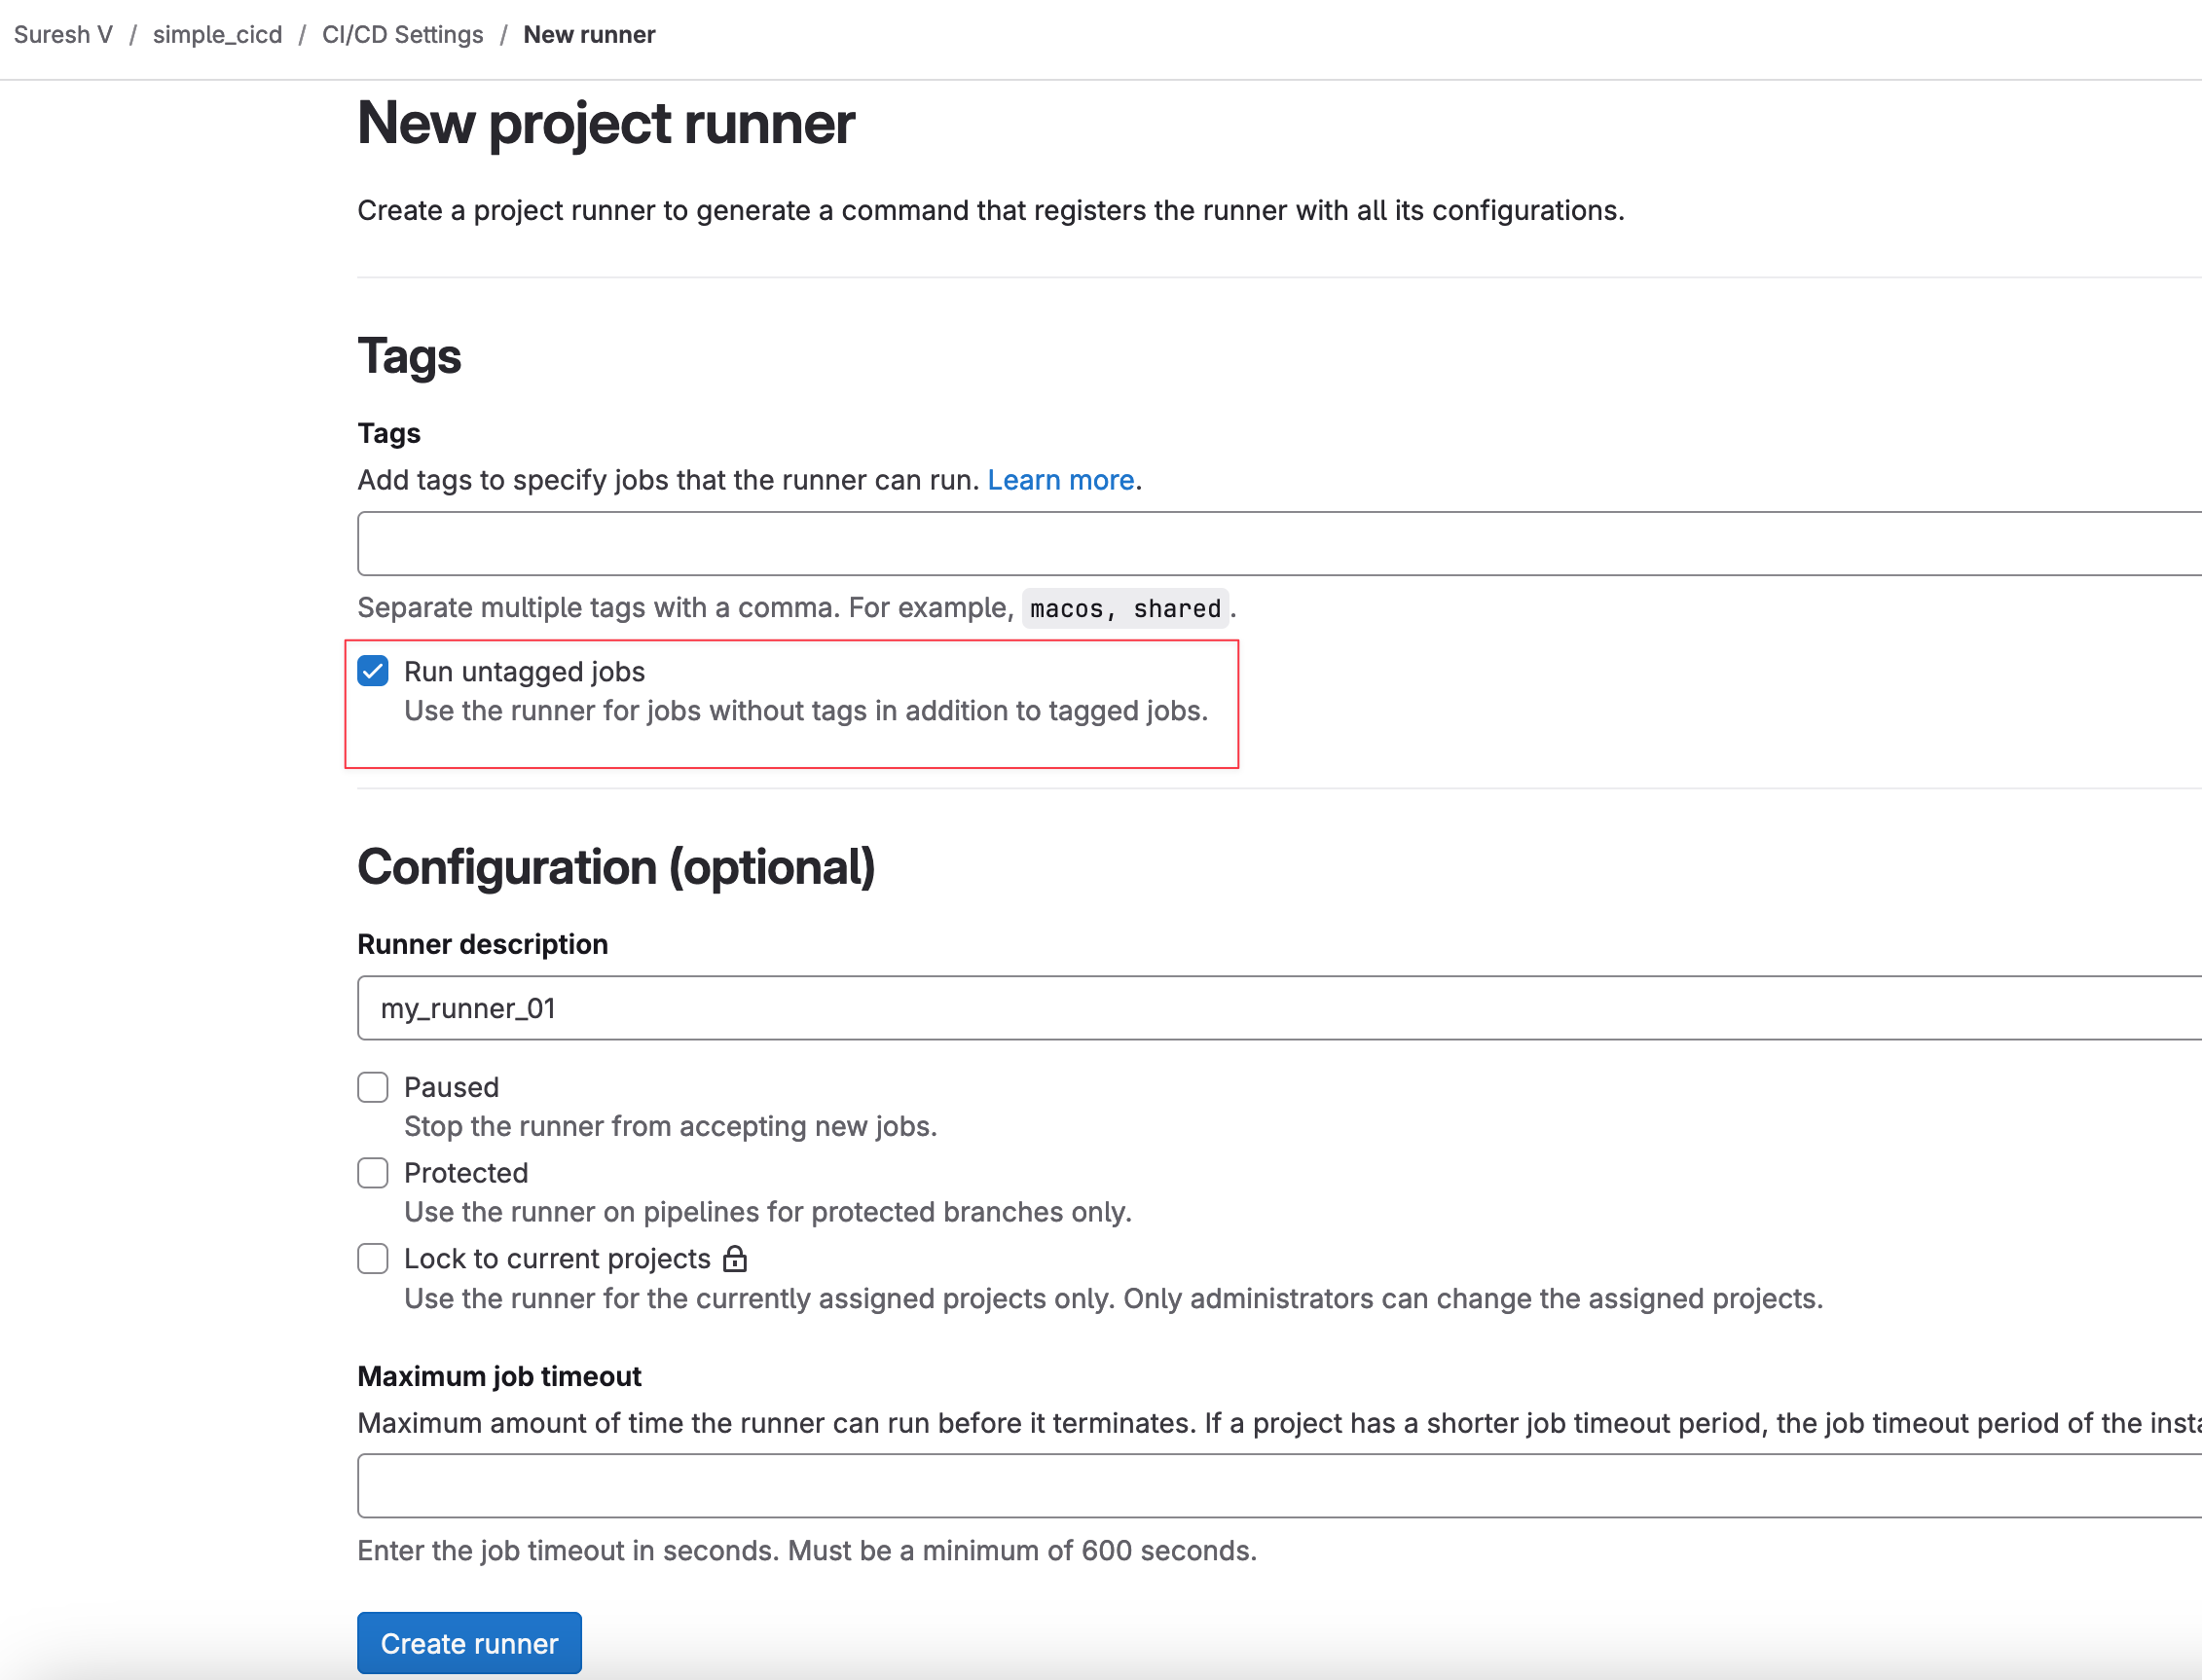
curl -LJO "https://s3.dualstack.us-east-1.amazonaws.com/gitlab-runner-downloads/latest/deb/gitlab-runner_amd64.deb"sudo dpkg -i gitlab-runner_amd64.debNext, once the GitLab Runner is installed, navigate to GitLab > your project > Settings > CI/CD > Runners and select New Project Runner. Here, you can add specific tags, so only jobs with those tags will use this runner. However, in this example, I’m selecting the option to Run untagged jobs.
On the next screen, you can also select the platform. Since I’m using a Linux server, I’ll choose Linux. GitLab provides instructions on how to register the runner. There are two key commands to run, gitlab- runner register and gitlab-runner run
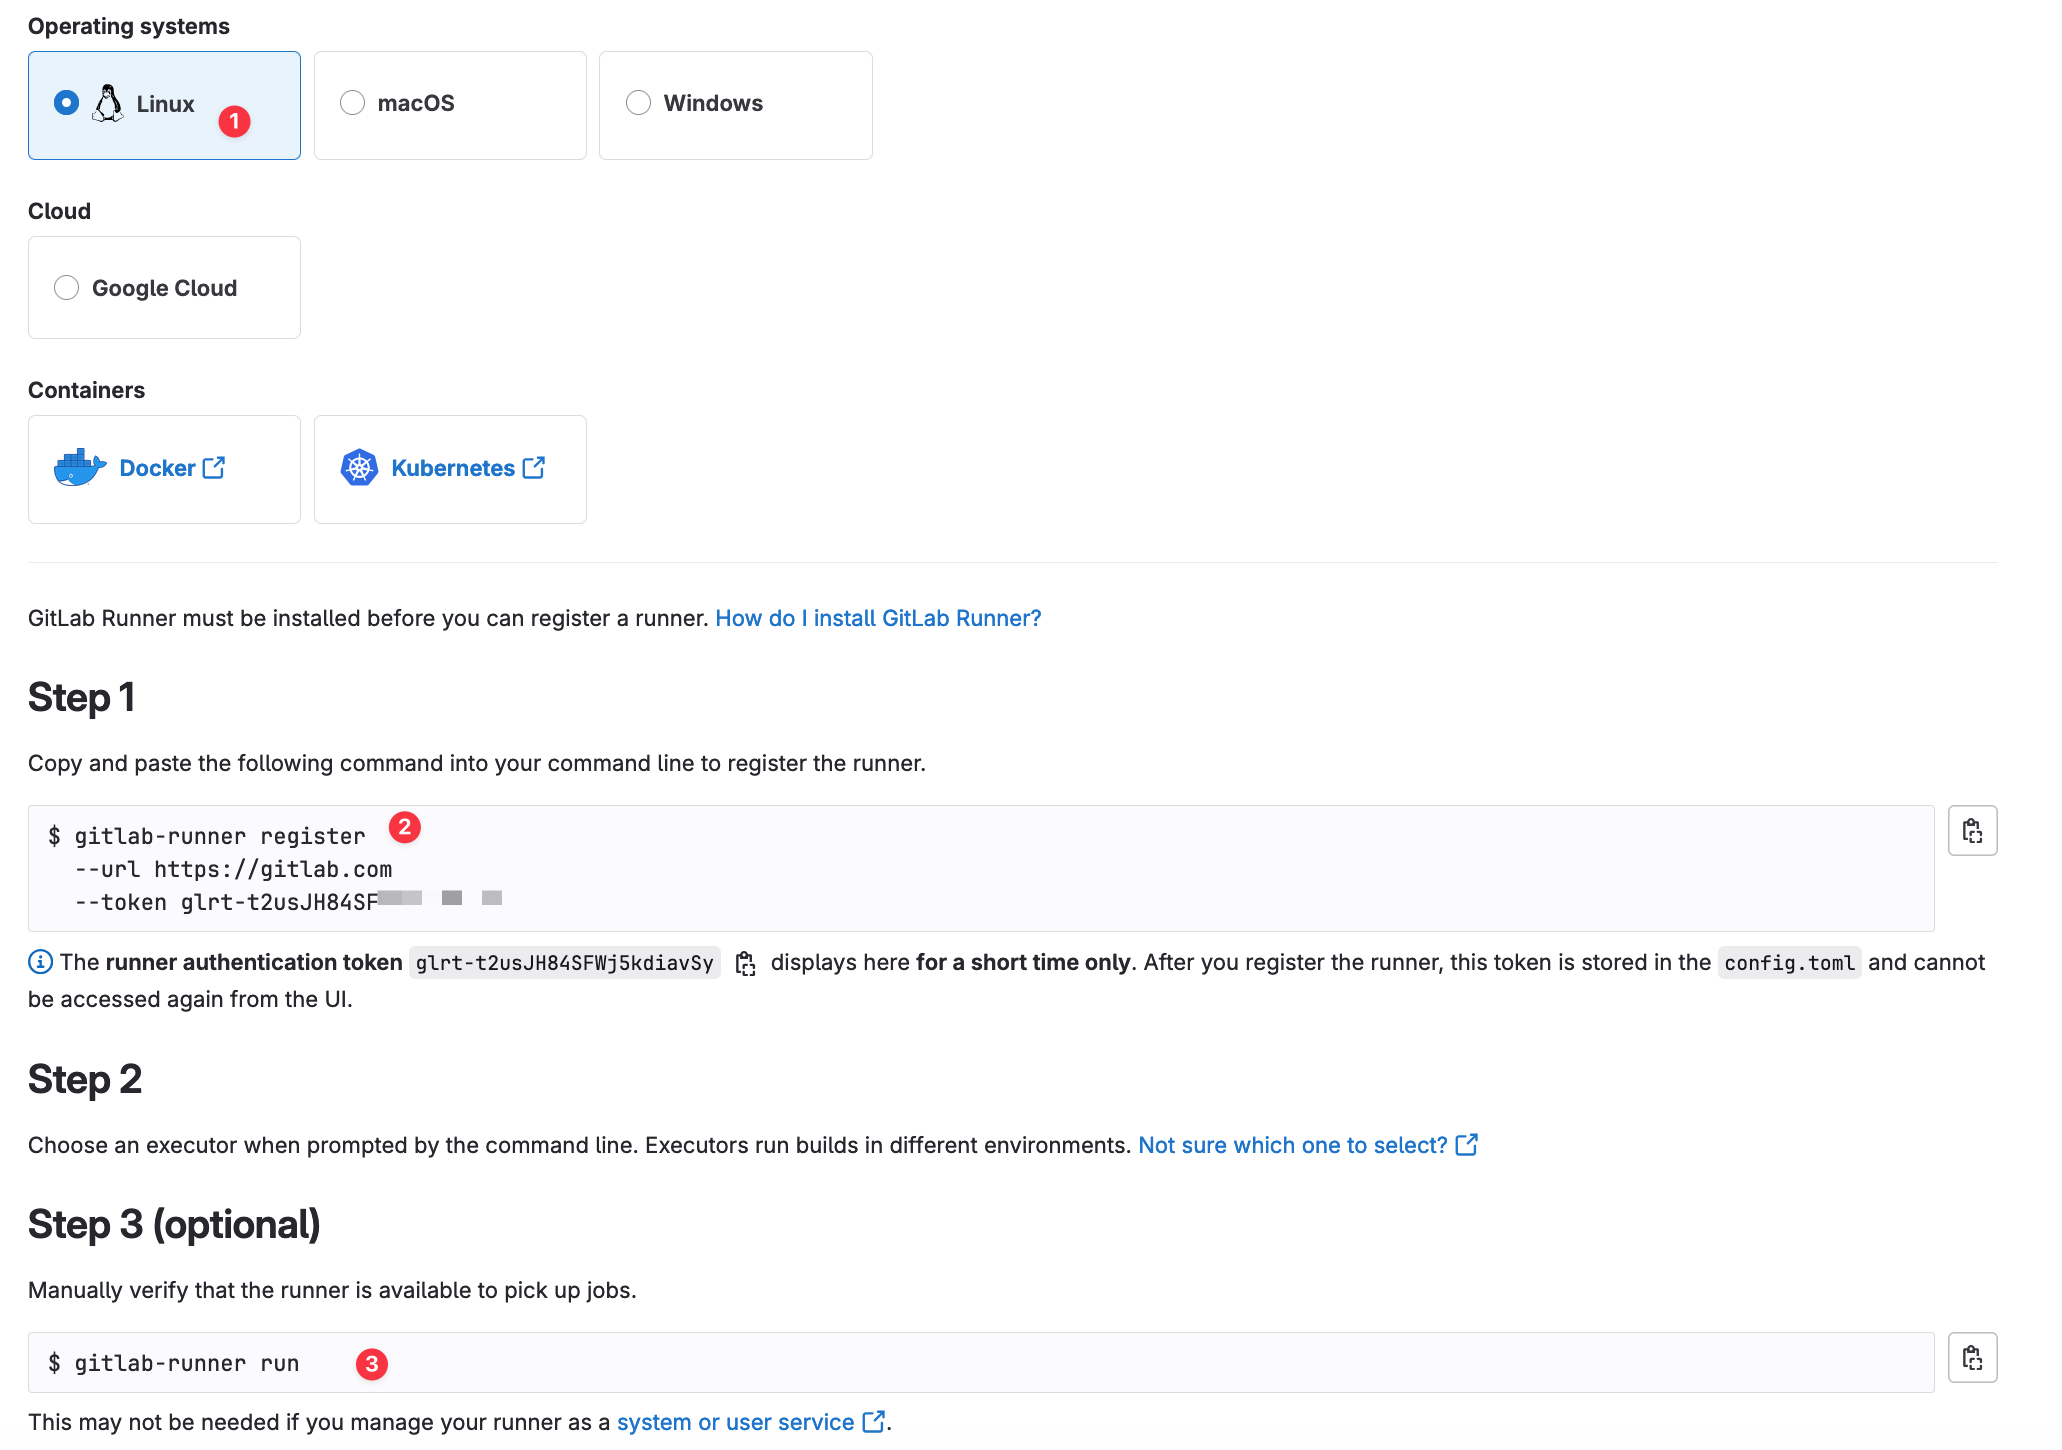
gitlab-runner register --url https://gitlab.com --token glrt-t2usJH84SFWDuring the GitLab Runner registration process, you will be prompted to choose an executor. I'm going with the 'docker' executor.
Enter an executor: parallels, virtualbox, docker-windows, docker+machine, kubernetes, instance, custom, shell, ssh, docker, docker-autoscaler:
docker

Enter the default Docker image (for example, ruby:2.7):
python:3
Runner registered successfully. Feel free to start it, but if it's running already the config should be automatically reloaded!
What is an Executor?
An executor is the environment in which your jobs will run. GitLab Runners support different types of executors, and each one determines how the job will be executed.
- Docker Executor - When you choose the Docker executor, each job runs in a Docker container based on the image you specify (in this case, python:3). This provides an isolated and consistent environment for your tasks. The advantage of using Docker is that you can easily define the environment with all necessary dependencies without affecting the host machine.
- Shell Executor - If you choose the shell executor, the job will execute directly on the host machine where the runner is installed. This means that the tasks are run in the native environment of the server, without the isolation that a Docker container provides. While this can be simpler in some cases, it also means that any changes or dependencies could potentially affect the server.
By selecting the Docker executor in our example, we ensure that each job runs in an isolated environment, which reduces the risk of interference between jobs and keeps our runner host clean.
Once this is done, just start gitlab-runner by running the following command.
gitlab-runner runFollowing these steps will complete the setup, and your runner will be ready to execute the CI/CD jobs for your project. If everything goes well, you will see a green icon next to your runner's ID.

Let's Look at Our Ansible Playbook
Before proceeding, let’s have a quick look at our Ansible setup. I have a minimal configuration with two playbooks. One for pre-testing and one for actually creating the VLANs. I’ve also separated the VLAN definitions from the playbook and stored them as variables. Here’s a brief overview of the directory structure and files.
.
├── ansible.cfg
├── create_vlan.yml
├── group_vars
│   └── switches.yaml
├── inventory
│   └── hostfile.ini
├── pre_test.yml
└── vlans.yml
• ansible.cfg - Configuration file for Ansible settings.
• create_vlan.yml - The playbook responsible for creating VLANs.
• group_vars/switches.yaml - Variables related to the network switches.
• inventory/hostfile.ini - The inventory file defining the target devices.
• pre_test.yml - The playbook used for pre-testing, such as validating VLAN IDs.
• vlans.yml - A separate YAML file that defines the VLANs to be configured.
#ansible.cfg

[defaults]
host_key_checking = False
inventory = inventory/hostfile.ini
#switches.yml
---
ansible_connection: ansible.netcommon.network_cli
ansible_network_os: arista.eos.eos
ansible_become: yes
ansible_become_method: enable
ansible_user: admin
ansible_password: admin
ansible_become_password: admin#hostfile.ini
[switches]
aggr-01 ansible_host=192.168.100.100
aggr-02 ansible_host=192.168.100.101
access-01 ansible_host=192.168.100.102
access-02 ansible_host=192.168.100.103#vlans.yml
vlans:
- vlan_id: 10
name: cctv
- vlan_id: 11
name: voip#pre-test.yml
- name: "VLAN Validation Playbook"
hosts: localhost
gather_facts: no
vars_files:
- vlans.yml
tasks:
- name: Validate VLAN IDs are between 1 and 100
assert:
that:
- vlan.vlan_id >= 10
- vlan.vlan_id <= 100
loop: "{{ vlans }}"
loop_control:
loop_var: vlan#create_vlan.yml
- name: "VLAN Playbook"
hosts: switches
gather_facts: no
vars_files:
- vlans.yml
tasks:
- name: Create VLANs
arista.eos.eos_vlans:
config: "{{ vlans }}"Creating a '.gitlab-ci.yml' File
To use GitLab CI/CD, you start with a .gitlab-ci.yml file at the root of your project. This file specifies the stages, jobs, and scripts to be executed during your CI/CD pipeline. It is a YAML file with its own custom syntax.
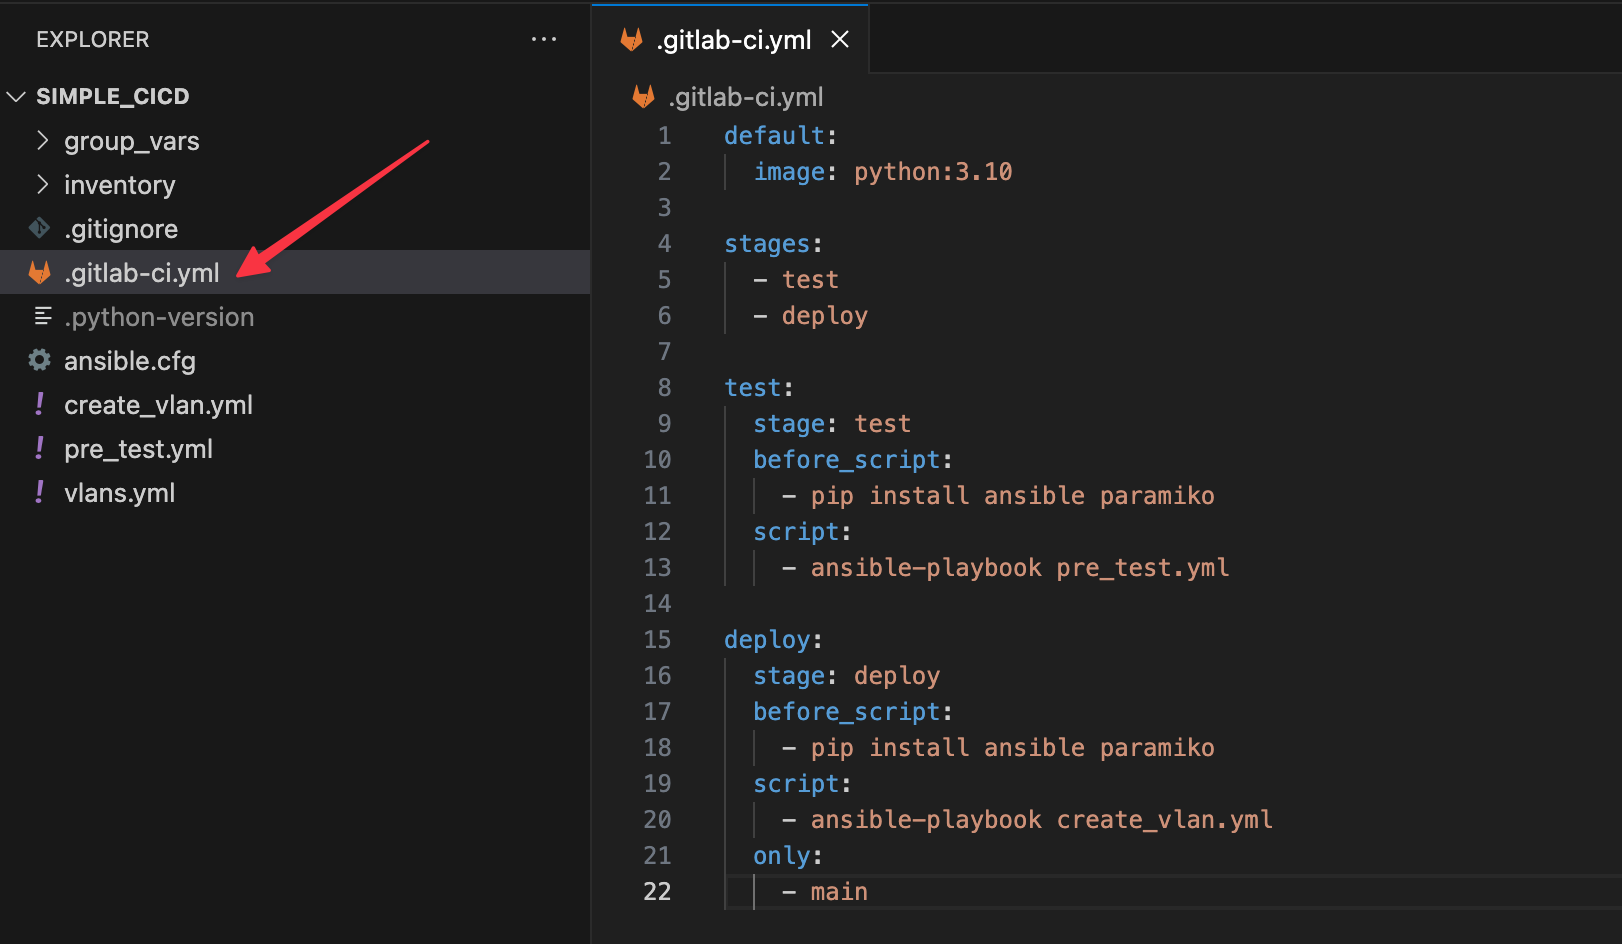
In this file, you define variables and dependencies between jobs and specify when and how each job should be executed.
For our example, we are defining two stages. One for the pre-test and the other for deploying the actual configuration. As mentioned in the previous post, stages are essentially the phases of your pipeline, executed in a specified order. In this case, the ‘test’ stage will run first, followed by the ‘deploy’ stage, provided that the test passes.
default:
  image: python:3.10

stages:
  - test
  - deploy

test:
  stage: test
  before_script:
    - pip install ansible paramiko
  script:
    - ansible-playbook pre_test.yml

deploy:
  stage: deploy
  before_script:
    - pip install ansible paramiko
  script:
    - ansible-playbook create_vlan.yml
  only:
    - main
The .gitlab-ci.yml file starts with the default keyword, where we specify the Docker image that will be used as the environment for our jobs. Here, we are using the python:3.10 image, which provides a pre-configured Python environment inside a Docker container. This image ensures that every job runs in a clean and consistent environment, with Python 3.10 available to run Ansible and other scripts.
Each job in the pipeline corresponds to a section in the YAML file. The test job belongs to the test stage, and before it executes the main task, it installs the required dependencies, Ansible and Paramiko, using the before_script section. After the dependencies are installed, the script runs the Ansible playbook pre_test.yml, which validates the VLAN configurations and makes sure the VLAN-ID is between 10 and 100 (this is just a simple check to demonstrate different stages)
Similarly, the deploy job is part of the deploy stage. Like the test job, it also installs the necessary dependencies first, and then it runs the main script, which is the create_vlan.yml playbook that actually configures the VLANs on the network. We’ve added an only condition to this job, specifying that it should only run on the main branch. This ensures that deployment only happens when changes are merged into the main branch, preventing accidental deployments from other branches.
In this setup, stages control the flow of jobs, and jobs represent the actual tasks that need to be executed. The Docker image ensures consistency across environments, and the pipeline is automatically triggered when you push code to your GitLab repository.
It's Show Time
Let me demonstrate an example by creating a new VLAN. This involves creating a feature branch, making the necessary changes (adding a new vlan 12), committing them, and pushing the feature branch to GitLab. This action will trigger the pipeline, but it will only run the ‘test’ stage because, as mentioned earlier, the ‘deploy’ stage is set to run only from the ‘main’ branch.
➜  simple_cicd git:(main) git checkout -b vlan_12
Switched to a new branch 'vlan_12'
➜  simple_cicd git:(vlan_12) ✗ git status
On branch vlan_12
Changes not staged for commit:
  (use "git add <file>..." to update what will be committed)
  (use "git restore <file>..." to discard changes in working directory)
        modified:   vlans.yml

➜  simple_cicd git:(vlan_12) ✗ git add vlans.yml
➜  simple_cicd git:(vlan_12) ✗ git commit -m "adding vlan 12"

➜  simple_cicd git:(vlan_12) git push origin vlan_12
remote:
To gitlab.com:vsurresh/simple_cicd.git
 * [new branch]      vlan_12 -> vlan_12
➜  simple_cicd git:(vlan_12)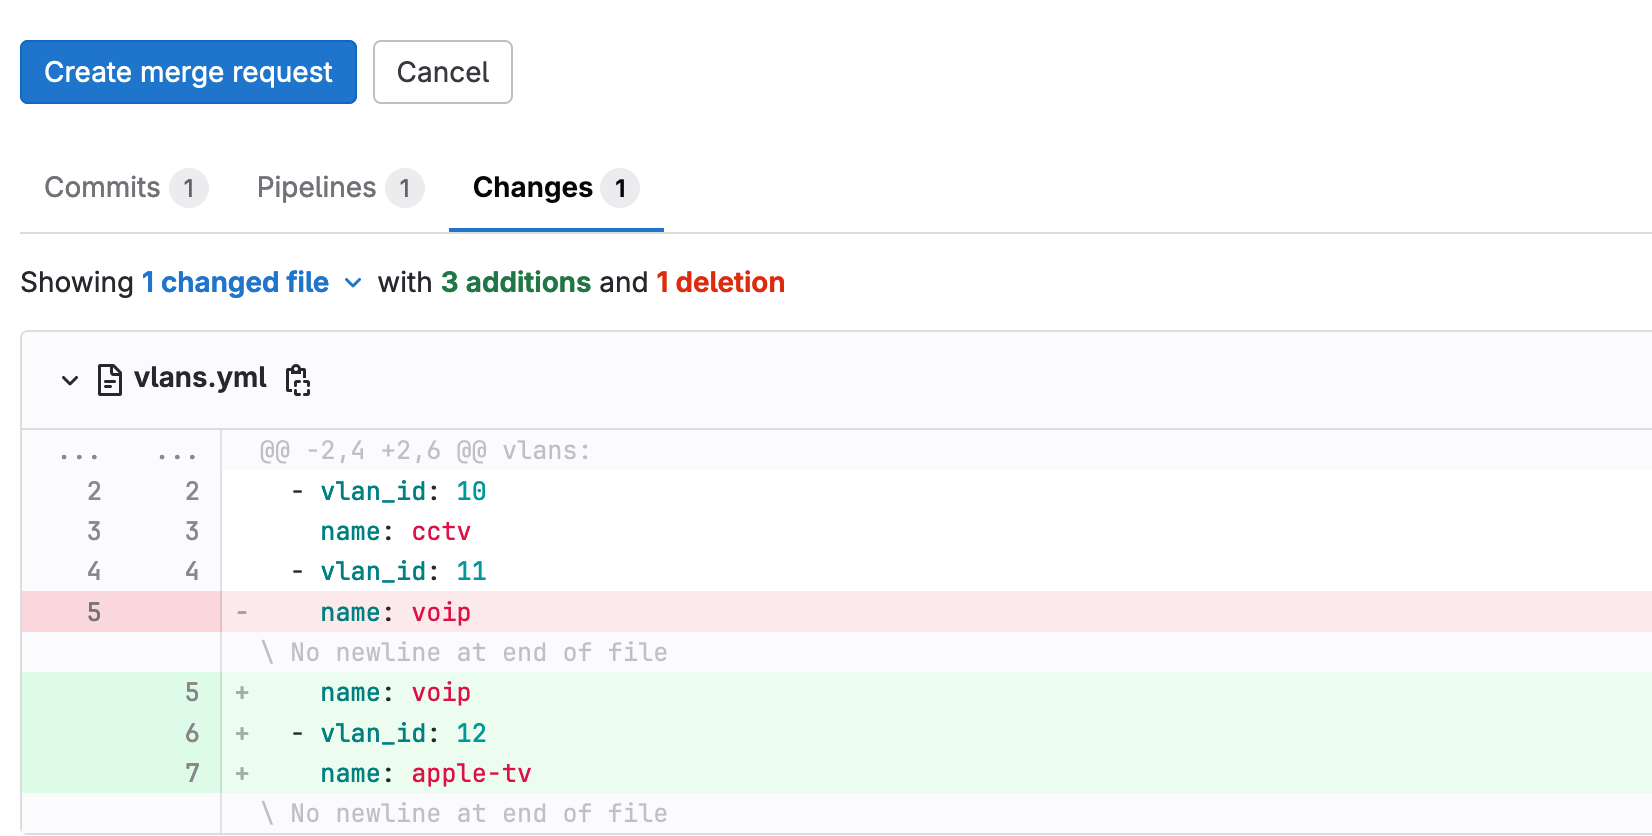
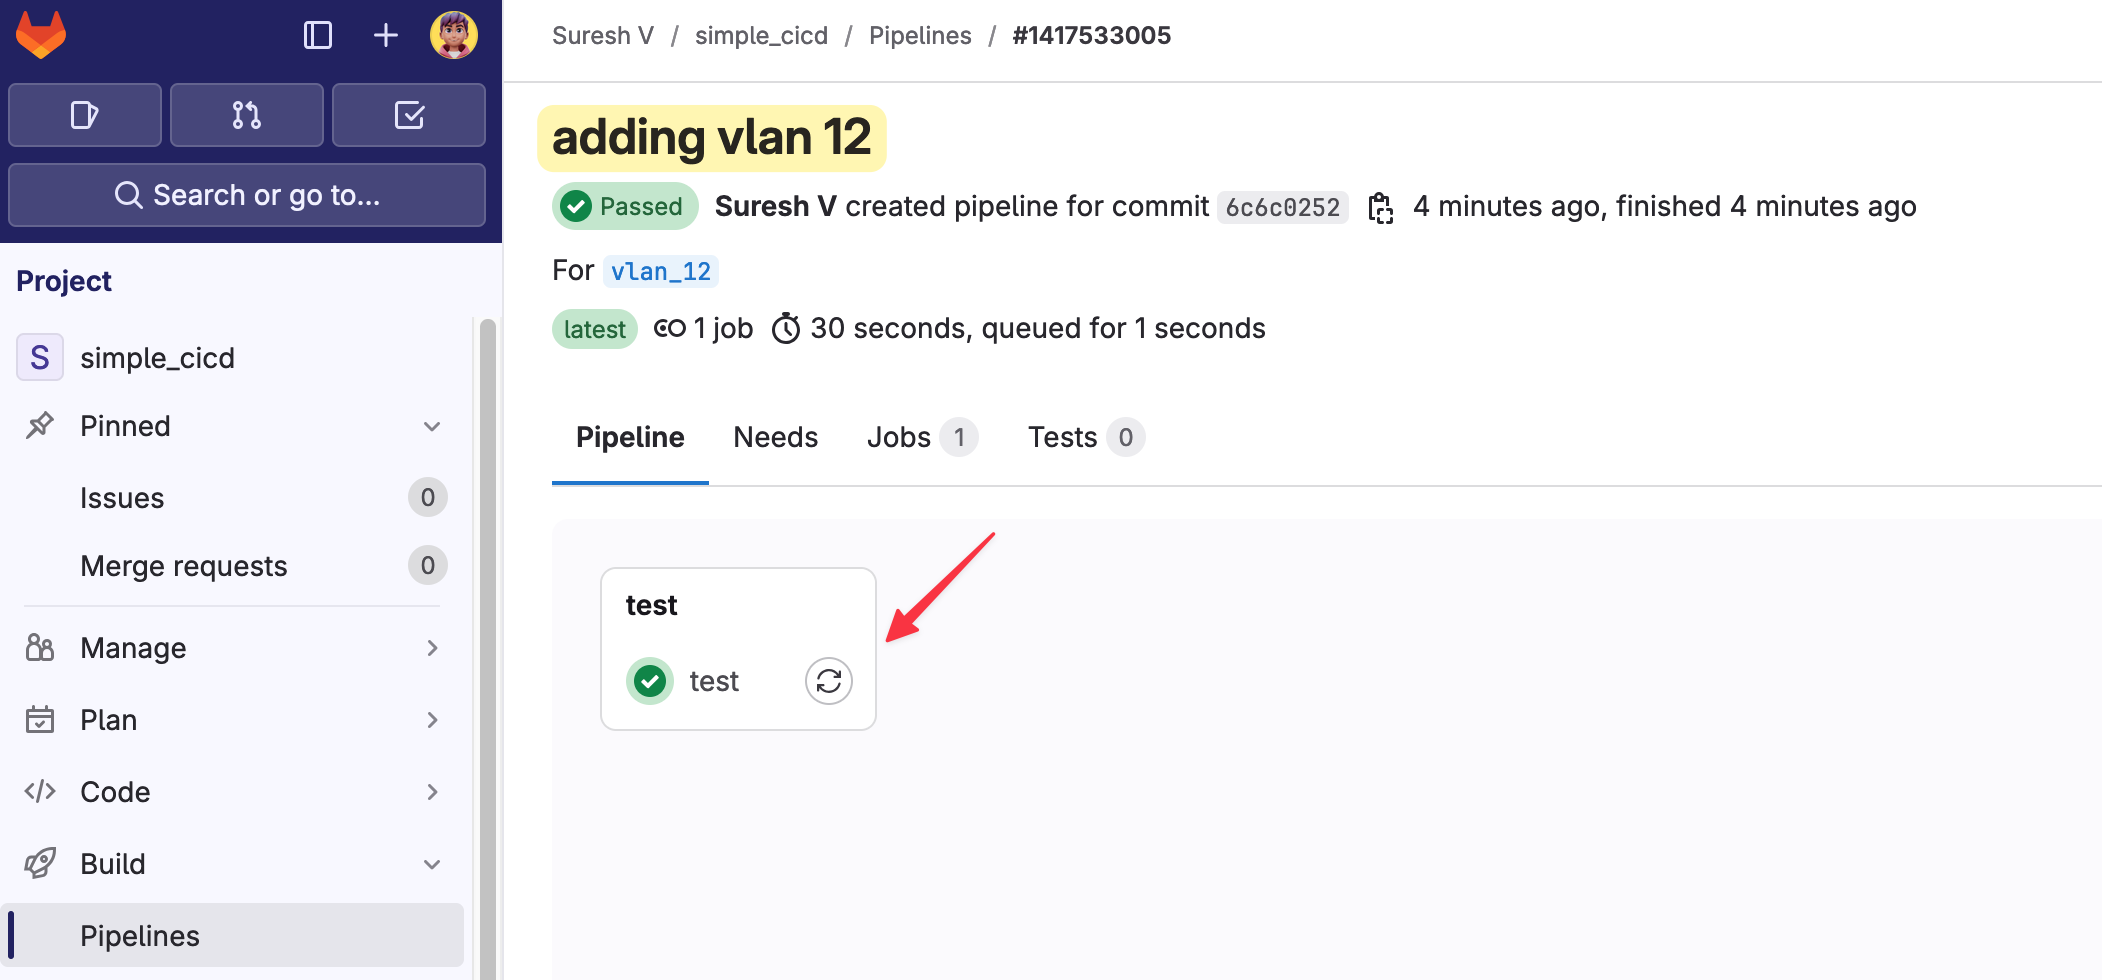
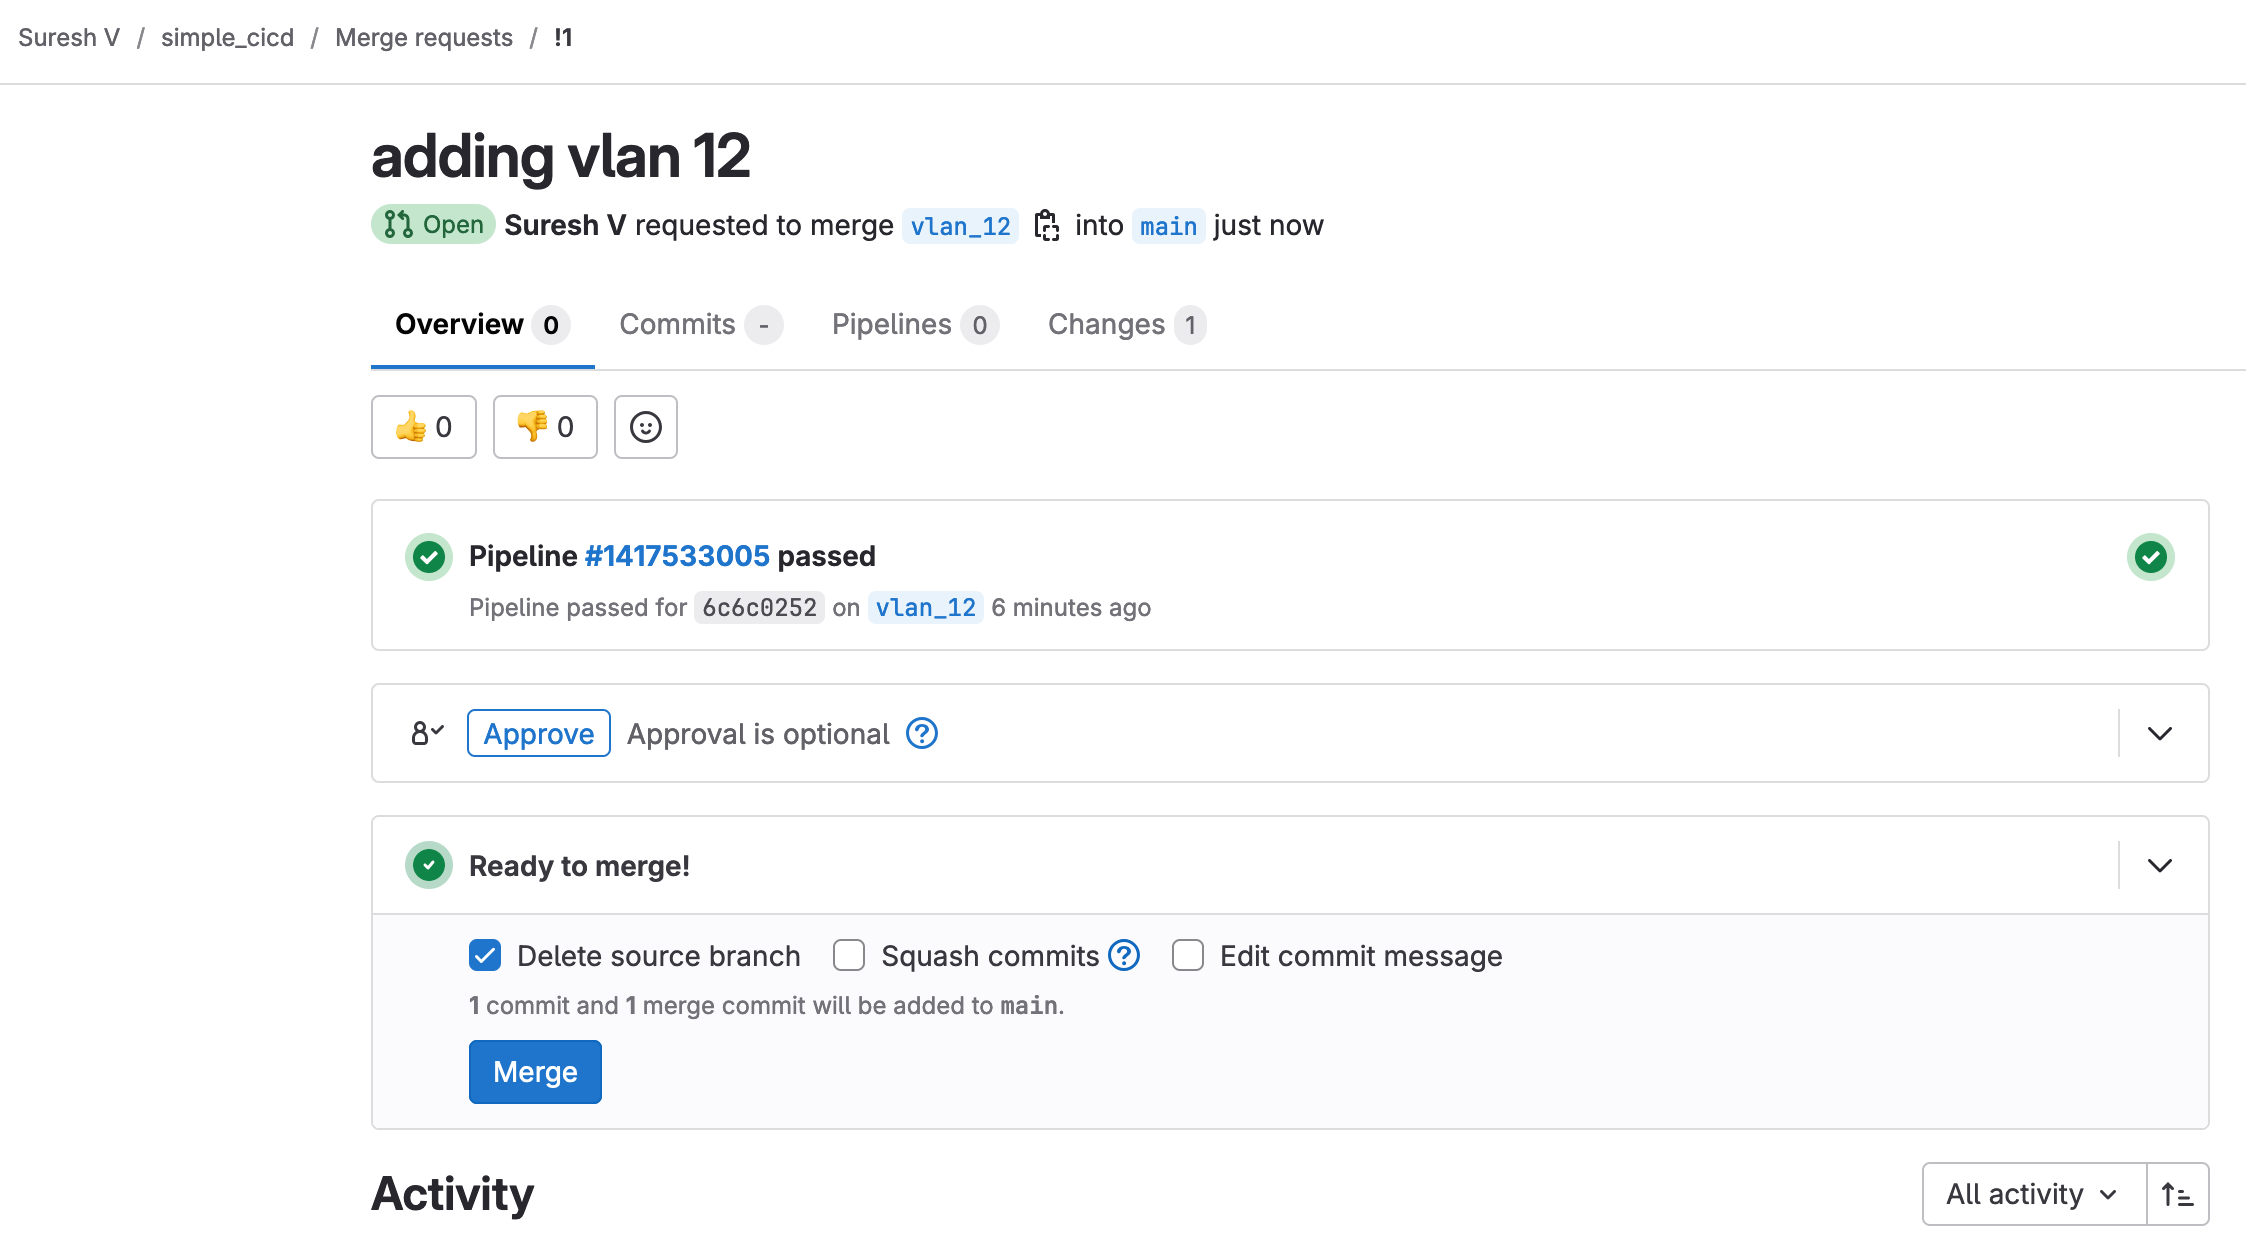
If the test passes successfully (as indicated by the green plus icon), we can then create a merge request to merge the feature branch into the main branch.
When I create a merge request, I can ask someone to review it. Since the test has already passed, the reviewer doesn’t need to check everything manually and can approve the merge request more confidently.
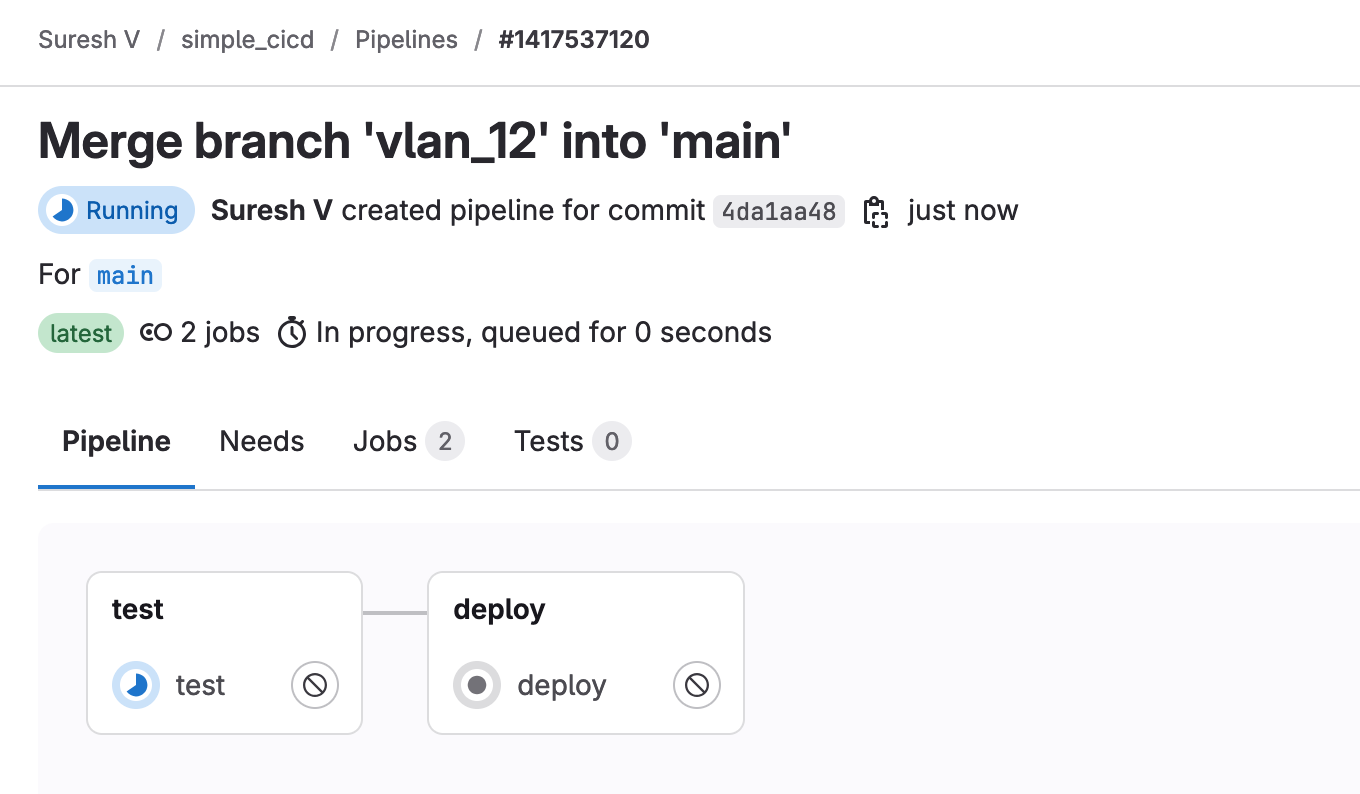
As soon as the merge request is approved, it triggers the pipeline again as shown below. This time, it runs both the ‘test’ and ‘deploy’ stages. The test stage ensures that everything is still valid, and if it passes, the deployment stage pushes the VLAN configuration to the network.

I hope this all makes sense to you now, and you can see the benefits of using CI/CD in network automation. By integrating testing and deployment into an automated pipeline, we reduce the chances of errors and make the whole process more efficient.
If you have any questions or feedback, please feel free to let me know in the comments. I'm happy to help!