Hi all, welcome back to another Palo Alto Firewall blog post. In this post, we will explore how to add a VM-Series Firewall into VMWare Workstation, set up the interfaces, and make initial configurations. This guide is designed for beginners who want to try the Palo Alto Firewall in their home lab but aren’t sure where to start.
Download the Image from the Palo Alto Portal
The first step is to download the image from the Palo Alto Customer Support Portal. To do this, you will need a valid support contract, as sharing the image with others is not allowed. I understand this can be frustrating, as it may seem like vendors make it difficult for users to access and use their products. However, if you use Palo Alto products at work, you might be able to download it there.
To download the required file, navigate to Updates > Software Updates in the portal. Look for the PA-VM section and download the file named PA-VM-ESX-10.1.3.ova (note that the version might differ).
Do I Need a License?
You don’t need any licenses or registration with Palo Alto Networks to try out most of the features on the VM-Series Firewall. You can configure security policies, NAT, Site-to-Site VPN, and GlobalProtect VPN without needing a license. Of course, if you plan to run this in a production environment, you absolutely need the appropriate licenses. However, for learning and testing in your home lab, you can explore and experiment without any licensing requirements.
Prepare VMWare Workstation
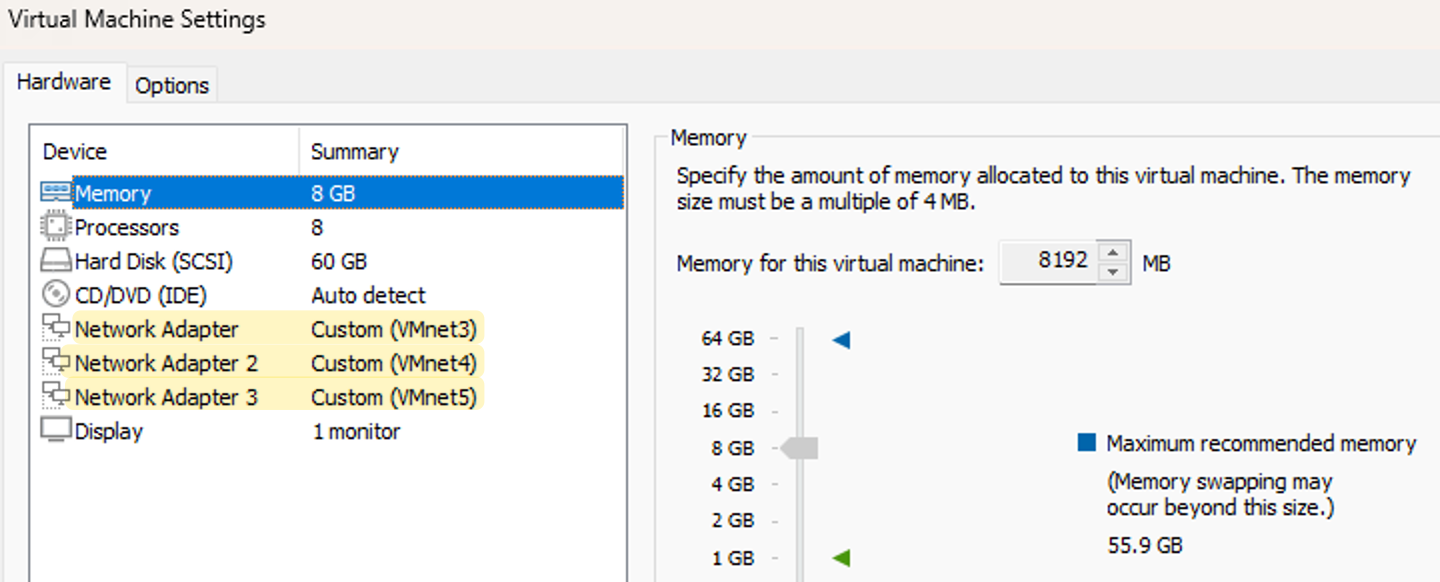
When setting up the Palo Alto Firewall in VMWare Workstation, I usually allocate 8 GB of RAM, 60 GB of disk space, and 8 CPU processors. However, you can use as few as 4 processors if needed. The key consideration is the configuration of the network interfaces.
Network Interfaces
In a typical home lab server, you may have only one physical interface that connects to your local network. For example, my physical network is 10.10.0.0/16. To test the firewall to its full potential, you need at least two data interfaces and a management interface. The management interface is for accessing the firewall GUI or using SSH, while the data interfaces allow you to experiment with features like setting up firewall rules or NAT policies.
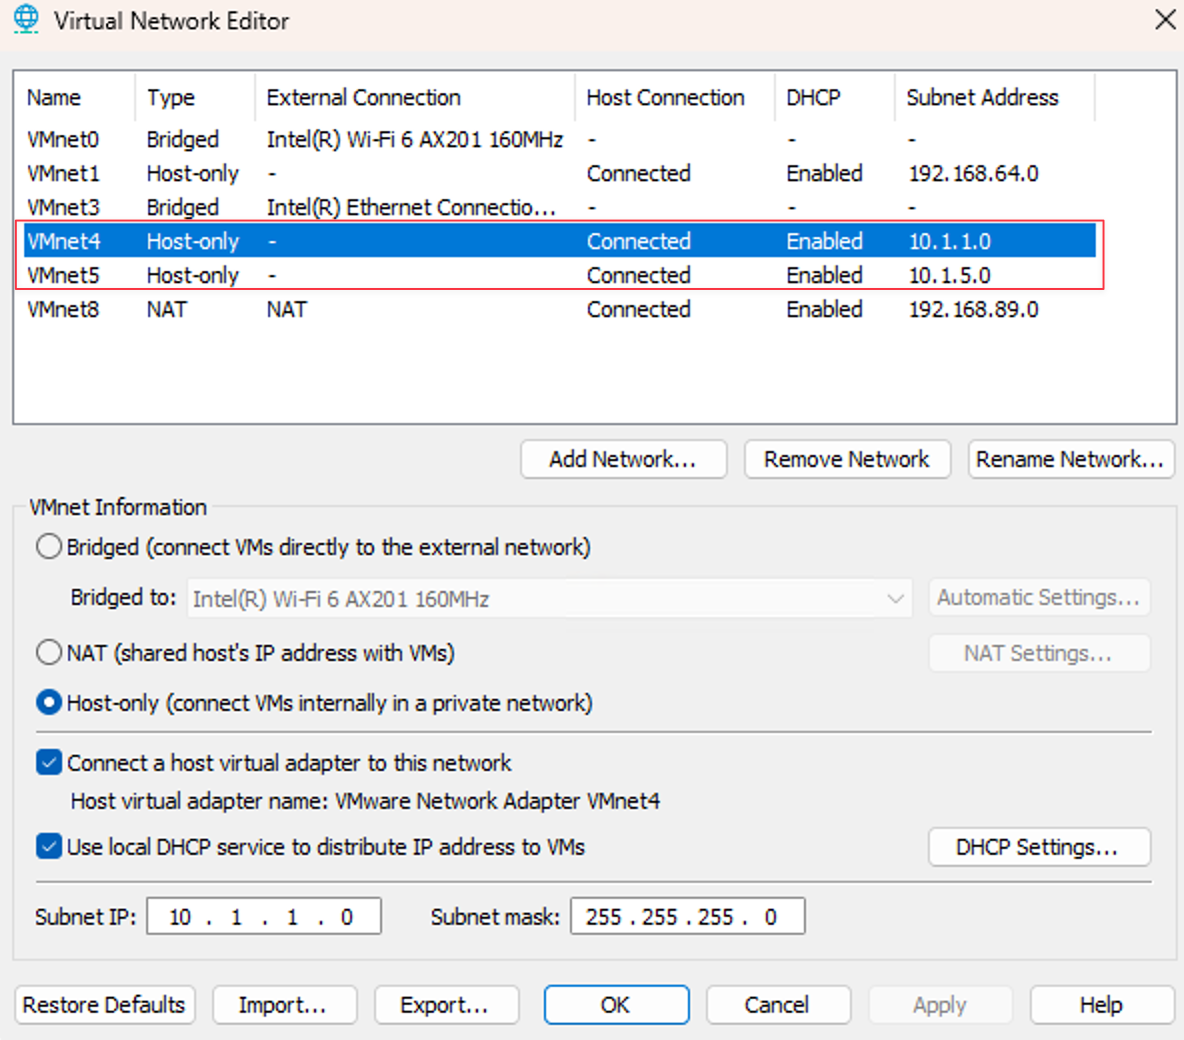
So, how can you manage multiple interfaces if your host machine has only one physical interface? VMWare Workstation enables you to create multiple virtual interfaces. You can easily create two more interfaces within VMWare Workstation without attaching them to a physical interface. Once you’ve set up the firewall, you can add clients behind it by launching a new VM, such as Windows 10. In the VM settings, attach the VM to one of the virtual NICs you created. This way, the Windows 10 VM connects to the firewall via the virtual NIC.
In our setup, I will create two virtual NICs as shown below. We will map these two interfaces to two of Palo's data interfaces (Eth1/1 and Eth1/2 for example)

Management Interface
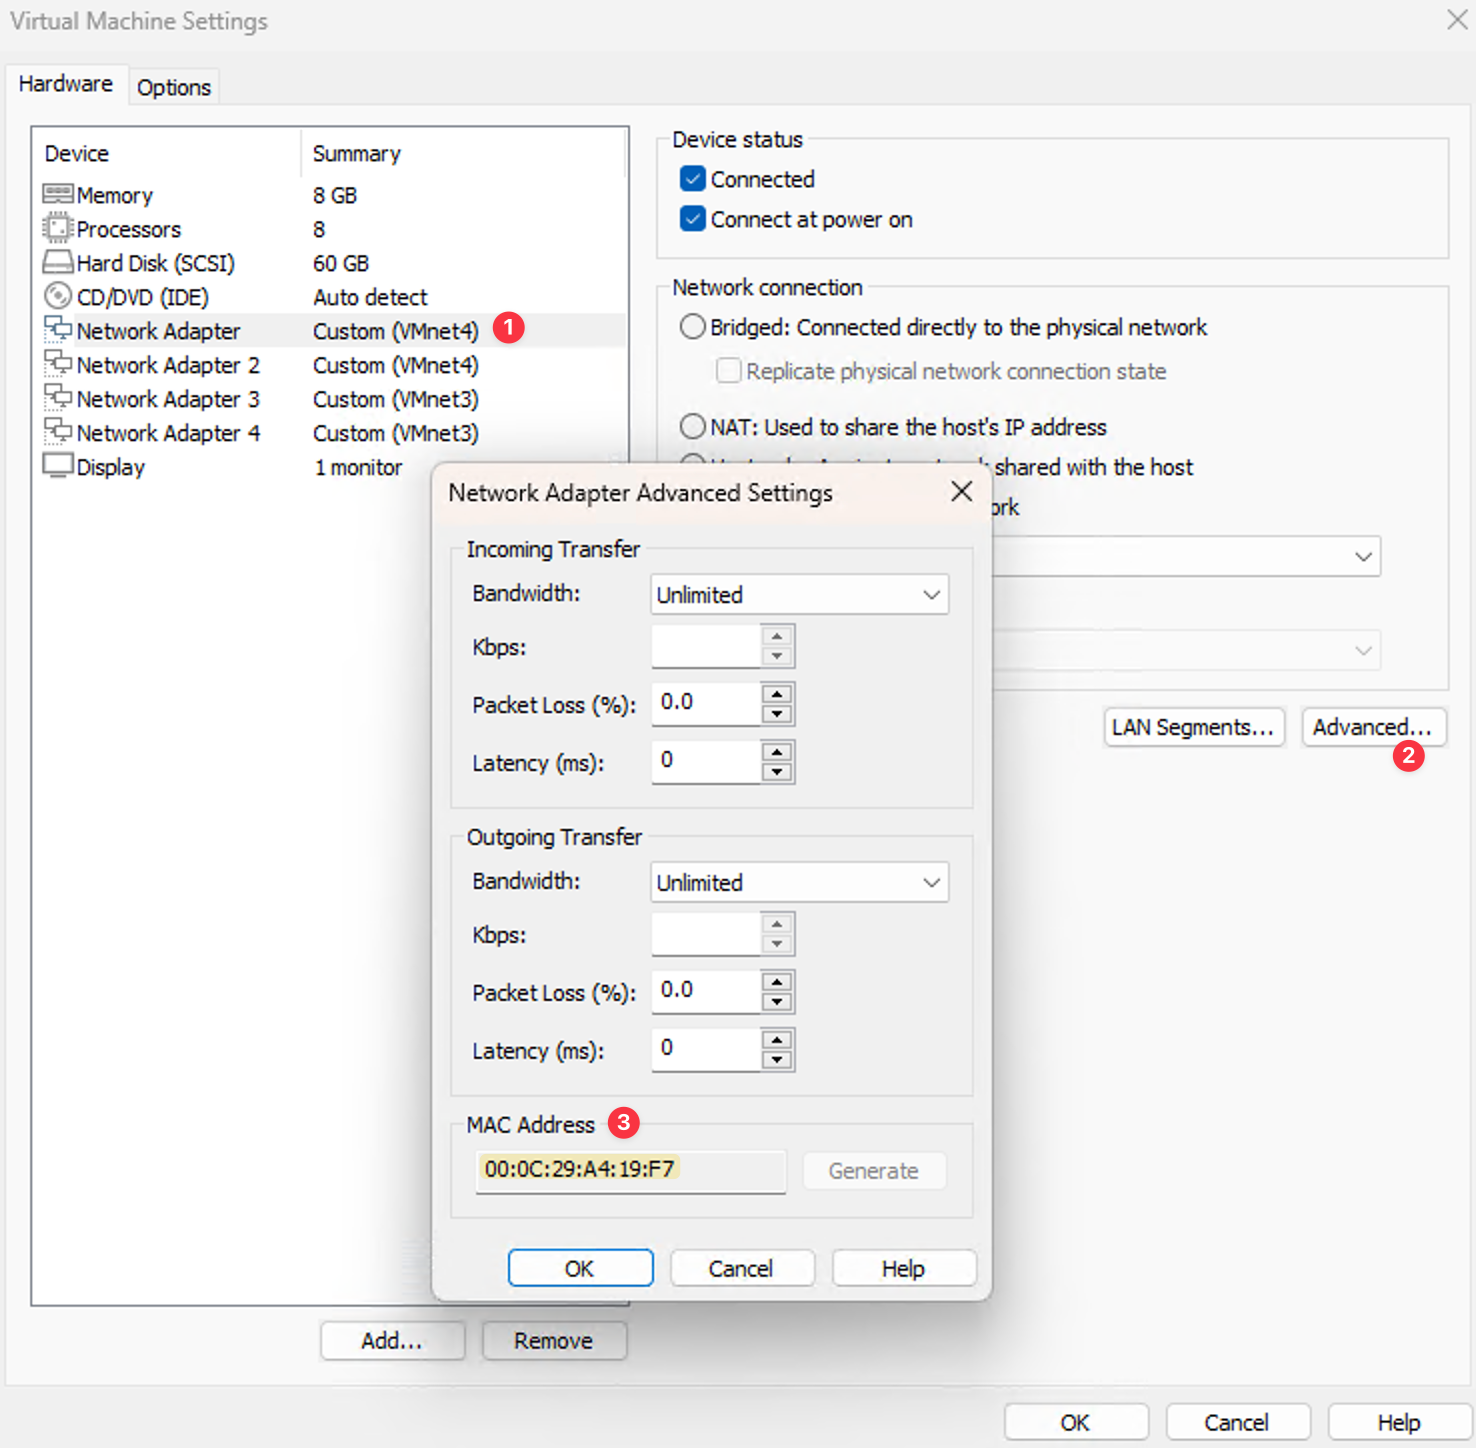
By default, the first network interface you attach to the Palo Alto VM is mapped to the management interface. This is crucial to remember because the order of attachment is important. Always attach your physical interface as the first interface in the VM so you can access the GUI. This setup ensures you can easily manage the firewall settings and configurations through the web interface or SSH.
Launching the Firewall
Now that we’ve covered the prerequisites, launching the firewall is as simple as opening the OVA file we downloaded. Once this is complete, you can edit the VM settings. This is where you configure the RAM, storage, CPU, and, importantly, the network adapters.
In the screenshot below, you can see I have three interfaces configured. The first one is for management and maps to my physical NIC, while the other two are connected to the virtual NICs.
Powering on Initial Configurations
Once you’ve configured the VM settings, power it on and wait for it to boot. When you see the login screen on the console, log in using the default credentials admin/admin.
To enter configuration mode on the CLI, type configure. Next, add a static IP, gateway, and DNS to your management interface. After you’ve made these changes, type commit to apply them.
admin@fw# set deviceconfig system ip-address <ip address> netmask <netmask> default-gateway <default gateway> dns-setting servers primary <DNS ip address>
admin@fw# commitOnce the commit process is complete, you should be able to log in to the GUI via https://<your_IP>
Configure Interfaces
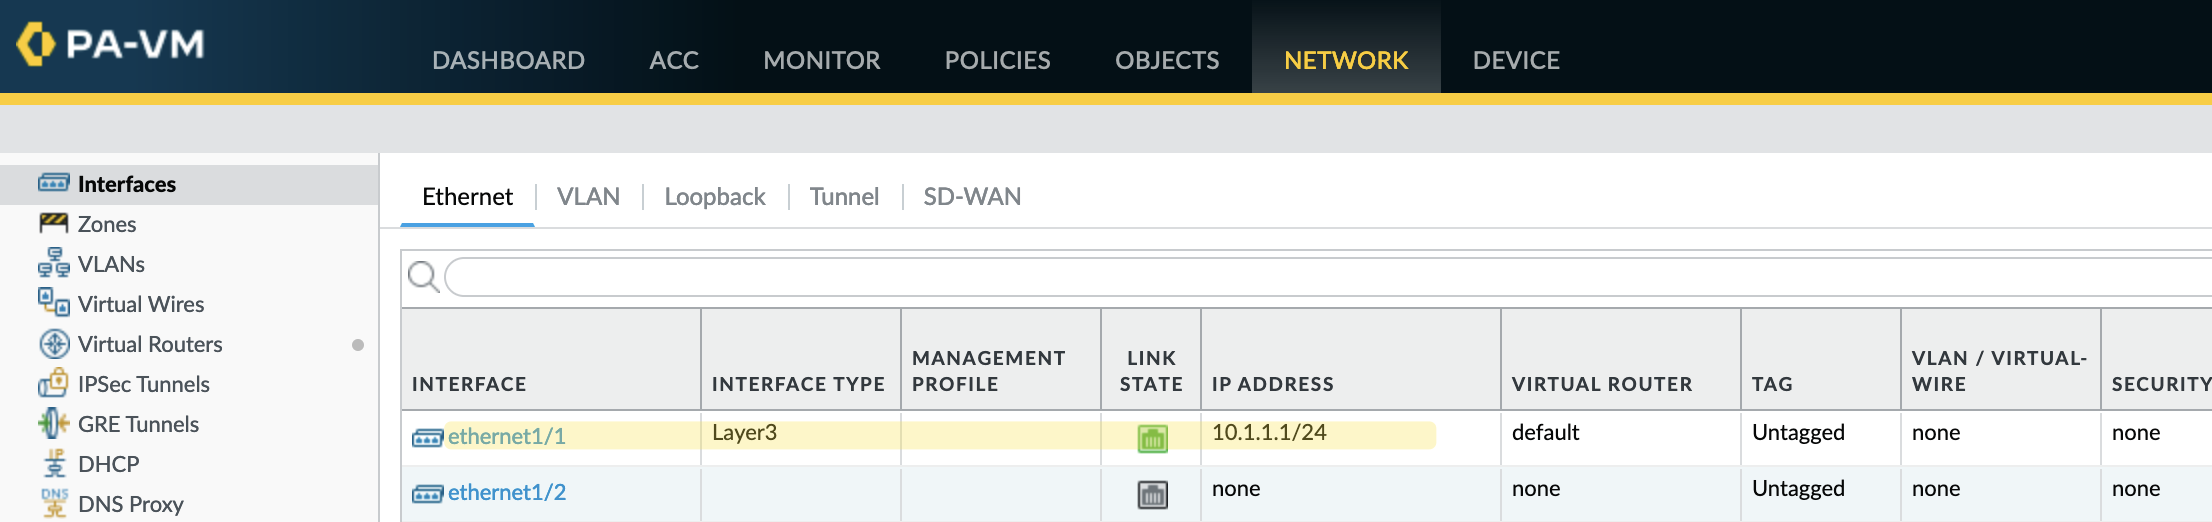
Once you log in, you may notice that the interfaces appear as ‘grey,’ indicating that they are down. Don’t worry, though this is because the interface types are set to ‘Tap’ by default.
To bring an interface up, configure it as a Layer 3 interface and assign an IP address. After making these changes, commit them, and the interface should come up.
Now, you can start launching VMs and connect their NICs to the same virtual NICs you assigned to the Palo Alto Firewall. This setup allows the VMs to communicate through the firewall, enabling you to test various configurations and policies.
Learn More
If you want to learn more about Palo Alto Firewalls or need help configuring basic settings, check out my introductory blog post linked below.
 Suresh Vina