Welcome to today's blog post where we're focusing on AWS Networking fundamentals. If you're new to AWS or just want to better understand AWS Networking, you've come to the right place.
We'll start by talking about Regions and Availability Zones (AZ). These are the building blocks of AWS infrastructure. Next, we'll cover how to set up your own Virtual Private Cloud (VPC). This will be your private space in the AWS cloud where you can launch resources. From there, we'll discuss subnets, breaking down the difference between public and private ones. Knowing this will help you better plan your network architecture.
To wrap it all up, we'll go through the steps of creating an EC2 instance (Linux server). Not only that, but we'll also walk you through accessing this instance over the Internet. This will give you a full-circle understanding of AWS networking basics.
Audience
If you're brand new to AWS, don't worry. This blog post focuses on AWS basic networking, so having some general networking knowledge is a plus but not a requirement. I'll explain things in clear detail to make sure everyone can follow along.
For those of you who are Network Engineers or familiar with another cloud provider, you should find this guide pretty straightforward. The principles we cover here will likely overlap with what you already know, making it easier for you to follow along.
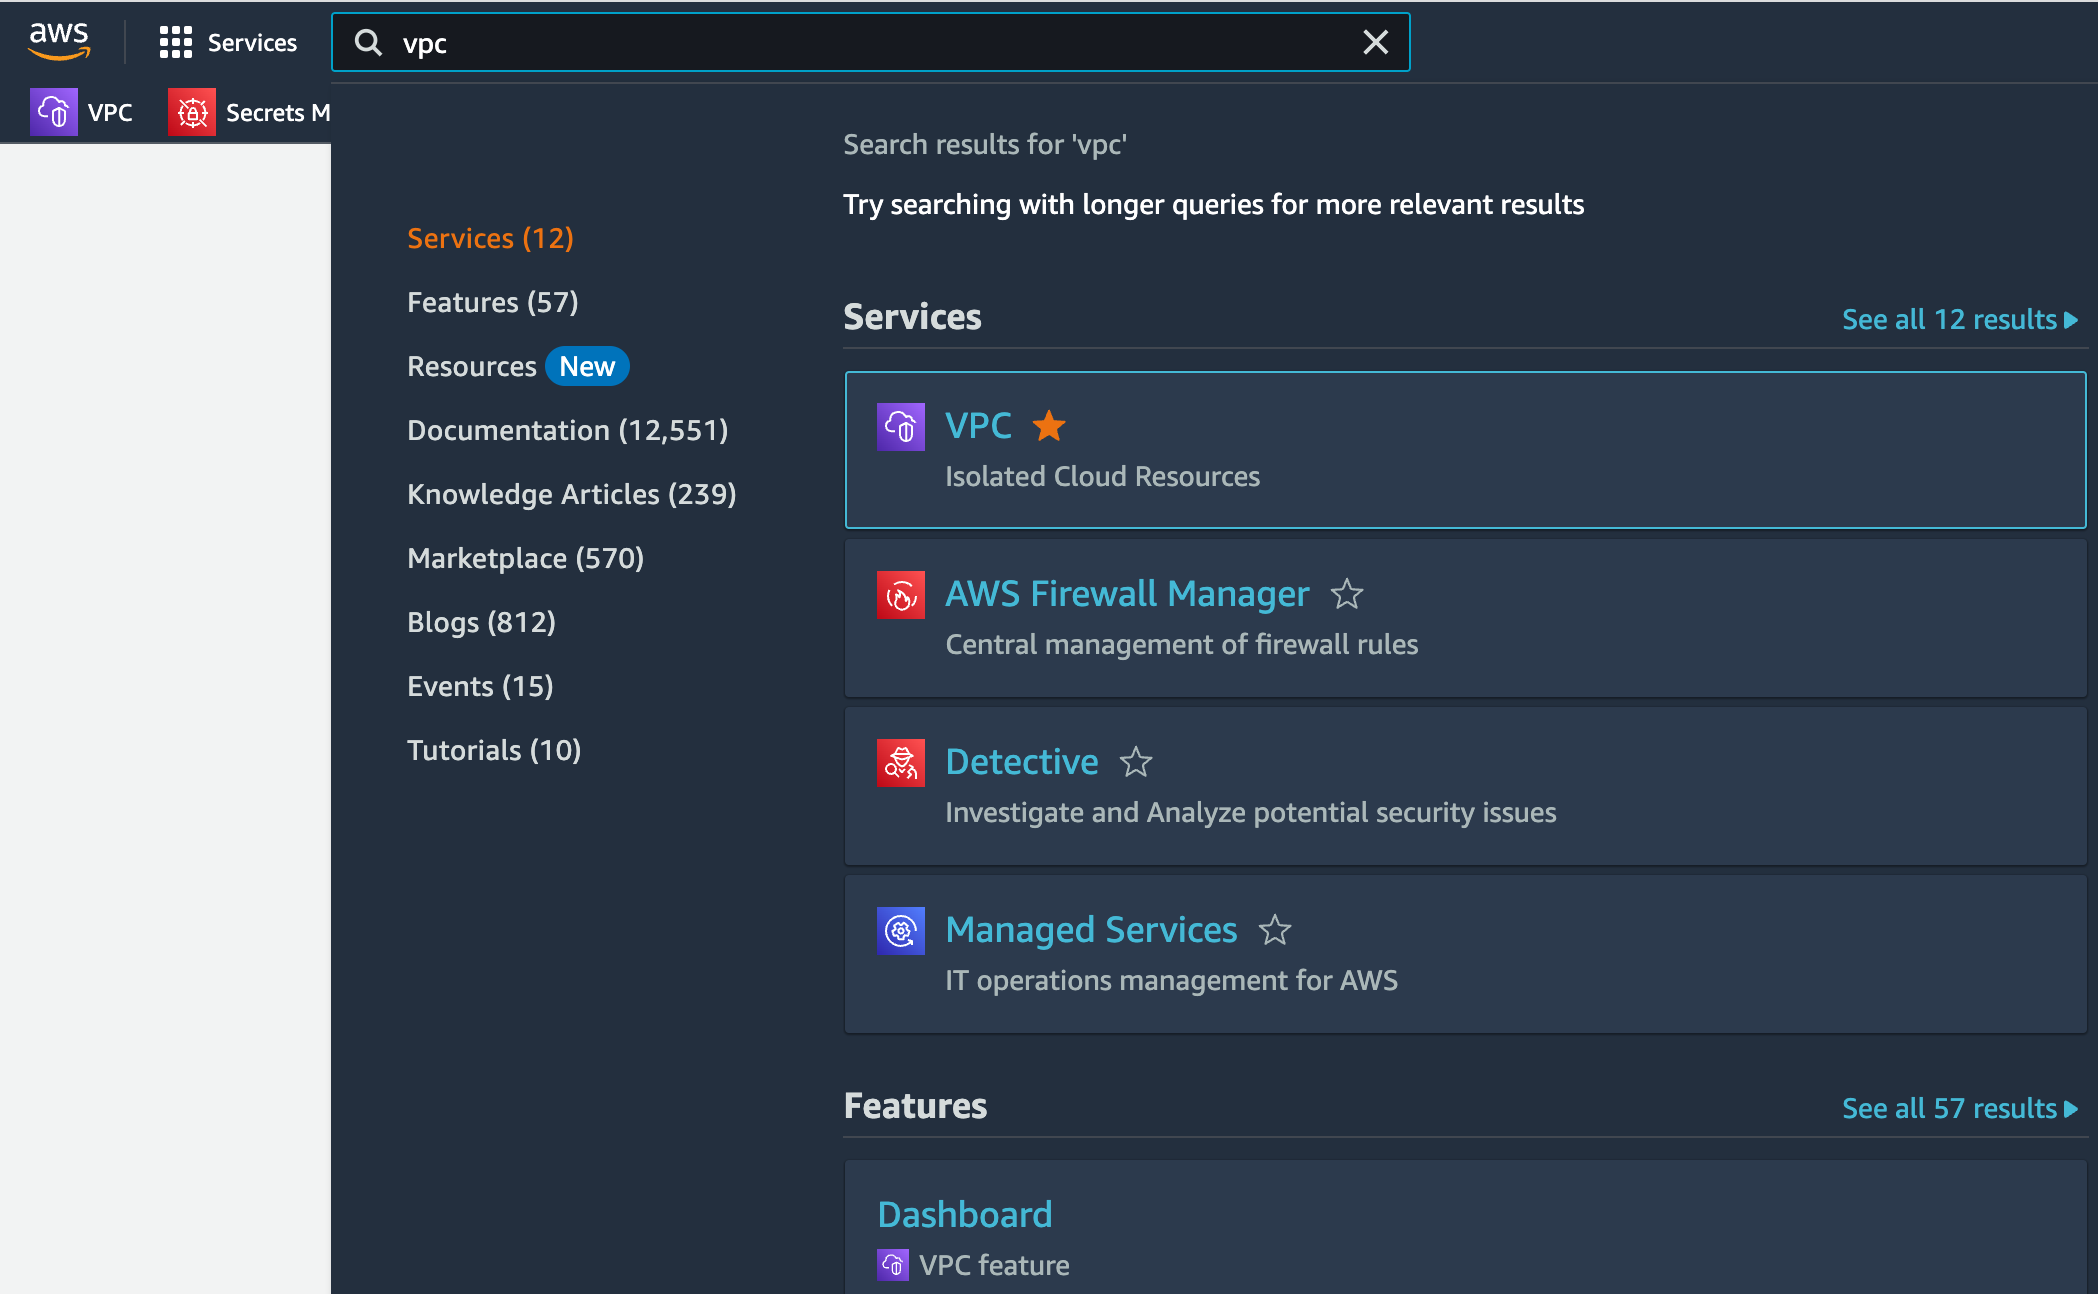
AWS Regions
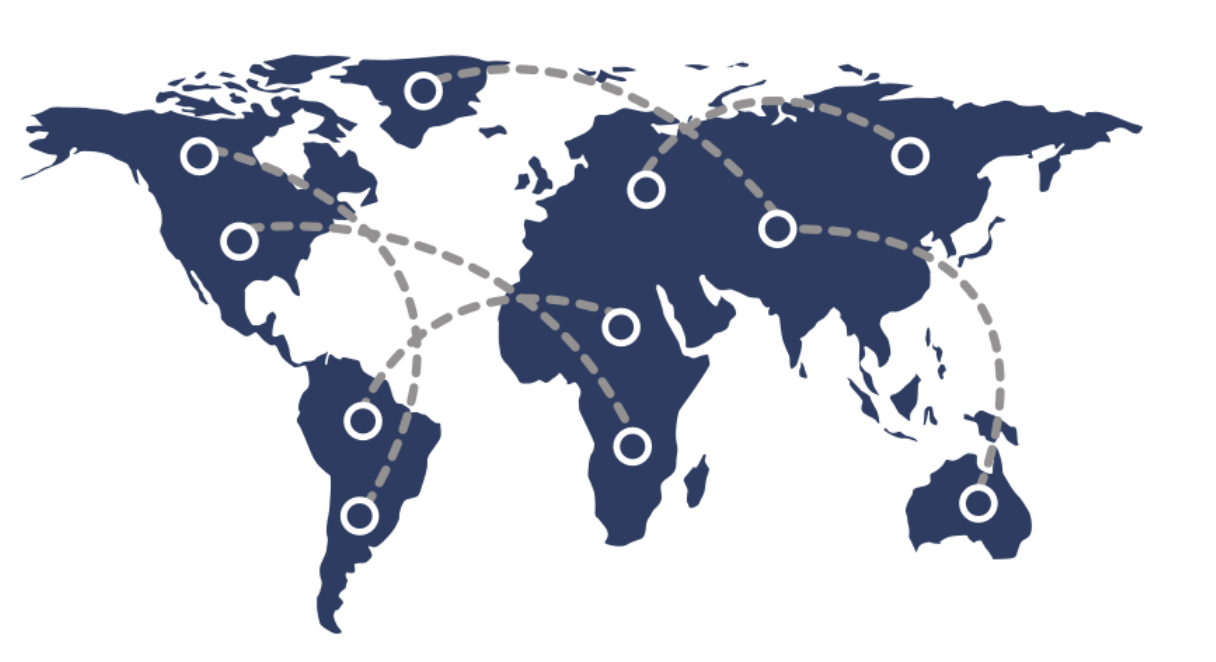
Think of AWS Regions as separate geographical locations where AWS stores its data and runs its services. Each Region is like a separate instance of the AWS cloud, operating independently from the others. This is important for a couple of reasons.
- Data Residency - Some businesses need to store their data in specific geographic locations due to legal or compliance reasons. Choosing a region close to you can also improve the speed and performance of your services.
- Availability - AWS offers multiple Regions around the world. This is great for making your services available to a global audience. But it also means that if one Region faces issues, your data and services in other Regions remain unaffected.
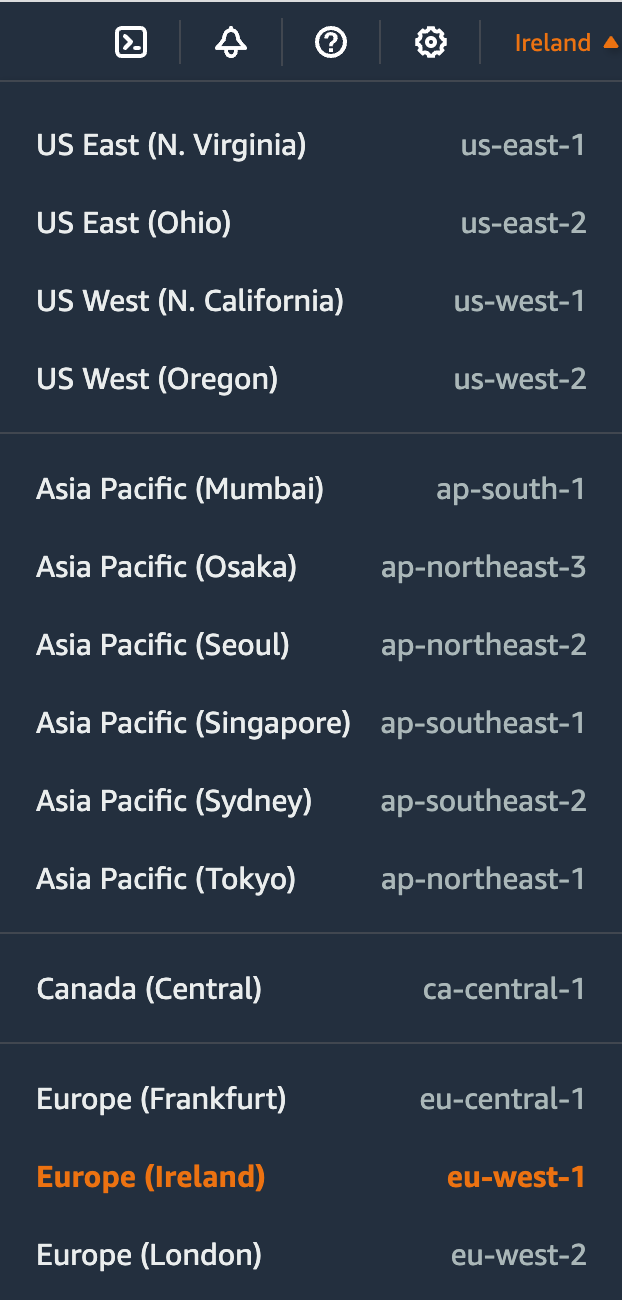
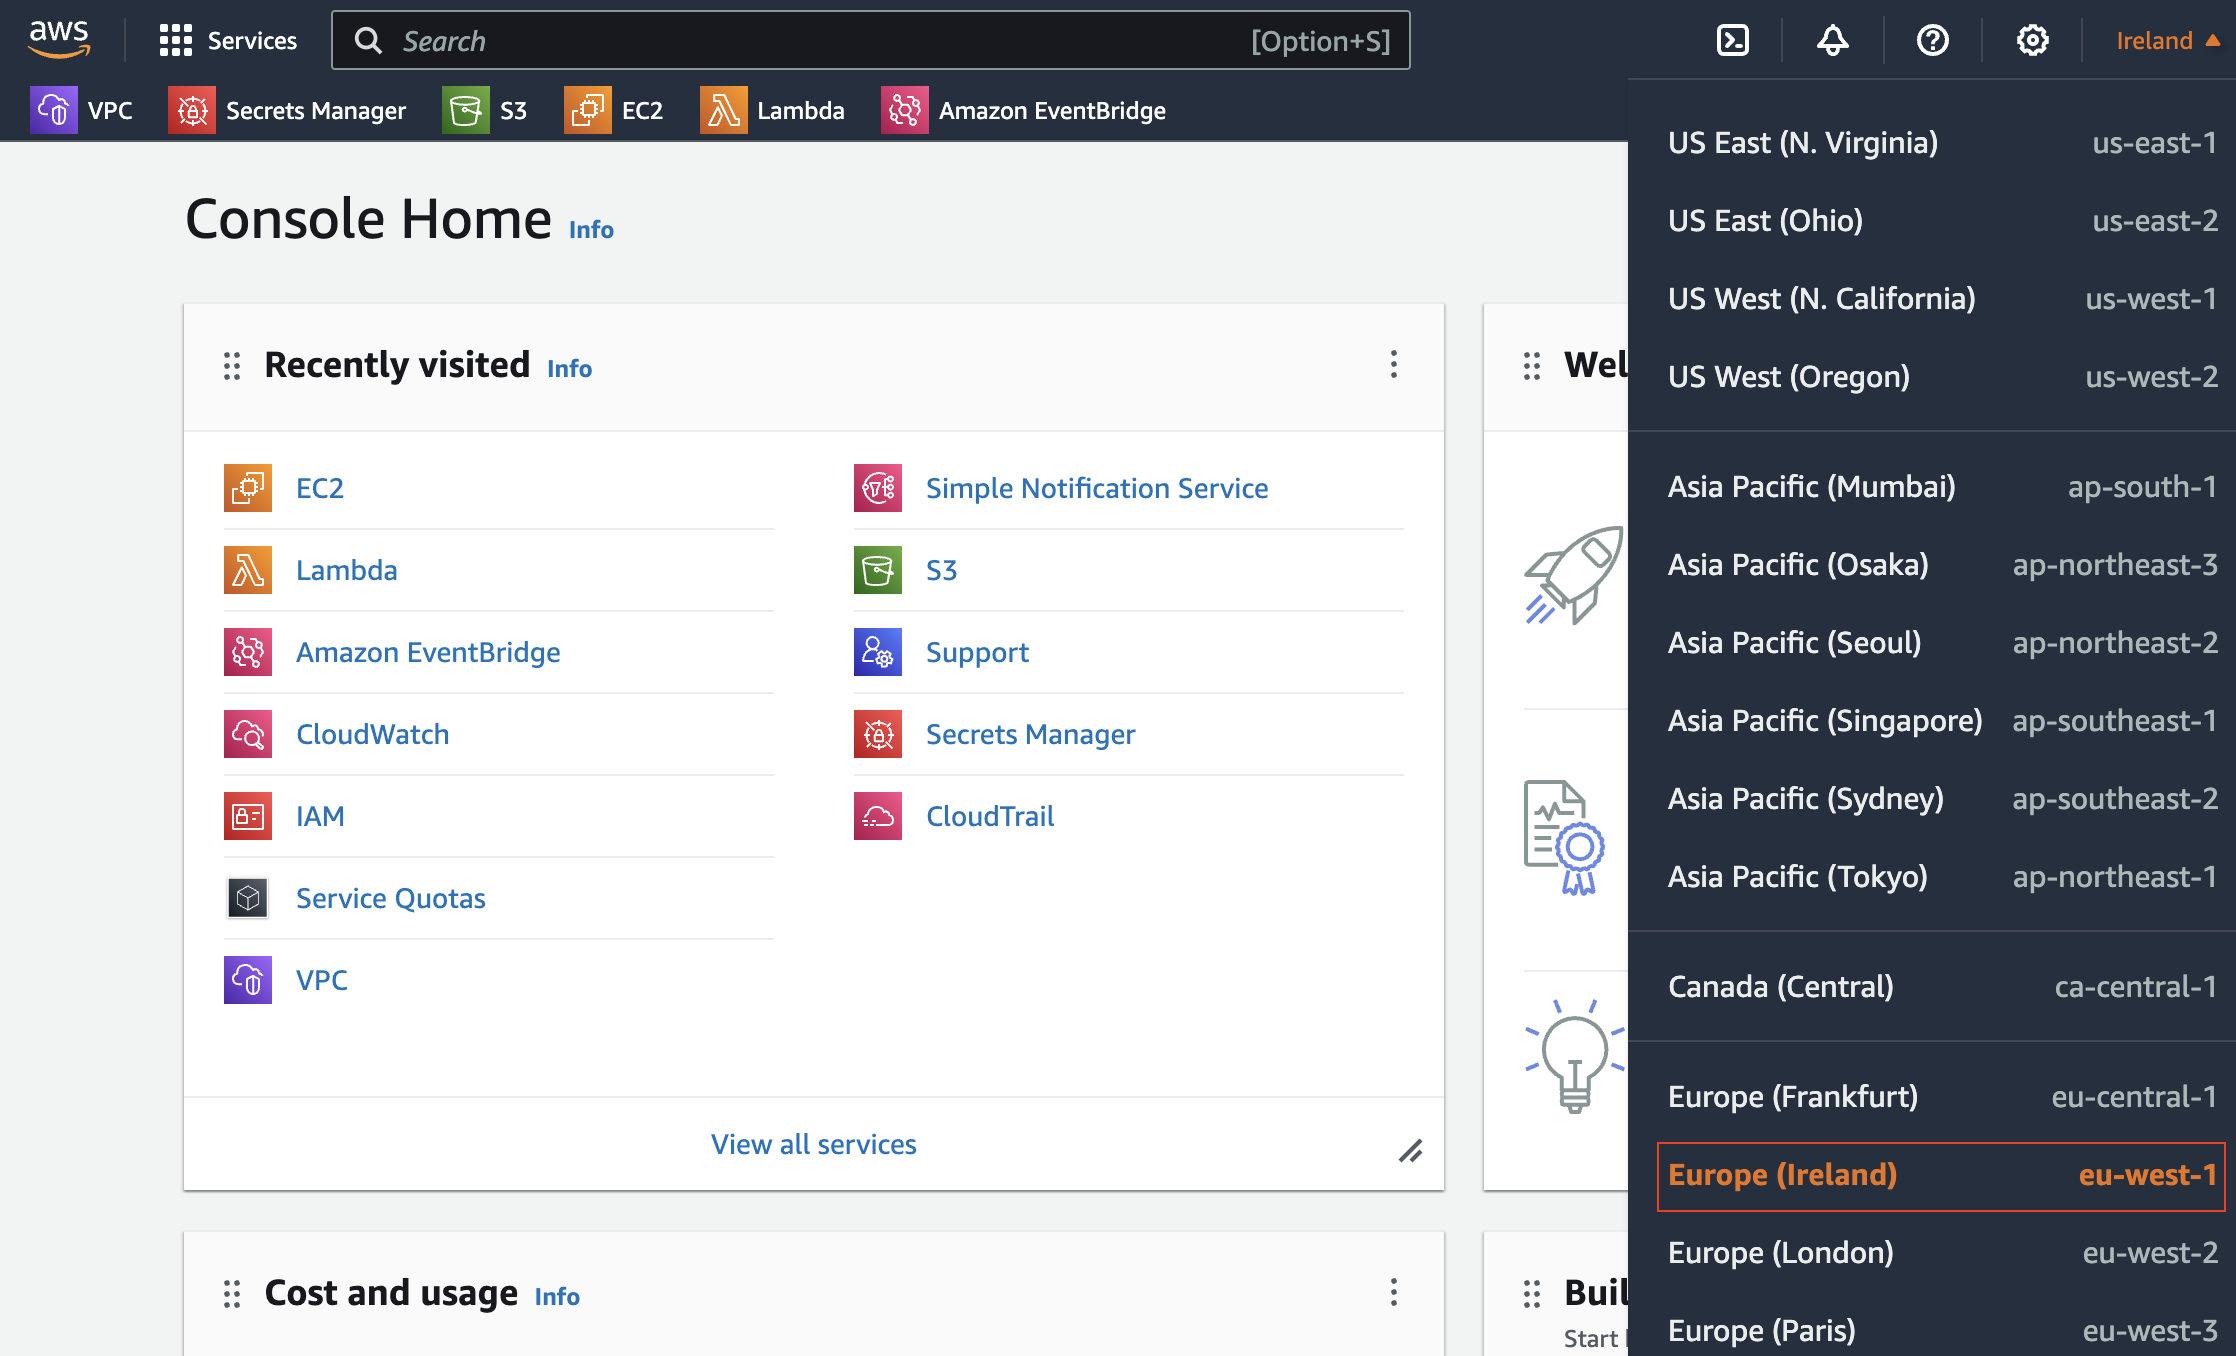
As you can see above, you will first need to choose the region in which you want to create the resources. Imagine you're based in London and you're building a web application for users in the UK. You'd probably want to pick the AWS Region closest to you and the users, which in this case is the London Region (eu-west-2). So, when you're setting up your AWS resources, the first thing you usually do is pick a Region that makes the most sense for your needs.
Availability Zones (AZs)
After you've picked a Region, the next step is to understand Availability Zones, often abbreviated as AZs. Think of an Availability Zone as a data centre(s) within a Region. Each Region has multiple AZs to provide a safety net against failures and are interconnected with fast and resilient fibre-optic connections.

Here's why this matters:
- Fault Tolerance - If one AZ faces issues like a power outage, your services can continue to run in another AZ within the same Region.
- Load Balancing - You can distribute your resources across different AZs. This helps balance the load and offers a better experience for your users.
Let's use some practical examples.
- If you've chosen the London Region, you'll find that it has multiple AZs (like
eu-west-2a,eu-west-2b, etc.). You can choose to store your data in one or spread it across several for added security and performance. - Similarly, if you picked the North Virginia (
us-east-1) Region, you could take advantage of its multiple AZs (us-east-1a,us-east-1b,us-east-1c, etc.) to cater to your audience in the US effectively.
By utilizing multiple AZs within your chosen Region, you set yourself up for better reliability and performance.
Virtual Private Cloud (VPC)
Once you've got a grasp on Regions and Availability Zones, the next step is setting up your Virtual Private Cloud, or VPC for short. A VPC is like your own private slice of the AWS cloud, a secure and isolated space where you can launch your AWS resources.
Here's why you may need a VPC.
- Isolation - Your VPC is a separate environment from others, which adds an extra layer of security.
- Control - You get to decide how resources inside your VPC communicate with each other and the outside world.
- Flexibility - You can customize your VPC to have public and private subnets, allowing you to control who has access to what.
First step, select your Region where you launch your VPC.
And then Select the VPC AWS service and click on Create VPC, and fill in the info such as description, tags and the CIDR.
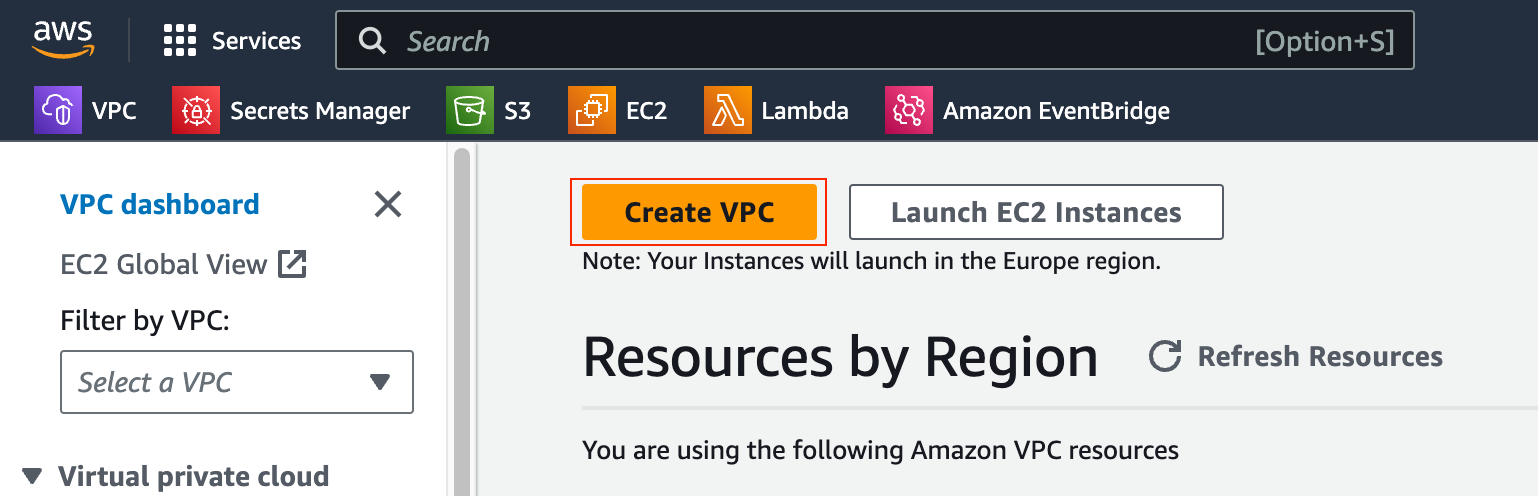

Setting up a VPC is usually one of the first tasks you'll perform in AWS, as it forms the foundation of your cloud-based network. When we talk about Subnets in the next section, everything will start making sense so, don't worry if you are still confused.
Subnets
Once your VPC is in place, you'll move on to configuring subnets. Subnets allow you to partition your VPC into smaller, more manageable sections. When we created our VPC, we allocated a /16 CIDR block, which is a range of IP addresses that the VPC will use. We can then use /24 for subnets inside the VPC.
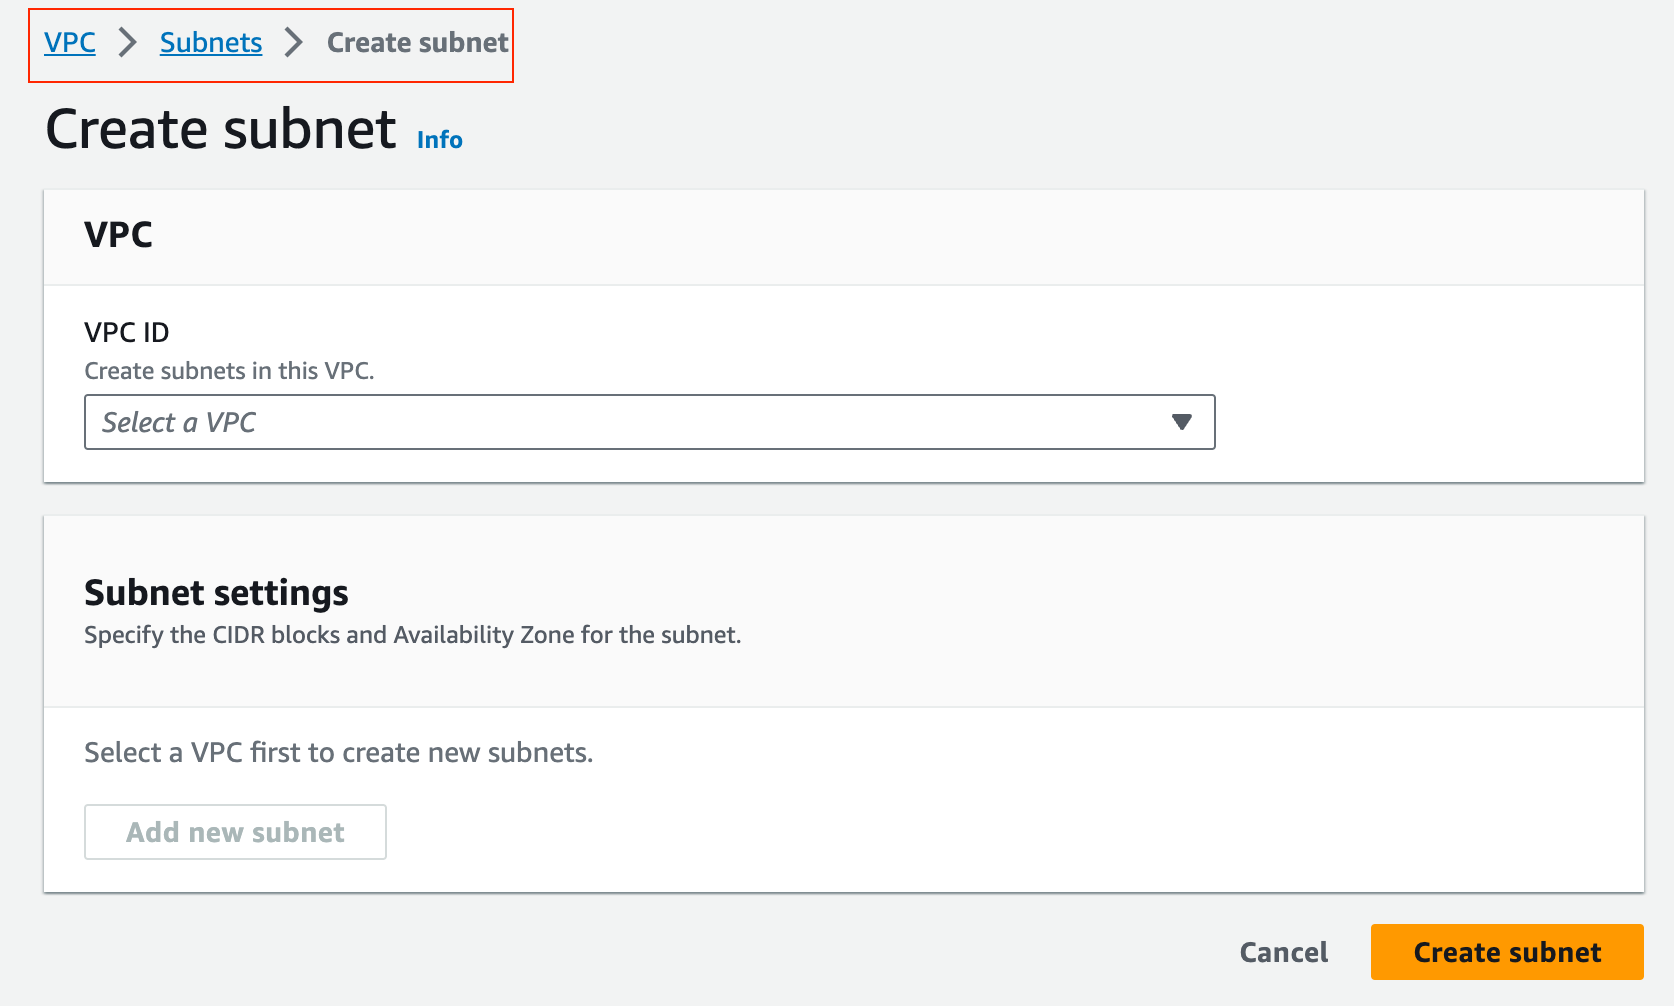
How to Create a Subnet?
- CIDR Block - You have to specify a subnet range that falls within the CIDR block you initially allocated for the VPC.
- Availability Zone - You also need to assign the subnet to a specific Availability Zone within your chosen Region.
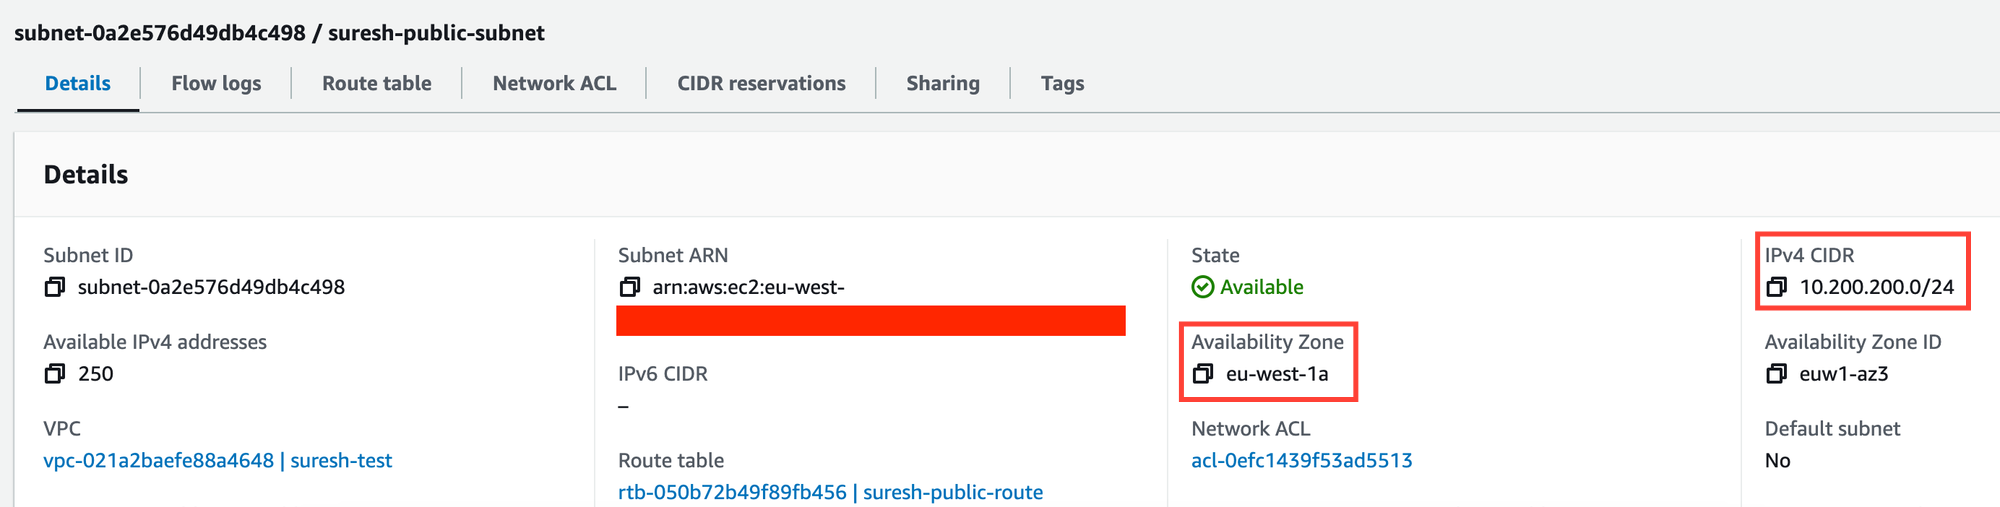
Please remember, if you need full resiliency, make sure to deploy your resources across a minimum of two AZs. Please also note that one subnet can't span across multiple AZs. As you can see below, I've created 10.200.200.0/24 in eu-west-1a availability zone.
Private vs Public Subnets
Once you start working with AWS, you will hear the term private or public subnets. Here's where it gets interesting, there's actually no such thing as a "private subnet" or a "public subnet" when you first create them. It's all about how you set up the routing.
- Private Subnet - Technically becomes "private" because it routes the Internet traffic via the NAT gateway and the instances in private subnets don't require a public IP. You can't also initiate traffic from the Internet to instances in the private subnet (we will discuss more about this later)
- Public Subnet - Becomes "public" when it routes the Internet traffic via Internet Gateway and requires public IP. Unlike private subnets, you can initiate traffic from the Internet to the instances in public subnet (we will discuss more about this later)
By understanding these aspects of subnets, you gain more control over how resources inside your VPC communicate, both with each other and with external networks. If you want to learn more about private vs public subnets, please check out my other blog post below.
 Suresh Vina
Route Tables
After setting up your subnets, the next step is configuring Route Tables. Route Tables dictate how network traffic flows between different resources within your VPC and to external destinations.
When you create a subnet, you'll need to attach it to a Route Table. When an instance in a subnet sends out traffic, it first lands on the Route Table attached to that subnet. This Route Table decides where to send the traffic based on the routes you've set up.
The Route Table needs to contain routes, that specify how to get to different destinations. For instance, if you want instances in a subnet to reach the Internet, the Route Table would need a default route pointing to an Internet Gateway.
You can attach multiple subnets to a single Route Table, giving them all the same set of routing rules. However, a single subnet can only be attached to one Route Table at a time.
By understanding Route Tables, you'll have better control over your network architecture, allowing you to define precisely how your instances communicate with each other and the outside world.
NAT Gateway and Internet Gateway
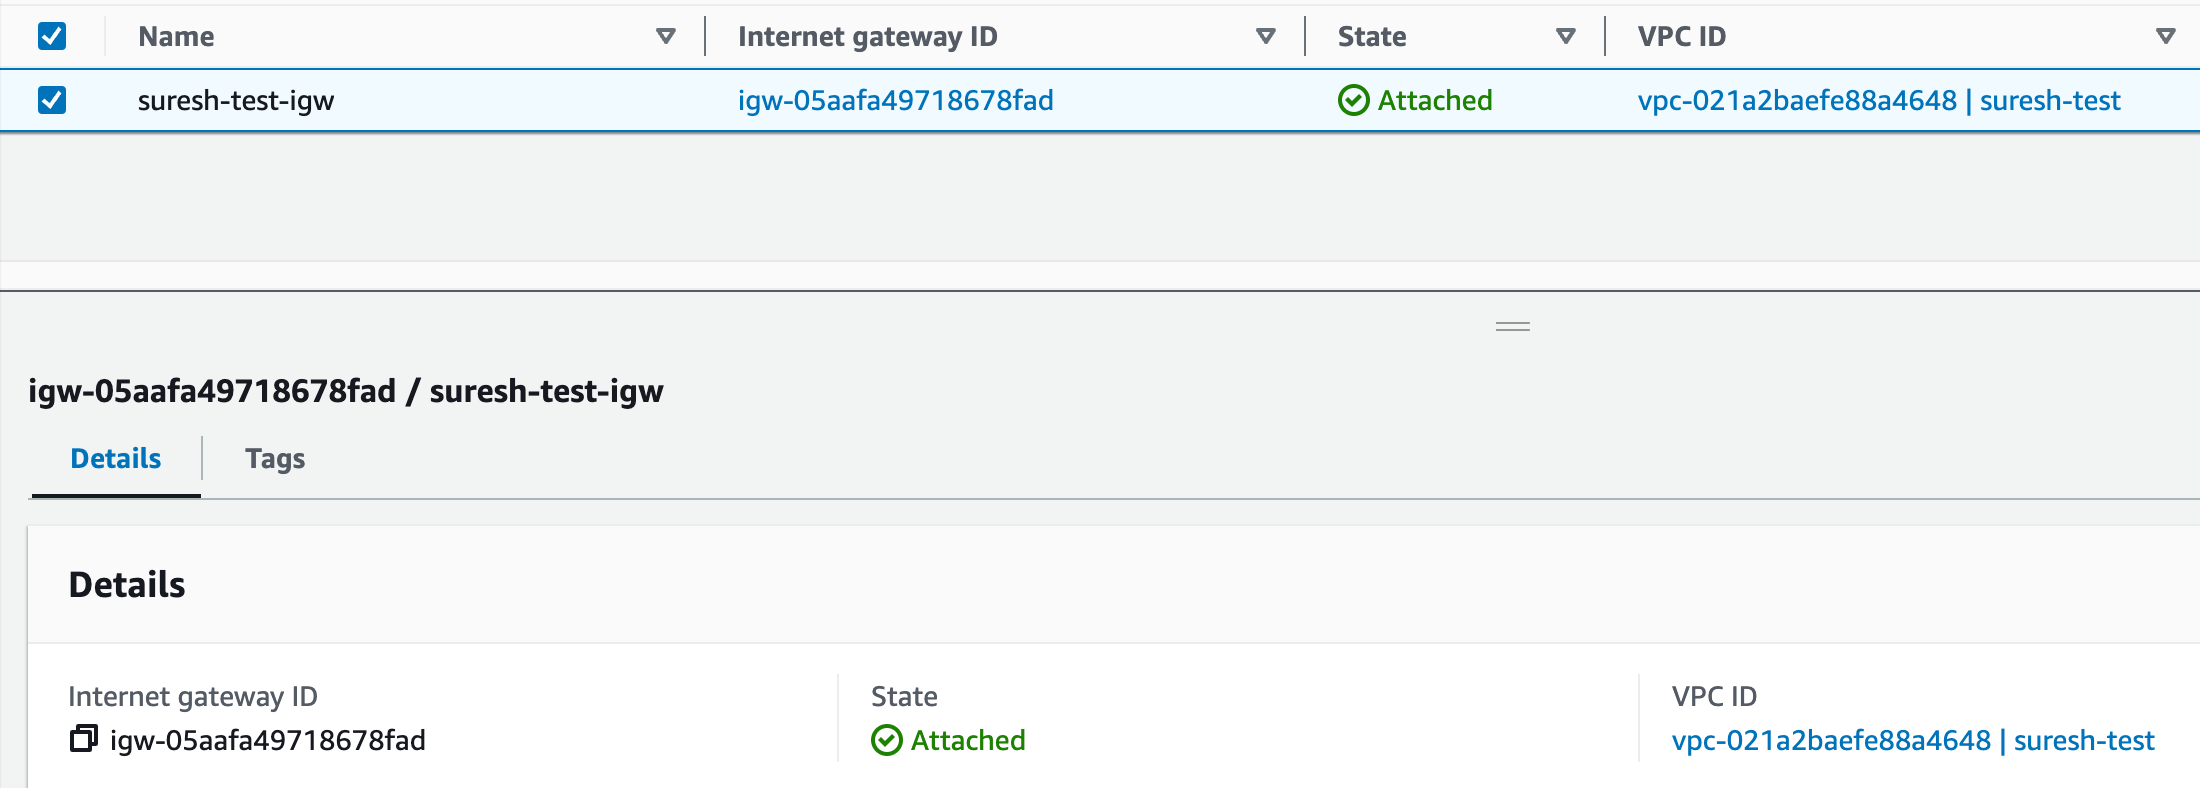
Once you've got your Route Tables sorted, the focus shifts to Internet connectivity, specifically through NAT Gateway and Internet Gateway.
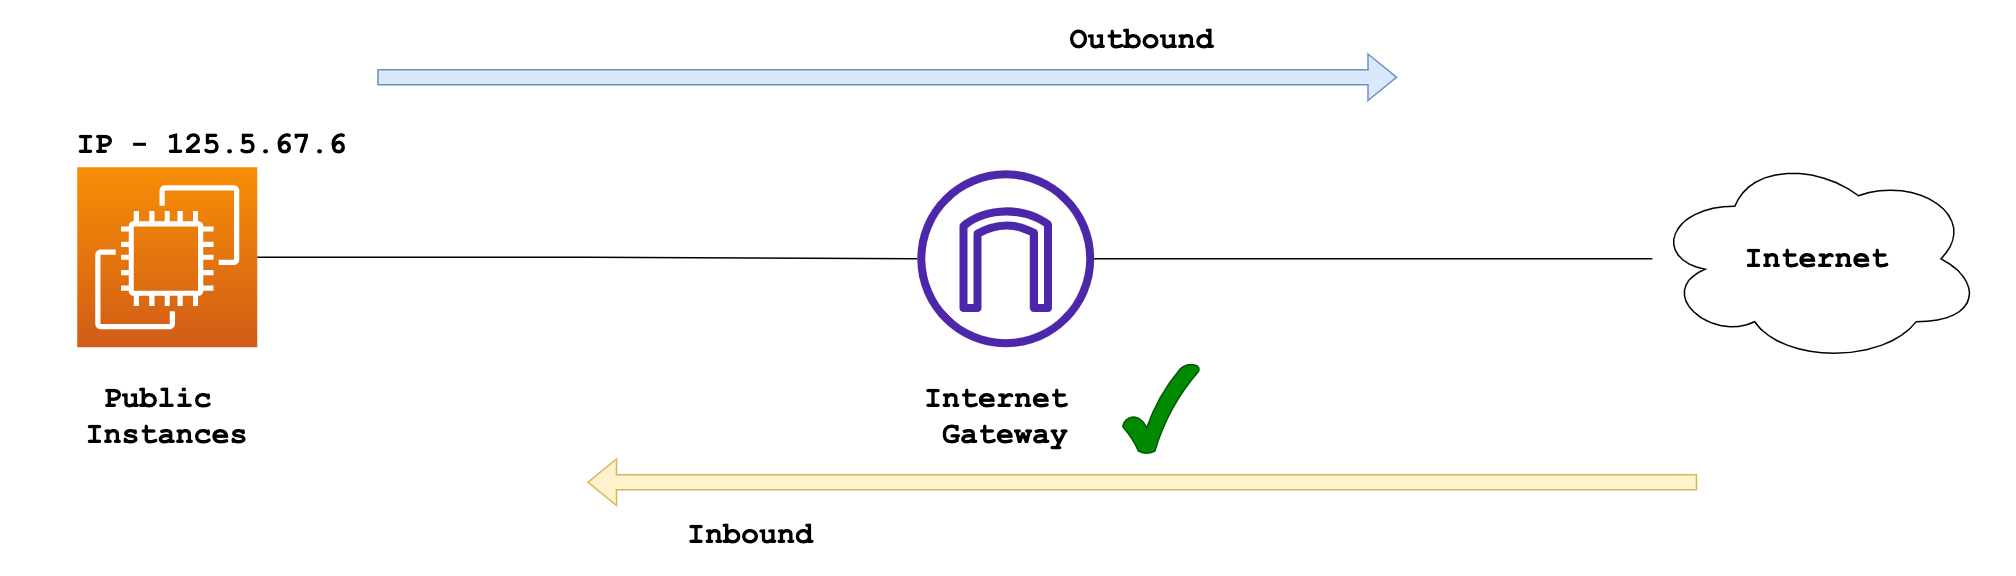
An Internet Gateway is a 'Router' that allows traffic to go in and out of your VPC to the Internet. It's generally attached to a public subnet, enabling instances within to directly access the Internet (both inbound and outbound)
On the other hand, a NAT Gateway is used by instances in a private subnet that require Internet access. The NAT Gateway resides in a public subnet and routes Internet-bound traffic from the private subnet through the Internet Gateway.
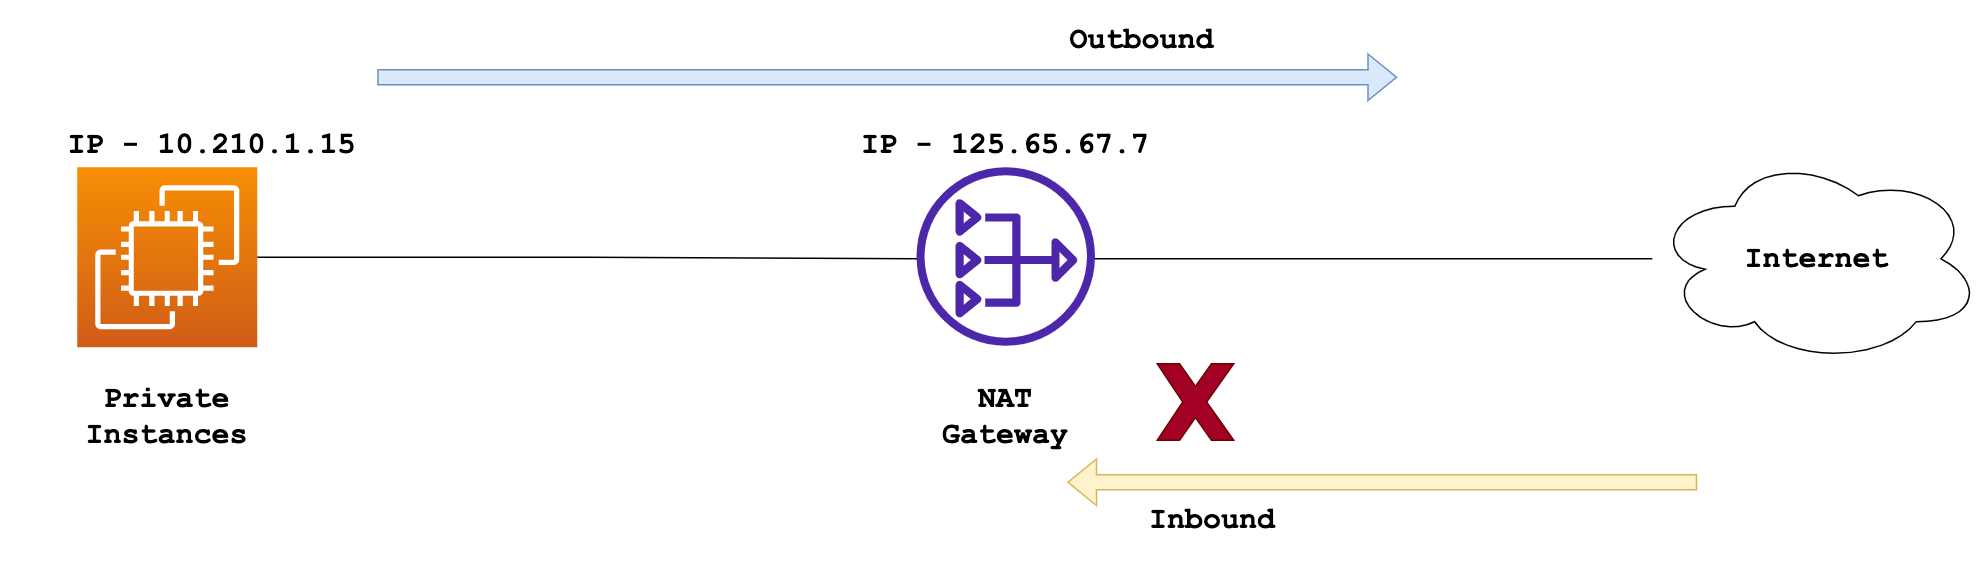
To sum it all up, NAT Gateway is designed for outbound-only traffic and doesn't require instances to have a public IP. Internet Gateway supports both inbound and outbound traffic and requires instances in the public subnet to have a public IP.
Hands-on Example
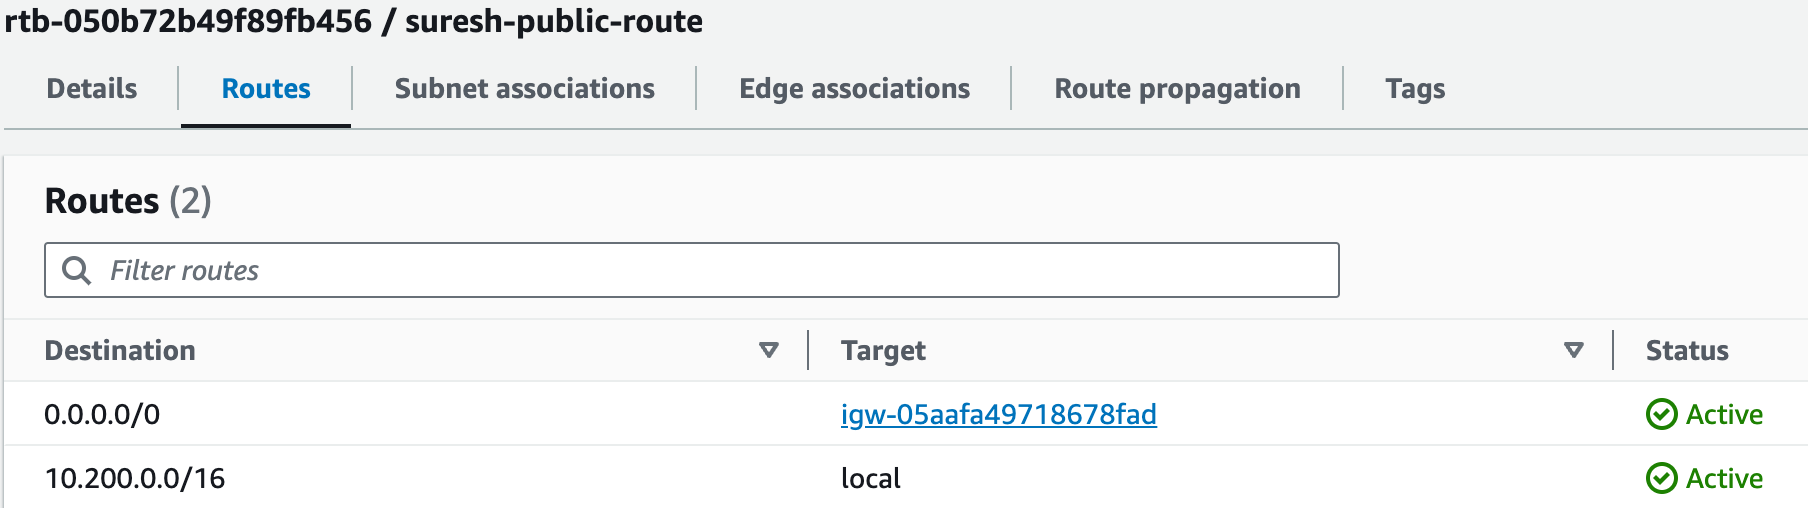
For this hands-on example, we'll create an EC2 instance in a public subnet. But first, let's make sure this public subnet is associated with a Route Table. How do we know it's public? Well, it will have a default route pointing to the Internet Gateway, allowing Internet access.

So, step one, In your Route Table, create a default route 0.0.0.0/0 that points to the Internet Gateway.
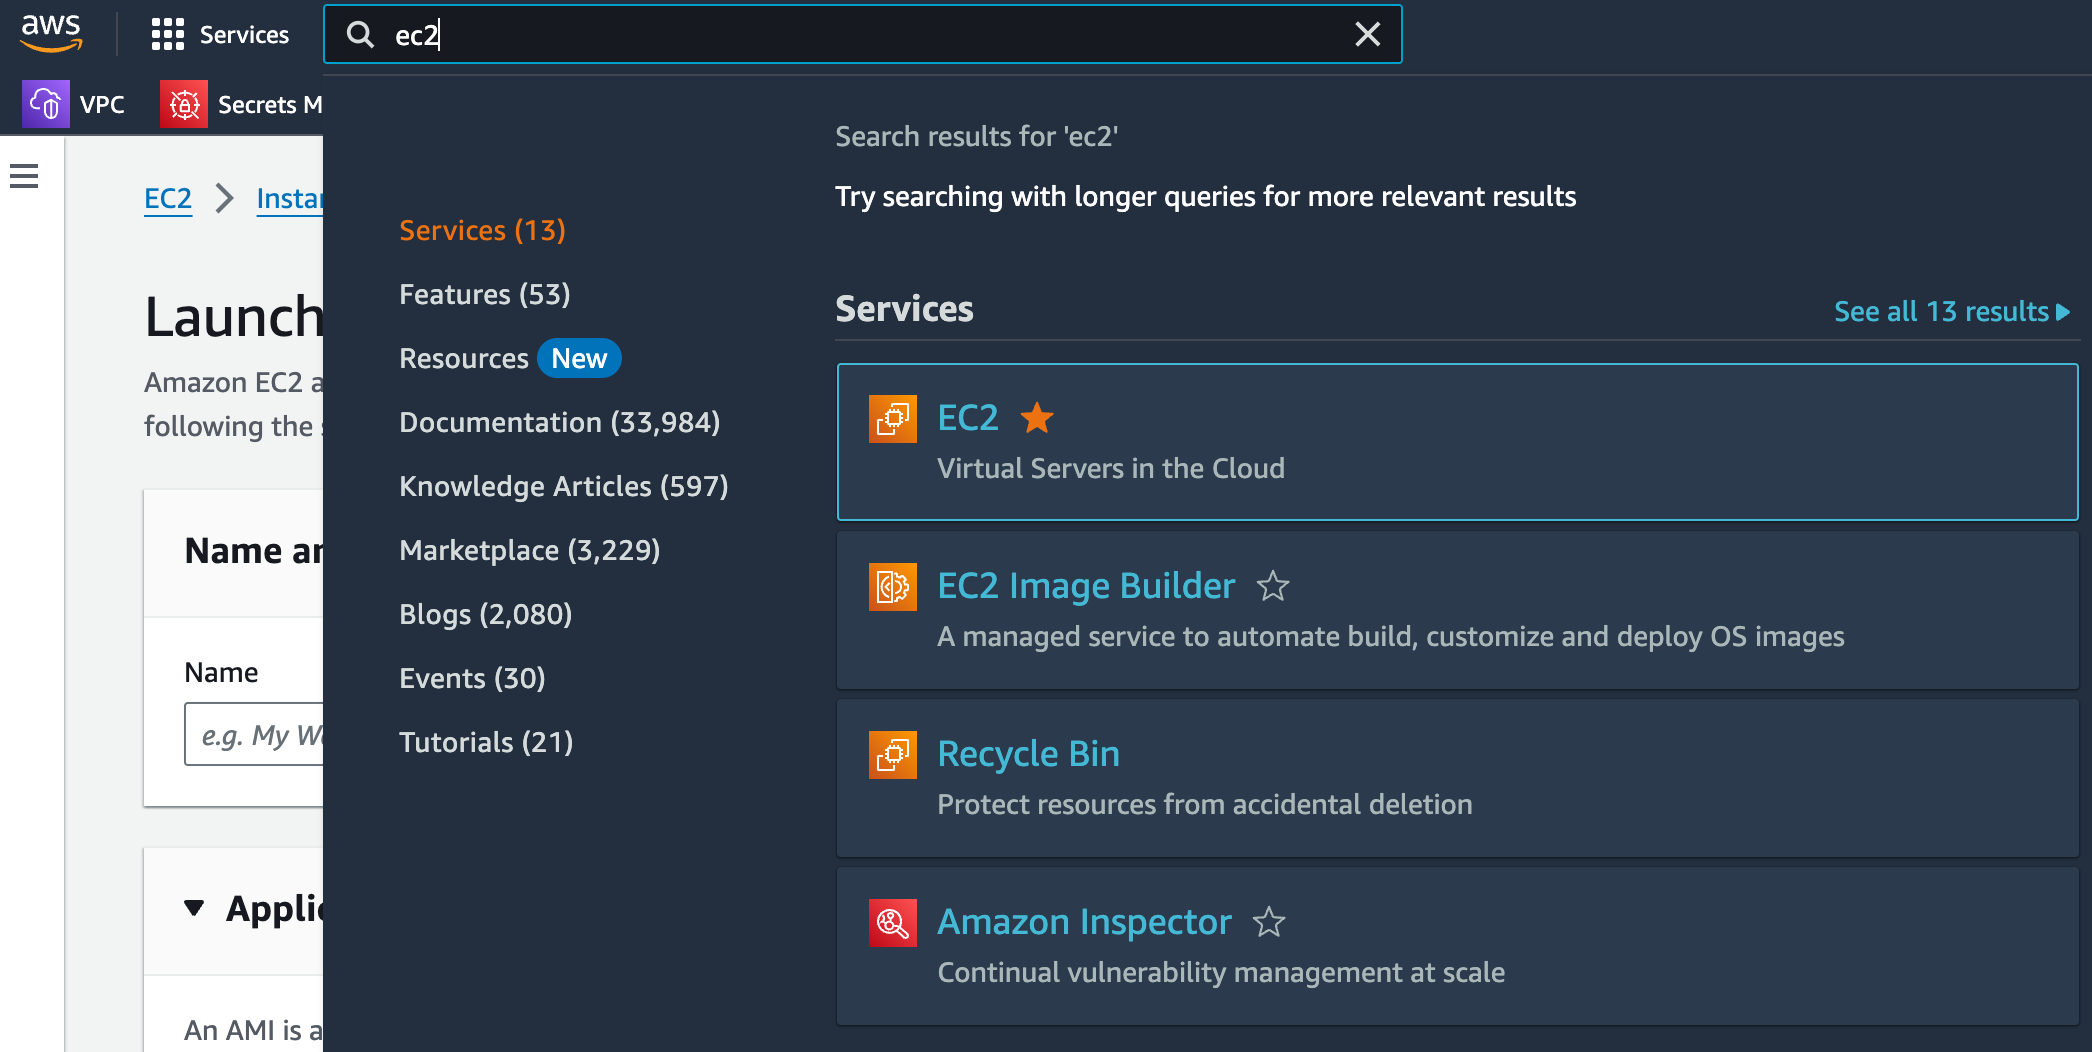
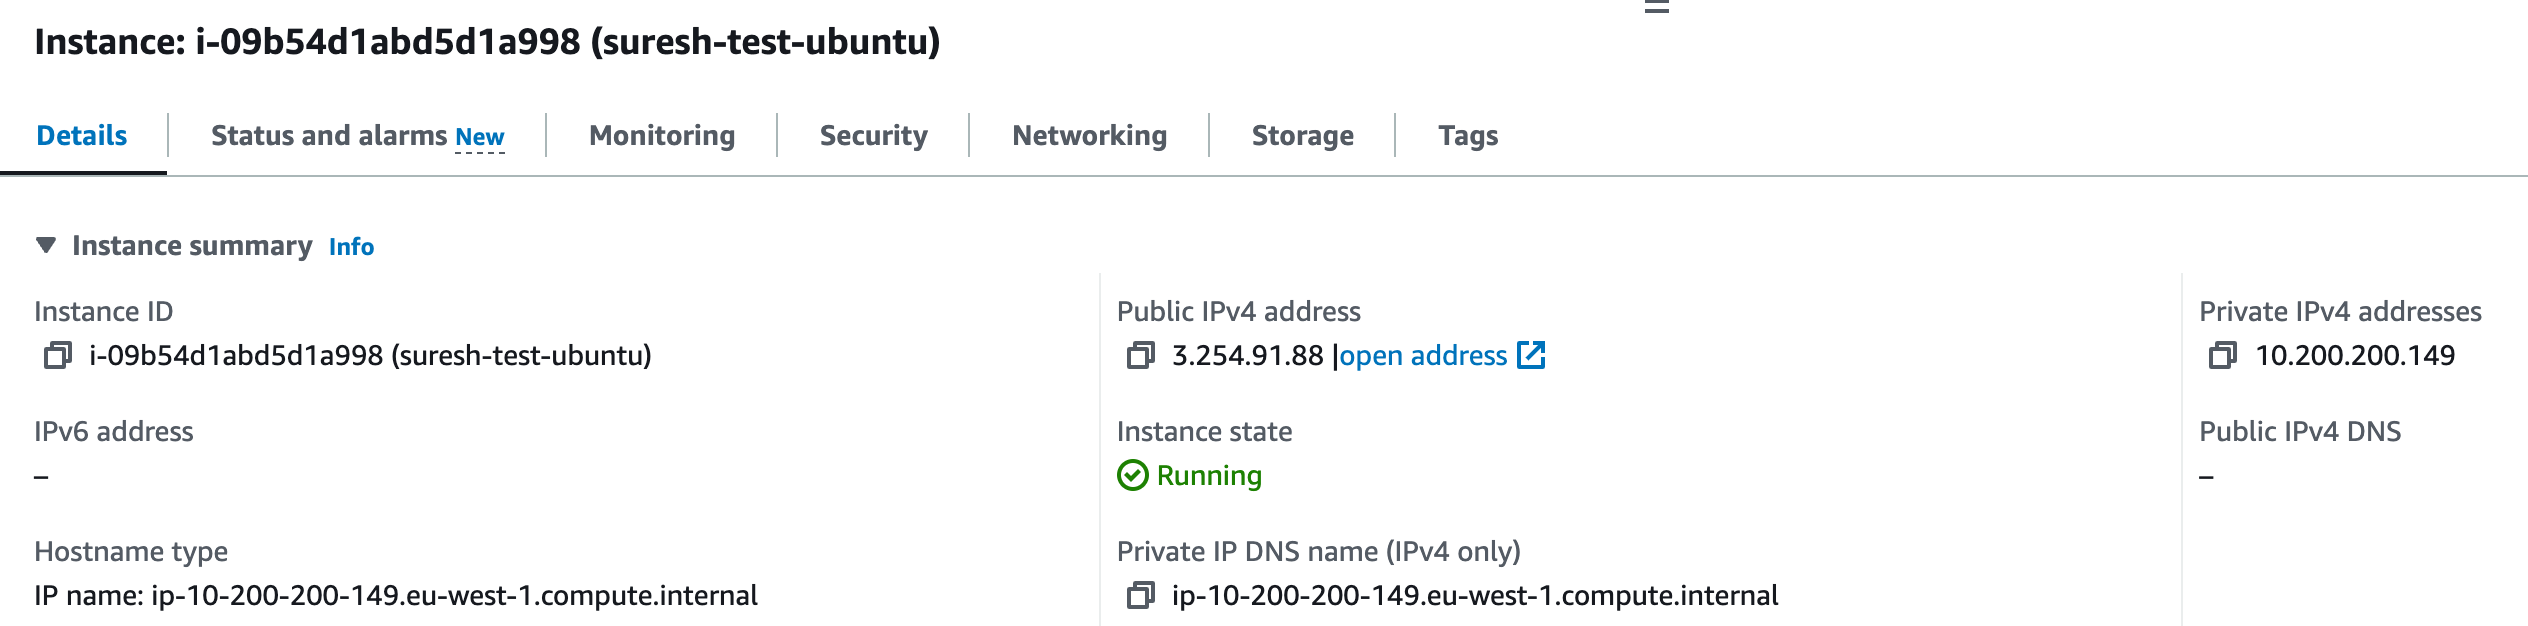
Step two, Launch your EC2 instance in this public subnet. Make sure to enable the option that assigns a public IP to this instance. Without a public IP, you won't be able to reach it from the Internet.
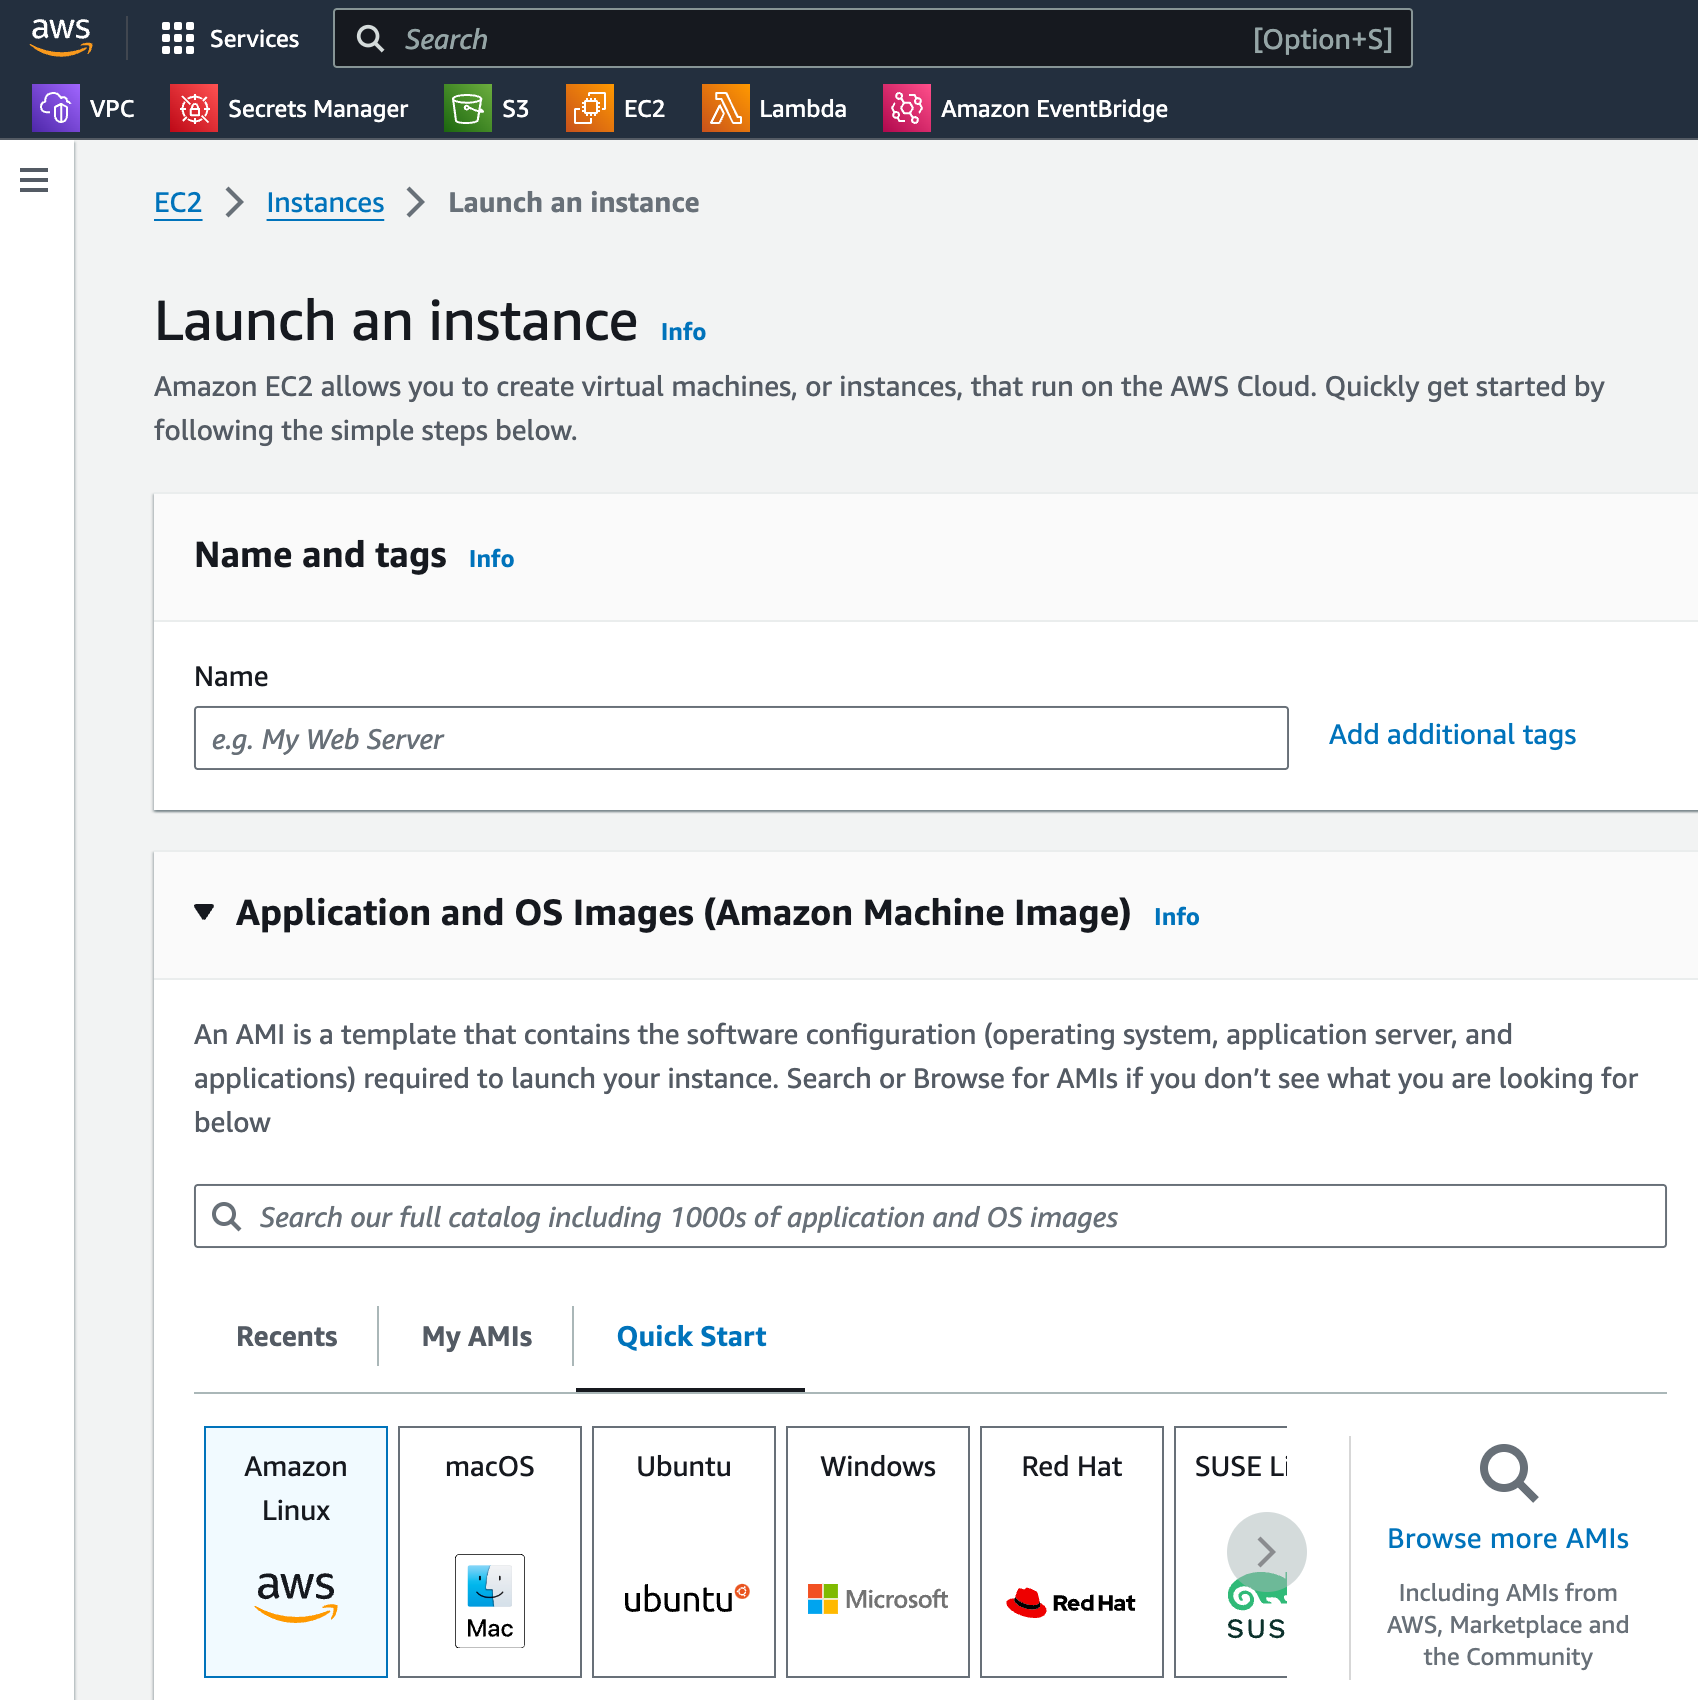
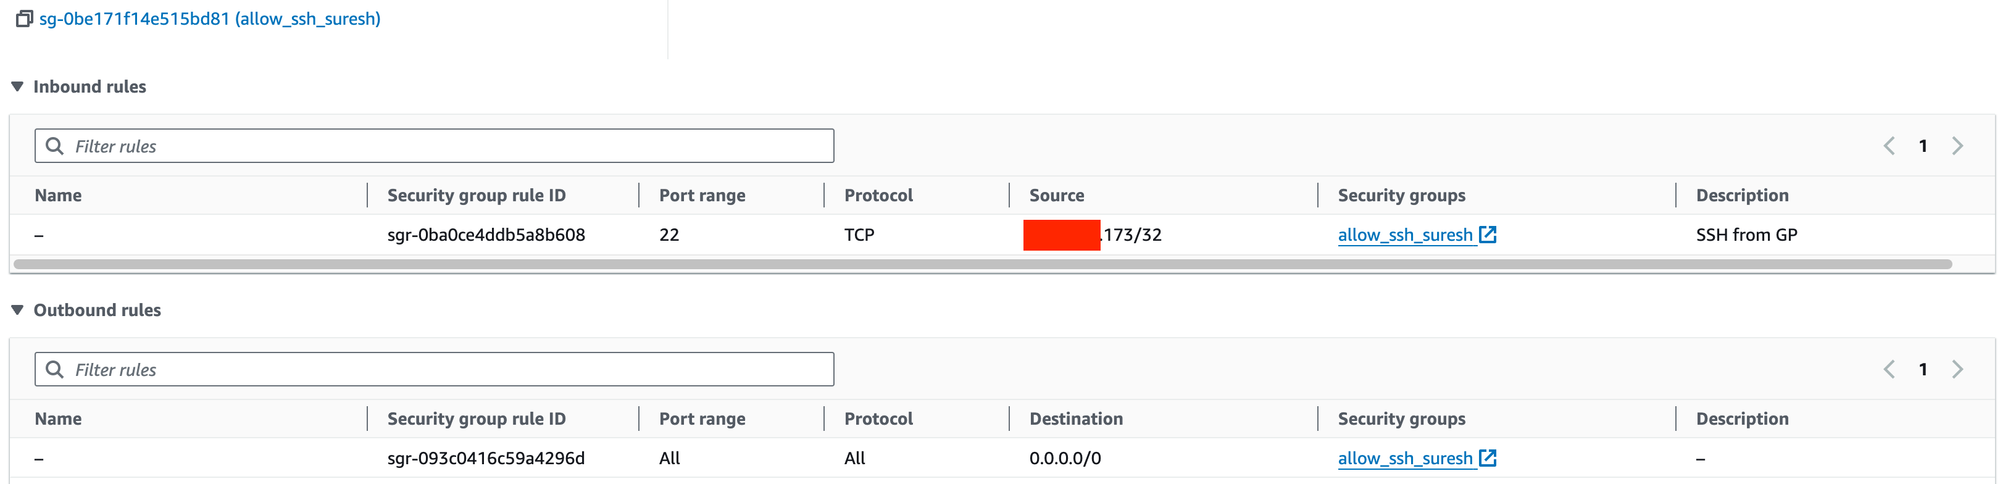
Step three, When you launch the instance, you'll be prompted to associate a Security Group. Create one that allows inbound SSH connections only from your specific IP address. For outbound rules, allow traffic to all IPs. This way, you're not exposing your instance to the whole world.
Finally, the moment of truth. Use SSH to connect to your instance. Once you're in, go ahead and run a simple ping google.com command to check if you have internet connectivity. If everything is set up correctly, you should be able to SSH into your instance and ping Google, confirming that your VPC, subnets, Route Table and gateways are all working as they should.
PING google.com (172.253.116.102) 56(84) bytes of data.
64 bytes from dj-in-f102.1e100.net (172.253.116.102): icmp_seq=1 ttl=52 time=0.866 ms
64 bytes from dj-in-f102.1e100.net (172.253.116.102): icmp_seq=2 ttl=52 time=0.904 ms
64 bytes from dj-in-f102.1e100.net (172.253.116.102): icmp_seq=3 ttl=52 time=1.02 ms
64 bytes from dj-in-f102.1e100.net (172.253.116.102): icmp_seq=4 ttl=52 time=0.915 ms
^C
--- google.com ping statistics ---
4 packets transmitted, 4 received, 0% packet loss, time 3005ms
rtt min/avg/max/mdev = 0.866/0.926/1.020/0.057 ms
[ec2-user@ip-10-200-200-149 ~]$
Closing up
Think of a VPC as a virtual version of a traditional network you'd operate in your own data centre. Just like a physical data centre has routers to route traffic, in AWS, you have route tables. These decide where network traffic from your subnets (segments of your VPC, much like VLANs in traditional networking) should go.
The Internet Gateway in AWS acts like a traditional router, connecting your AWS network to the wider network/Internet. Launching an EC2 instance with a public IP is akin to assigning a public IP to a server in your data centre, allowing it to communicate with the internet.
When you pinged 8.8.8.8 from your EC2 instance, it's similar to pinging an external address from a server in your physical network, traversing through the various network layers – firewall (security groups in AWS), switches (subnets), and routers (route tables and IGW). This demo in AWS mirrors how traditional networking functions, but it's all virtual and managed through the AWS console.
Here is a resource map that shows we have a VPC, one subnet, a couple of route tables (one of them is the default) and finally the Internet Gateway. You can see that the suresh-public-subnet is associated with the suresh-public-route route table which has a default route to the suresh-test-igw


