In this blog post, we're going to learn how to set up an AWS Lambda function using Terraform. I'll walk you through each step, making it as straightforward as possible for you to follow along. We'll also talk about IAM roles and policies which are key components when working with Lambda Functions.
Overview
Using the AWS web console to manually create a Lambda function is an option, but it's not the most efficient way to go about it. Instead, we'll use Infrastructure as Code (IaC) through Terraform. This approach allows us to write code that specifies what our infrastructure should look like, which is a big time-saver. You can deploy or remove resources quickly, all with a few lines of code.
The function will run a Python script. This is a great way to see how Python interacts with AWS services, providing a practical example that many of you might find useful.
Event Rules and Triggering the Lambda Function
In this tutorial, we're not just setting up a Lambda function to sit idly. We'll also configure an Event Rule that will trigger our Lambda function at a scheduled time. Once triggered, the Lambda function will execute the Python script we've set up.
Setting up an event rule adds an automated aspect to our setup, making our Lambda function more dynamic and useful. Instead of having to manually trigger the function, it will run automatically at the day/time we specify.
Lambda Execution Role
Next up, let's talk about IAM roles, specifically the Lambda Execution Role. So why do we need this? Simply put, when your Lambda function runs, it does so with a set of permissions that allow it to interact with other AWS services. That set of permissions is defined by its IAM role.
At a minimum, you'll need the following permissions for your Lambda Execution Role.
lambda:InvokeFunction- Allows the function to be invoked.logs:CreateLogGroup- Allows the function to create a new log group in CloudWatch.logs:CreateLogStream- Let the function create a log stream within a log group.logs:PutLogEvents- Allows the function to write logs to a log stream.
These are the basics to get your Lambda function up and running while also ensuring it can write logs to CloudWatch, which is super helpful for debugging and monitoring.
lambda.amazonaws.com) as a trusted service.{
"Version": "2012-10-17",
"Statement": [
{
"Effect": "Allow",
"Principal": {
"Service": "lambda.amazonaws.com"
},
"Action": "sts:AssumeRole"
}
]
}Additional Permissions for Lambda Functions
Now that we've covered the basic permissions you need for a Lambda function, let's discuss what happens when you want your function to do more—like reading from an S3 bucket or controlling EC2 instances.
In such cases, you'll need to add more permissions to your Lambda Execution Role. For example, if you want your function to read an S3 bucket, you'd add the s3:GetObject permission. To start or stop EC2 instances, permissions like ec2:Describe, ec2:StartInstances and ec2:StopInstances would be necessary.
Adding these permissions is important because they extend what your Lambda function can do within your AWS environment. Just make sure to only give your function the permissions it absolutely needs, so you keep everything as secure as possible.
About the Python Script
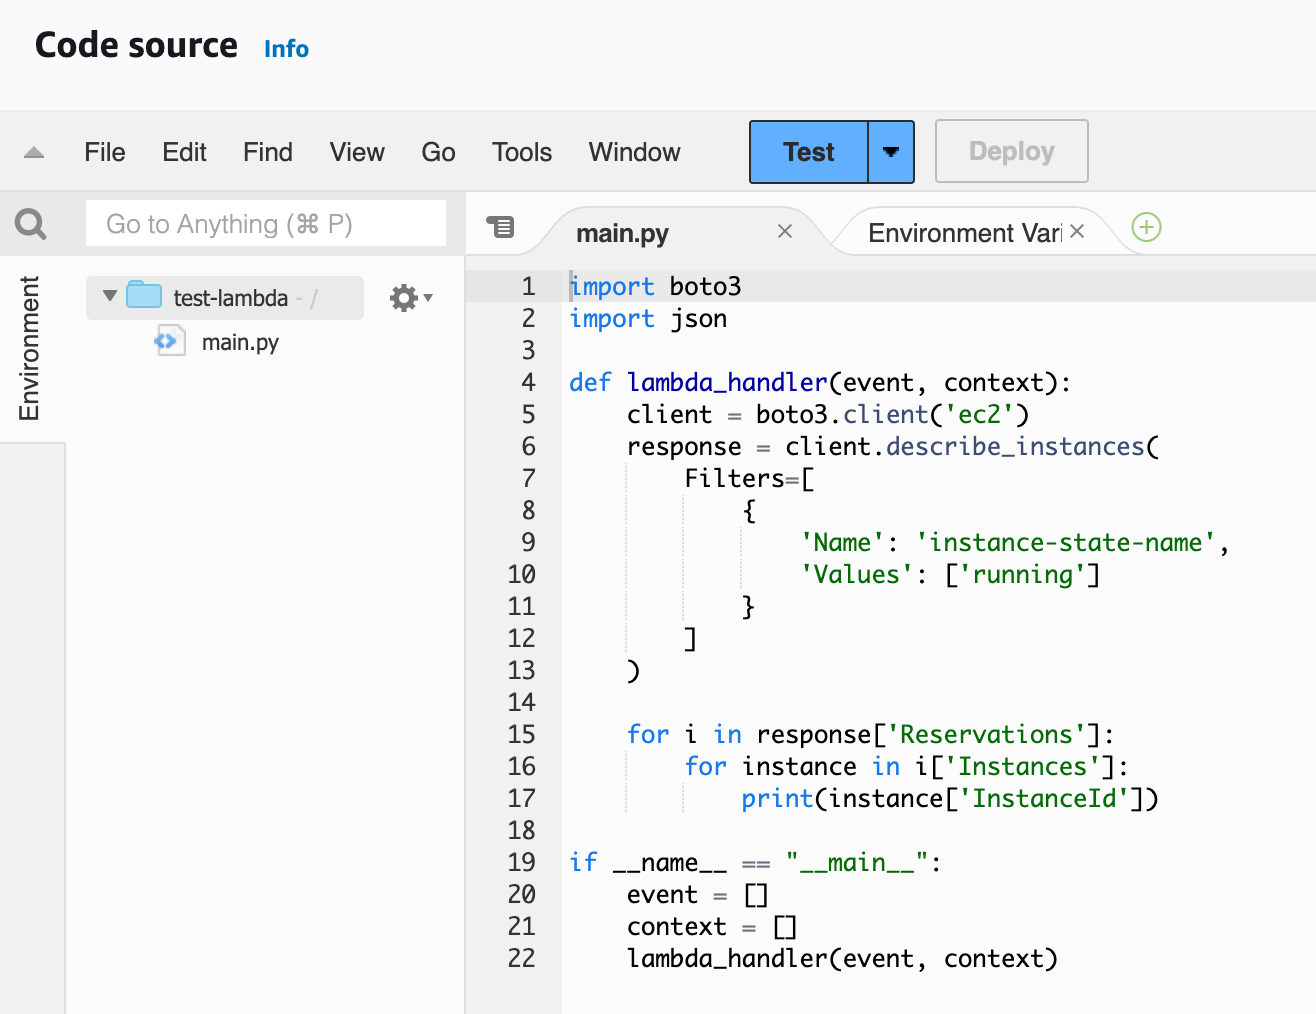
Now, let's talk about the Python script that our Lambda function will run. In essence, the script uses the AWS SDK for Python, known as Boto3, to interact with EC2 instances. Specifically, it fetches details about all the running EC2 instances.
import boto3

def lambda_handler(event, context):
    client = boto3.client('ec2')
    response = client.describe_instances(
        Filters=[
            {
                'Name': 'instance-state-name',
                'Values': ['running']
            }
        ]
    )

    running_instances = [instance['InstanceId'] for i in response['Reservations'] for instance in i['Instances'] ]

    return running_instances

if __name__ == "__main__":
    event = []
    context = []
    lambda_handler(event, context)
The script defines a function called lambda_handler, which takes two arguments: event and context (we don't use them for this example). Inside this function, it calls the EC2 client's describe_instances method with a filter to only get the 'running' instances. It then extracts the Instance IDs of these running instances and returns them. You can then send them via Teams or Slack or Email to the team if you want.
One thing to note is that you'll see an if __name__ == "__main__": block at the bottom of the script. This is there for local development. It allows us to run the script locally to test it out before deploying it to Lambda.
Setting up Terraform
Alright, let's shift gears and talk about what we're really here for—Terraform. I'm assuming you already have a basic grasp of Terraform and know how to set up your AWS credentials so that Terraform can interact with your AWS environment.
In this guide, I'm breaking down the setup into four separate Terraform files.
- The first file will define the provider, which in our case is AWS. This is where we'll specify which region we're working in, among other things.
- The second file is for the IAM roles and policies.
- The third file is for the Lambda function itself
- The fourth file is for the Event Rule which triggers the Lambda function a a scheduled time.
Of course, we can't forget the Python file that our Lambda function will run. To keep things simple, I'm going to place the Python file in the same directory as the Terraform files.
Directory Structure
Here are the files, as mentioned before, we have four Terraform files and one Python file. Let's look at each one of them
➜  lambda tree
.
├── event.tf
├── iam.tf
├── lambda.tf
├── main.py
├── provider.tf

0 directories, 5 files
provider.tf
provider "aws" {
  region = "eu-west-1"
}
iam.tf
resource "aws_iam_role" "lambda-role" {
  name               = "test-lambda-role"
  assume_role_policy = <<EOF
{
  "Version": "2012-10-17",
  "Statement": [
    {
      "Action": "sts:AssumeRole",
      "Principal": {
        "Service": "lambda.amazonaws.com"
      },
      "Effect": "Allow",
      "Sid": ""
    }
  ]
}
EOF
}

data "aws_iam_policy_document" "lambda-policy-doc" {
  statement {
    sid    = "AllowInvokingLambdas"
    effect = "Allow"

    resources = [
      "arn:aws:lambda:*:*:function:*"
    ]

    actions = [
      "lambda:InvokeFunction"
    ]
  }

  statement {
    sid    = "AllowCreatingLogGroups"
    effect = "Allow"

    resources = [
      "arn:aws:logs:*:*:*"
    ]

    actions = [
      "logs:CreateLogGroup"
    ]
  }
  statement {
    sid    = "AllowWritingLogs"
    effect = "Allow"

    resources = [
      "arn:aws:logs:*:*:log-group:/aws/lambda/*:*"
    ]

    actions = [
      "logs:CreateLogStream",
      "logs:PutLogEvents",
    ]
  }
  statement {
    sid    = "AllowEC2"
    effect = "Allow"

    resources = [
      "*"
    ]

    actions = [
      "ec2:Describe*"
    ]
  }
}

resource "aws_iam_policy" "lambda-policy" {
  name   = "test-lambda-policy"
  policy = data.aws_iam_policy_document.lambda-policy-doc.json
}

resource "aws_iam_role_policy_attachment" "lambda-role" {
  policy_arn = aws_iam_policy.lambda-policy.arn
  role       = aws_iam_role.lambda-role.name
}- IAM Role - First, we create an IAM role named
test-lambda-role. This role is given permission to assume the Lambda service role. - IAM Policy Document - Next, we define an IAM policy document that lays out the permissions we talked about earlier. It has multiple statements, each focusing on specific actions.
- IAM Policy - We create an IAM policy named
test-lambda-policyand attach our IAM policy document to it. - IAM Role Policy Attachment - Finally, we attach this policy to our previously created IAM role. This completes the set of permissions that our Lambda function will have.
lambda.tf
data "archive_file" "zip" {
  type = "zip"
  source_file = "./main.py"
  output_path = "./main.zip"
}

resource "aws_lambda_function" "lambda" {
  function_name = "test-lambda"
  description   = "My Test Lambda Function"
  handler       = "main.lambda_handler"
  runtime       = "python3.11"
  role          = aws_iam_role.lambda-role.arn
  filename      = "./main.zip"
  source_code_hash = data.archive_file.zip.output_base64sha256
}
First up, we're zipping our Python file. We use the archive_file data block to turn our main.py Python script into a ZIP file called main.zip. This makes it ready for uploading to AWS Lambda.
Next, we are defining the Lambda function itself. The entry point for our code is the lambda_handler function in our main.py script. We set the runtime to Python 3.11, which tells Lambda to use this Python version to run our code. And remember the IAM role we set up earlier? We're linking that to this Lambda function so it has the permissions it needs to operate.
Finally, we tell Terraform where to find the ZIP file and include a hash to ensure the file's integrity.
main.lambda_handler. Here's how to read this, the part before the dot (main) should match the name of your Python file (main.py). The part after the dot (lambda_handler) specifies the function within that Python file to run. So, main.lambda_handler tells AWS Lambda to execute the main.py file and run the lambda_handler function inside it. Make sure these names align; otherwise, your Lambda function won't work as expected.
event.tf
resource "aws_cloudwatch_event_rule" "event_rule" {
name = "test-event-rule-lambda"
description = "Test Event for Lambda"
schedule_expression = "cron(00 08 ? * MON-FRI *)"
}
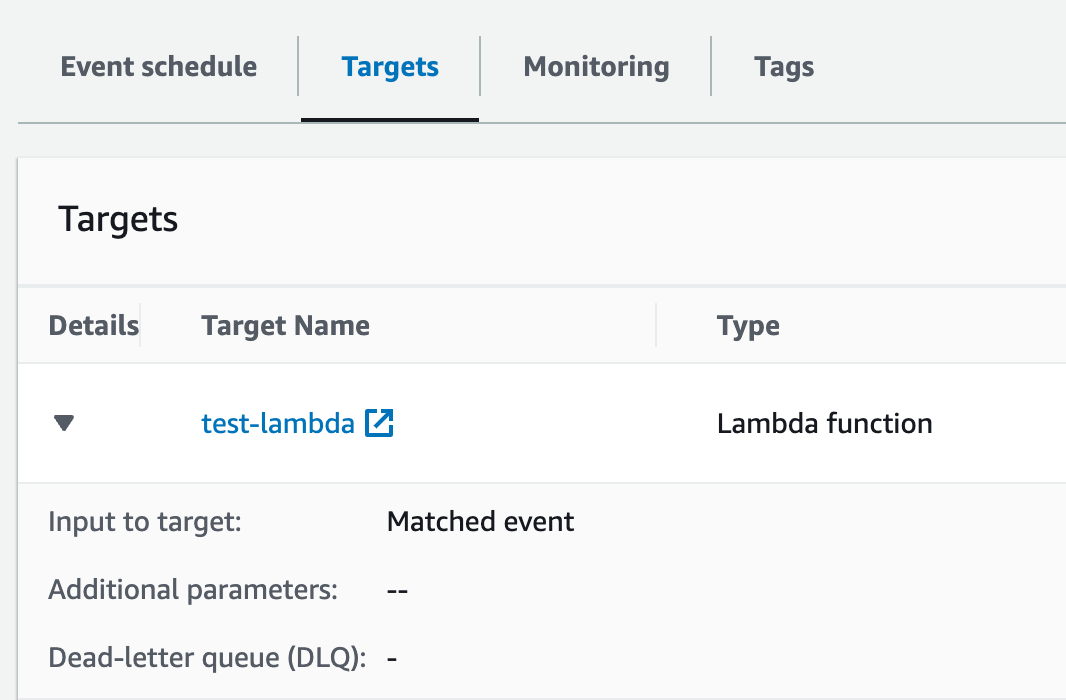
resource "aws_cloudwatch_event_target" "event_target" {
rule = aws_cloudwatch_event_rule.event_rule.name
arn = aws_lambda_function.lambda.arn
}
resource "aws_lambda_permission" "allow_cloudwatch_to_call_lambda" {
action = "lambda:InvokeFunction"
function_name = aws_lambda_function.lambda.function_name
principal = "events.amazonaws.com"
source_arn = aws_cloudwatch_event_rule.event_rule.arn
}The final piece of the puzzle is setting up an event rule to trigger our Lambda function.
- CloudWatch Event Rule - We create a rule named
test-event-rule-lambda. This rule will trigger based on a cron expression, meaning it will run on a schedule. In our case, it's set to run from Monday to Friday at 8:00 AM. - Event Target - Then, we specify that this event rule should trigger our Lambda function. We do this by setting the rule's target to the ARN of our Lambda function.
- Lambda Permission - Last but not least, we need to give permission for this event to actually trigger our Lambda function.
So, to sum it up, we're using Terraform to set up a CloudWatch event that will kick off our Lambda function at a specific time, which in turn will execute our Python script. This neatly ties all our earlier setup into a functional, automated process.
Closing Thoughts
I hope all of this makes sense to you guys. Even though it's a simple example, it can be quite useful. For instance, you might want to get a daily notification about your running instances, so you're not shelling out money for unused resources. This setup can help you do just that. If you have any questions or need further clarification, don't hesitate to drop a comment below. Looking forward to hearing from you.